New-build apartment: from bare walls to turnkey – the stages in photos
A new-build apartment renovation in photos: a shower niche, a concealed cistern, terrazzo-effect tiles in the hallway and kitchen and built-in wardrobes – and the stage by which each must be decided.
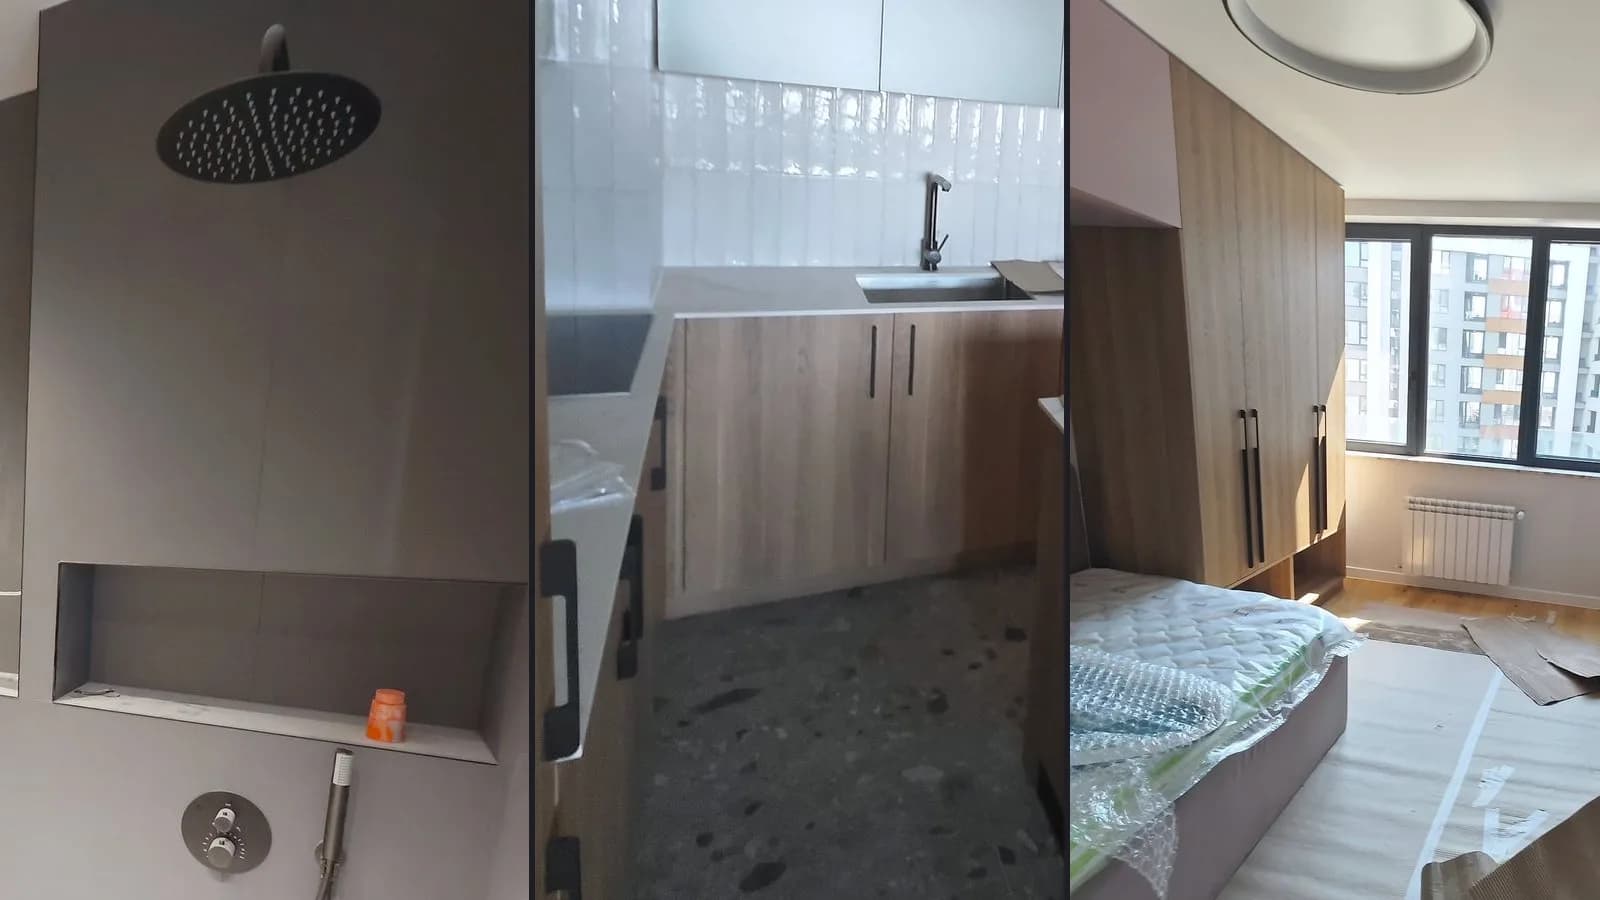
Renovating an apartment in a new build starts from bare walls and a screeded floor. In a new home there is usually nothing to break out, but a lot has to be decided early – before the tiles, the floors and the furniture. Here we show it with photos of the new-build apartment from our gallery, photographed from the bare walls to the final finishing work.
The story is built around four decisions you can see in the photos – a niche in the shower, a concealed cistern, terrazzo-effect tiles in the hallway and kitchen, and built-in wardrobes – and for each one it shows the stage by which it has to be made. The ‘after’ photos are not staged for a catalogue: the beds and the sofa are still wrapped in plastic, and there are boxes and protective paper on the floor.
Prices are given only for the details you can see in the photos, from our price list and for labour. What it costs to finish a whole new apartment is worked out in the article on what finishing a new-build apartment costs.
Before: bare walls, screed and cables
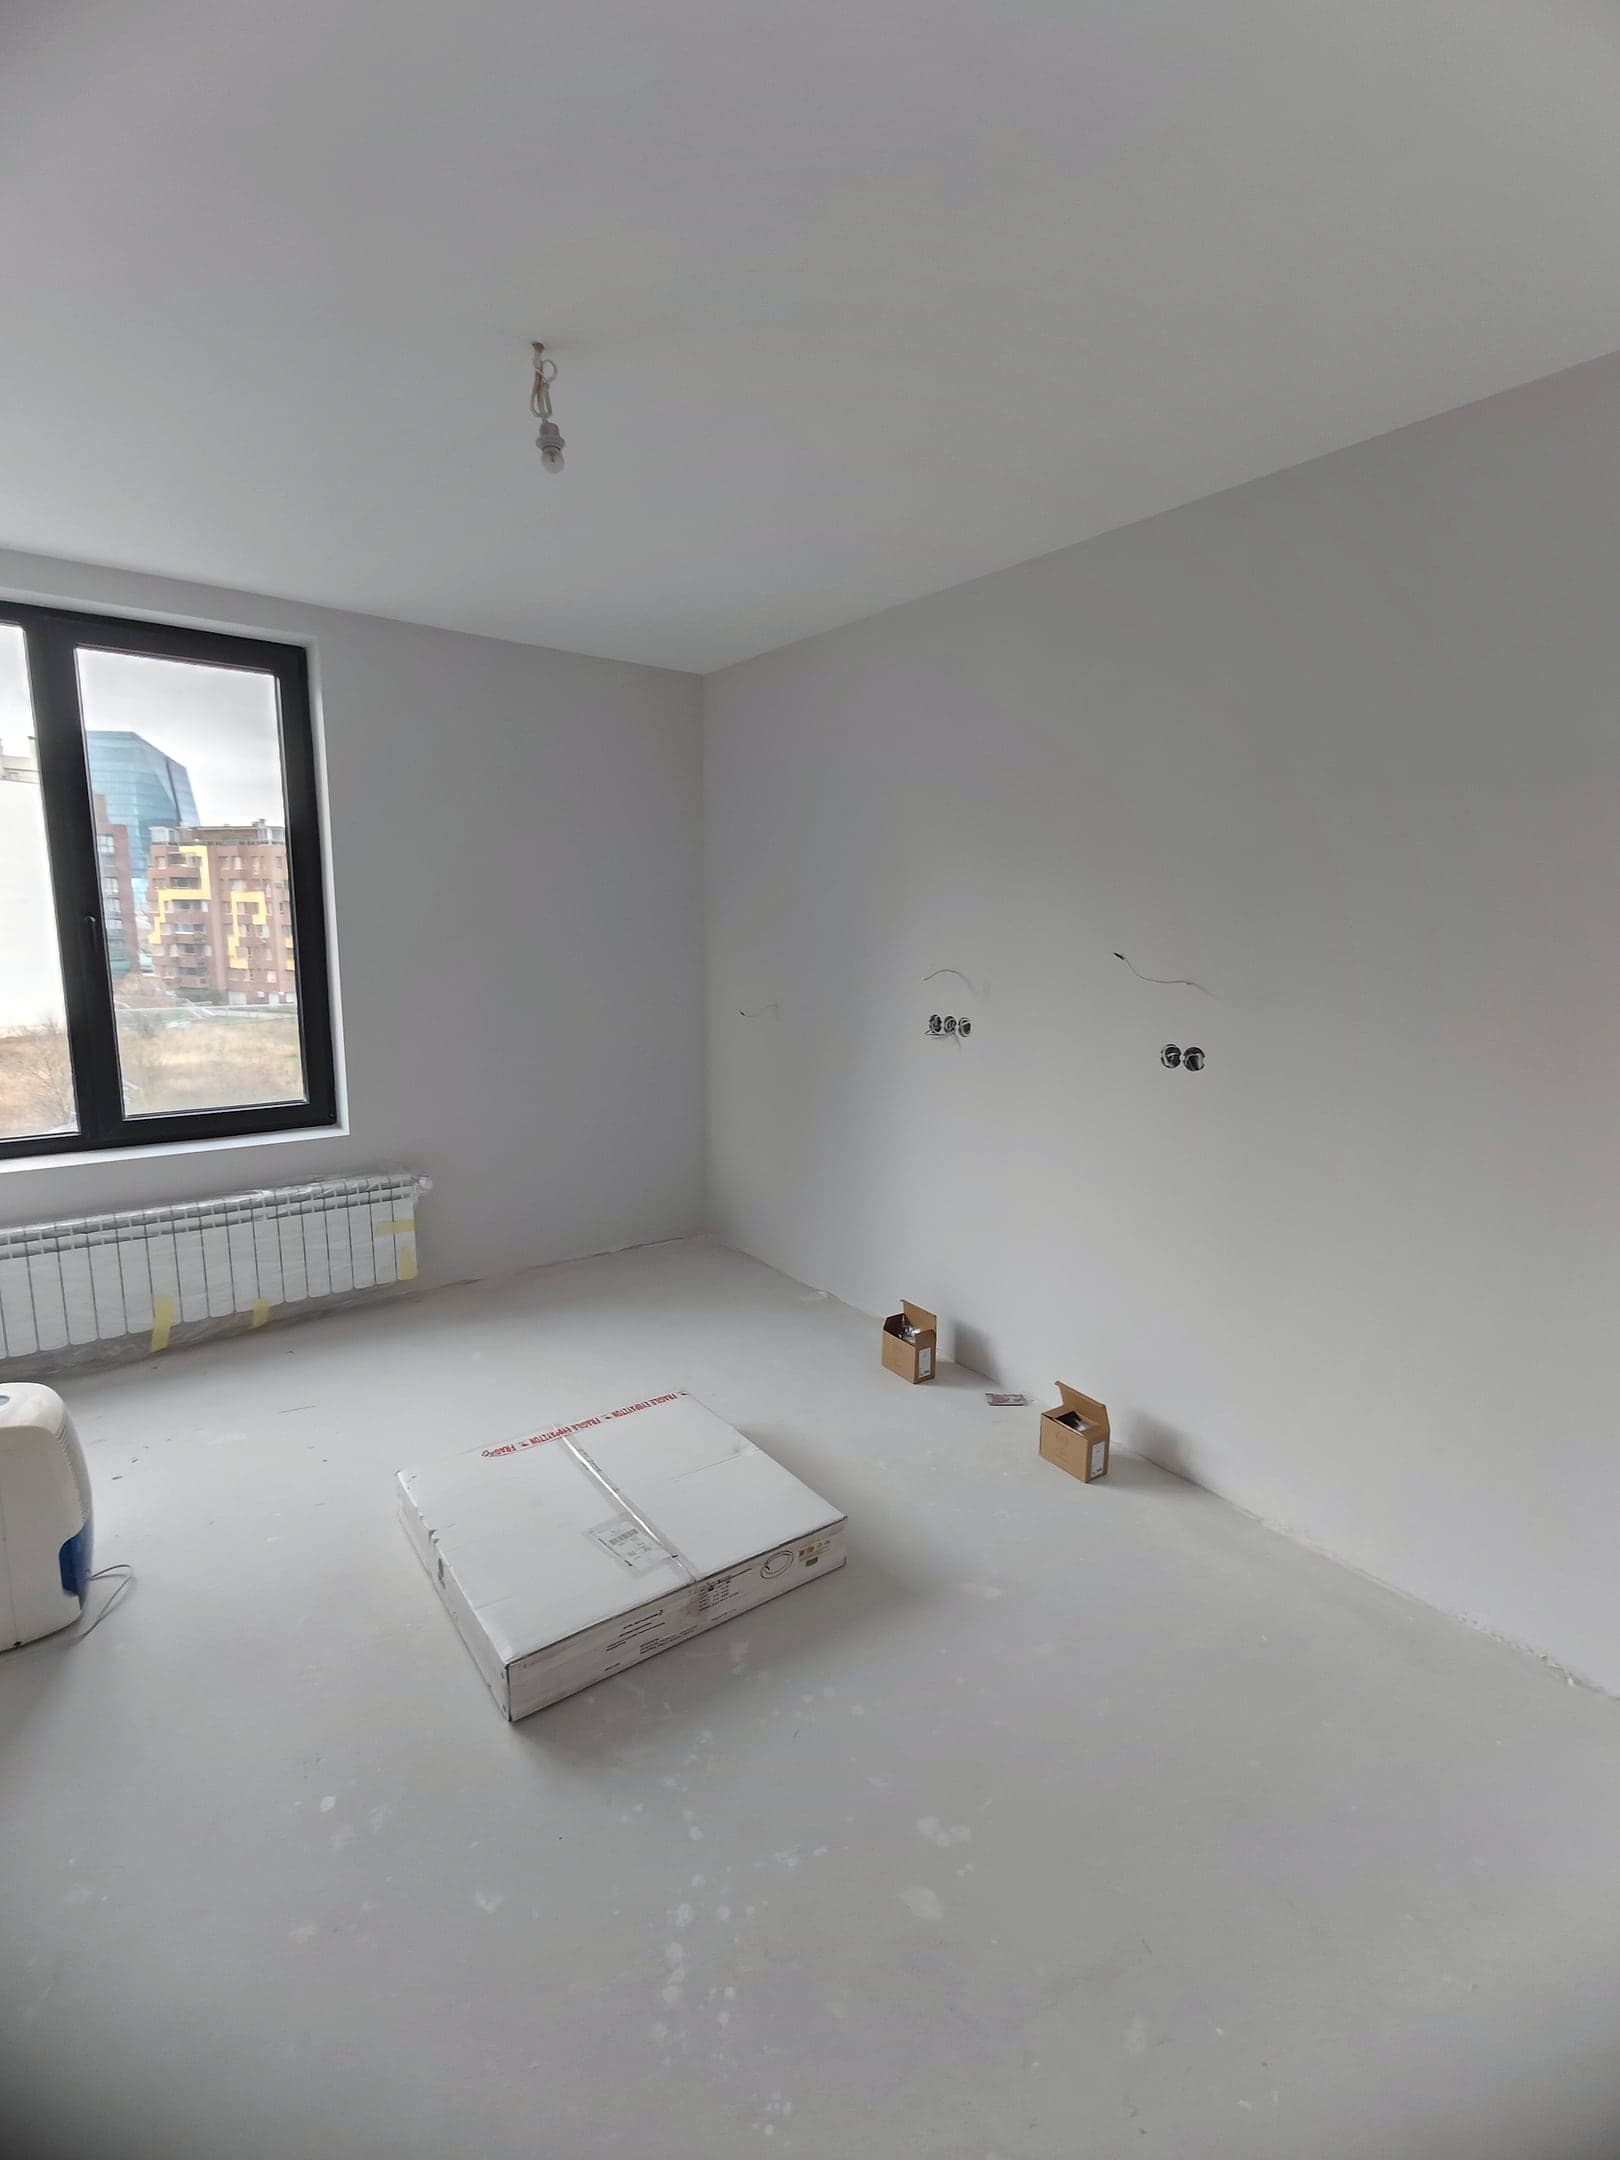
In the first photos the walls are white and smooth, the floor is bare screed, and cables for the sockets and lights stick out of the walls and ceiling, with temporary bulbs hanging from the ceiling. The windows and radiators are already in place – the radiators still with their protective tape.
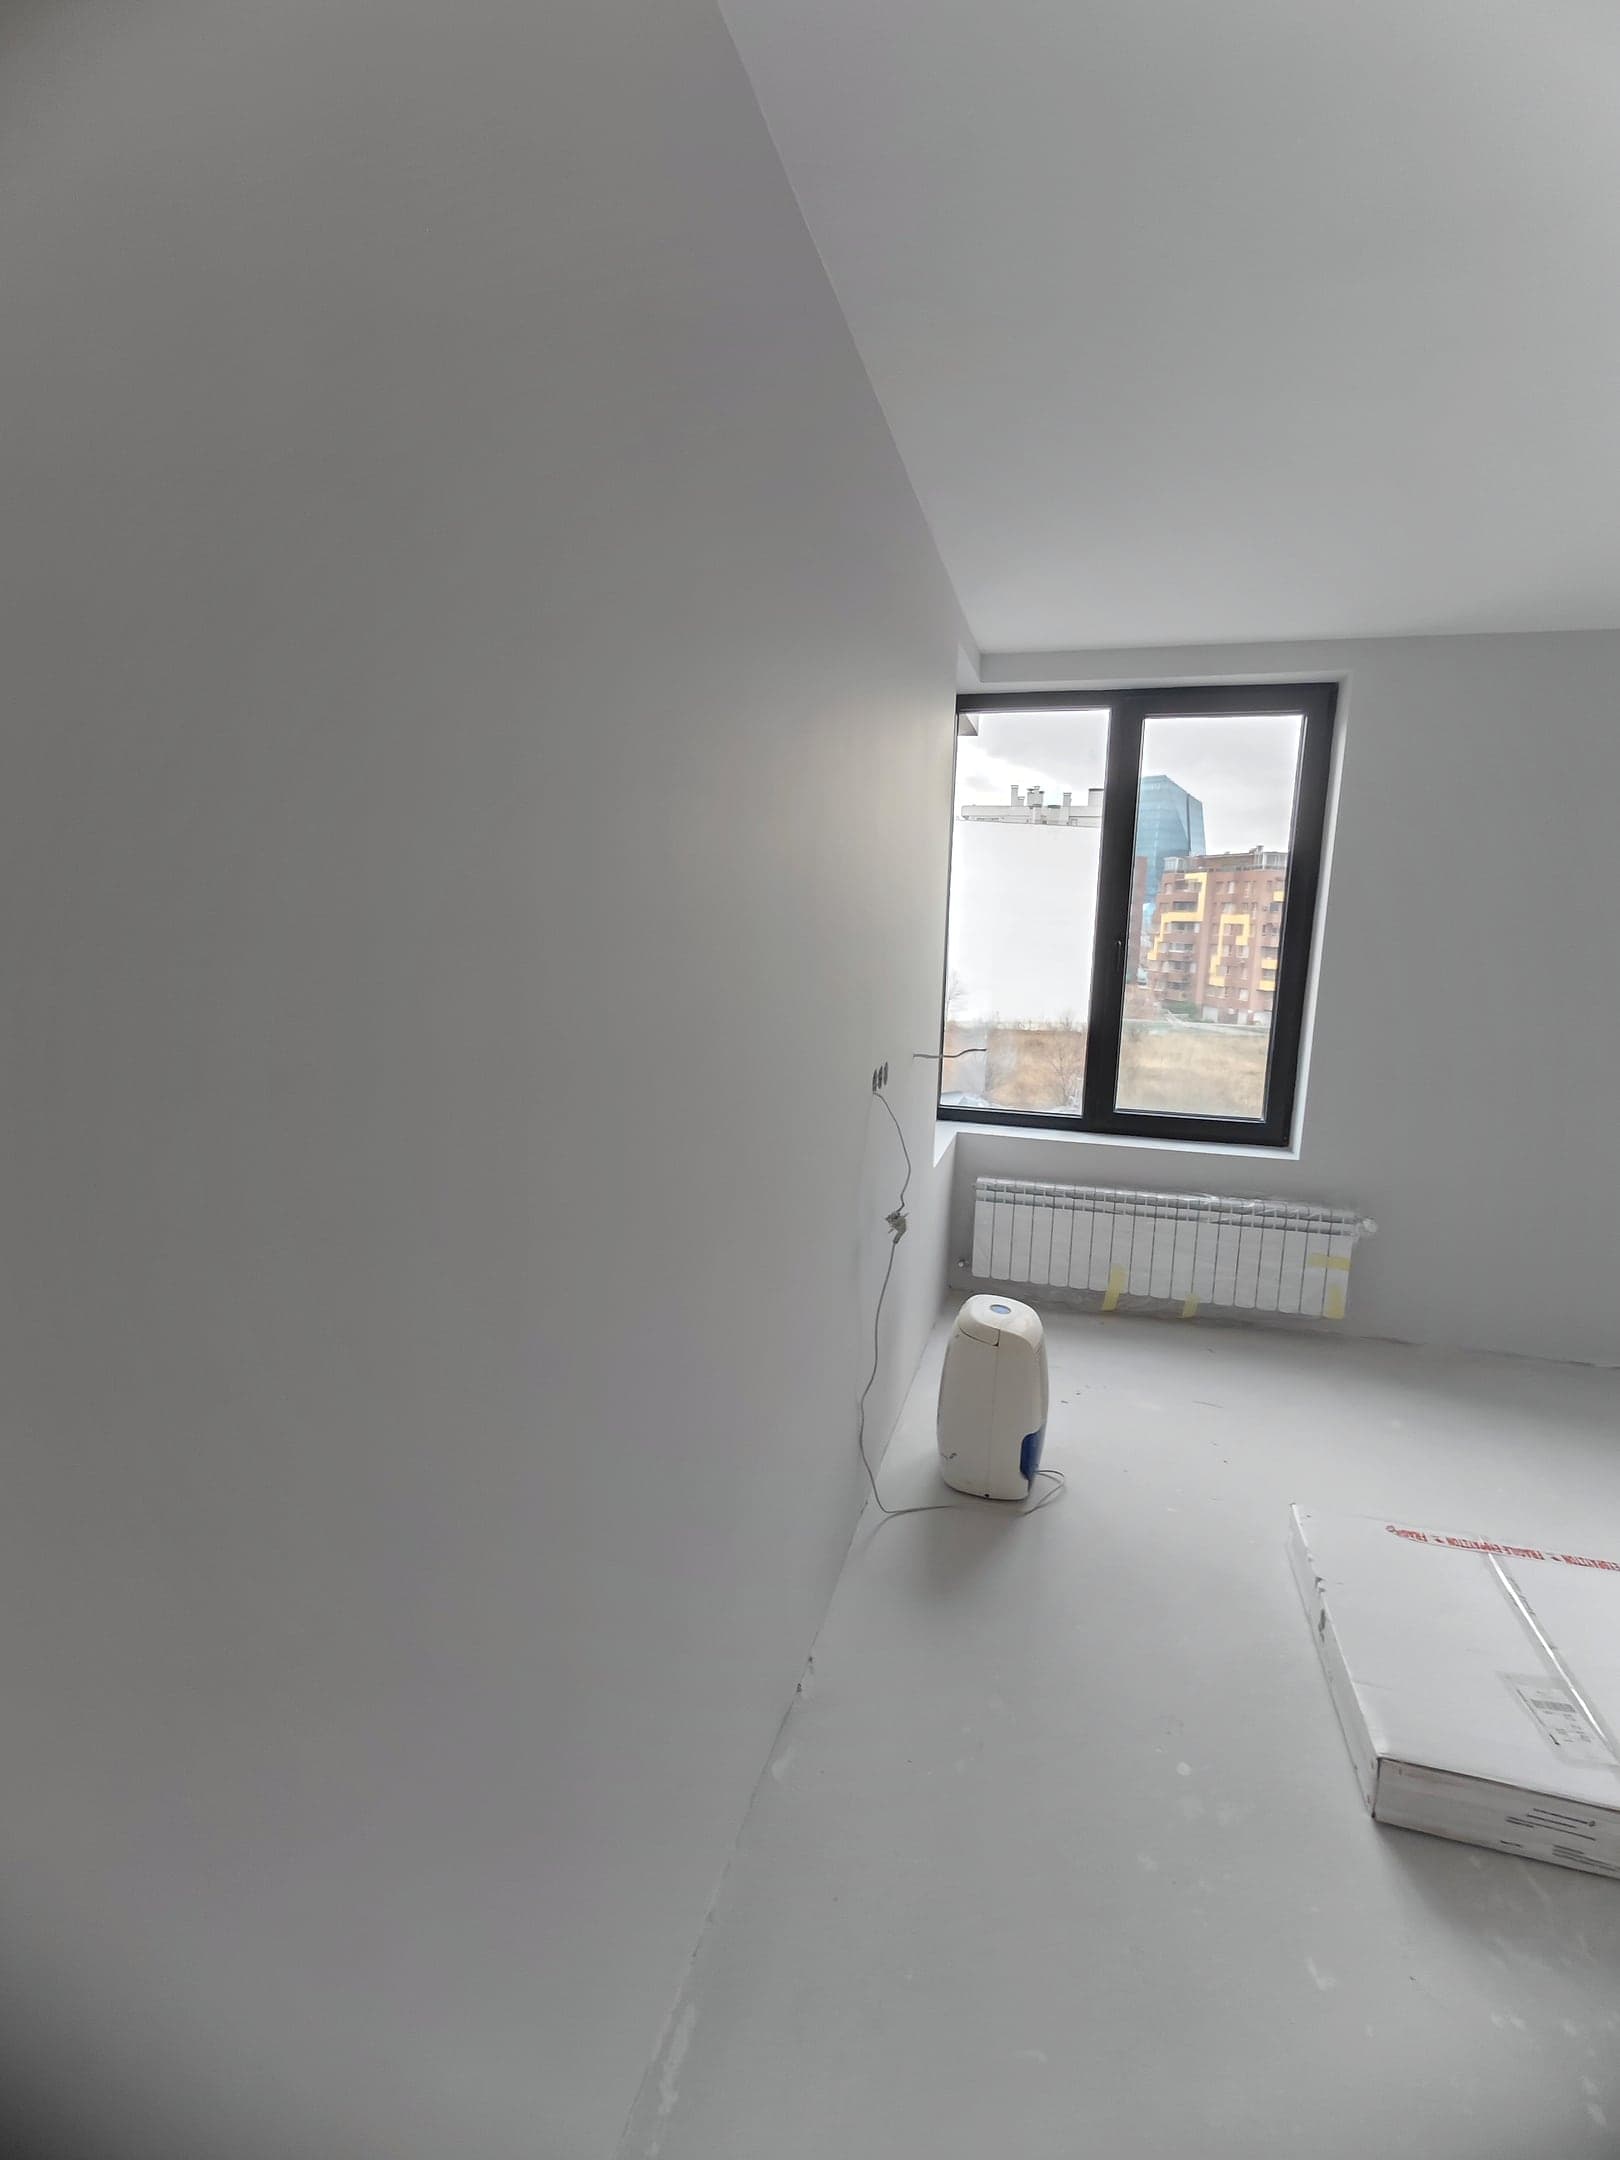 Before
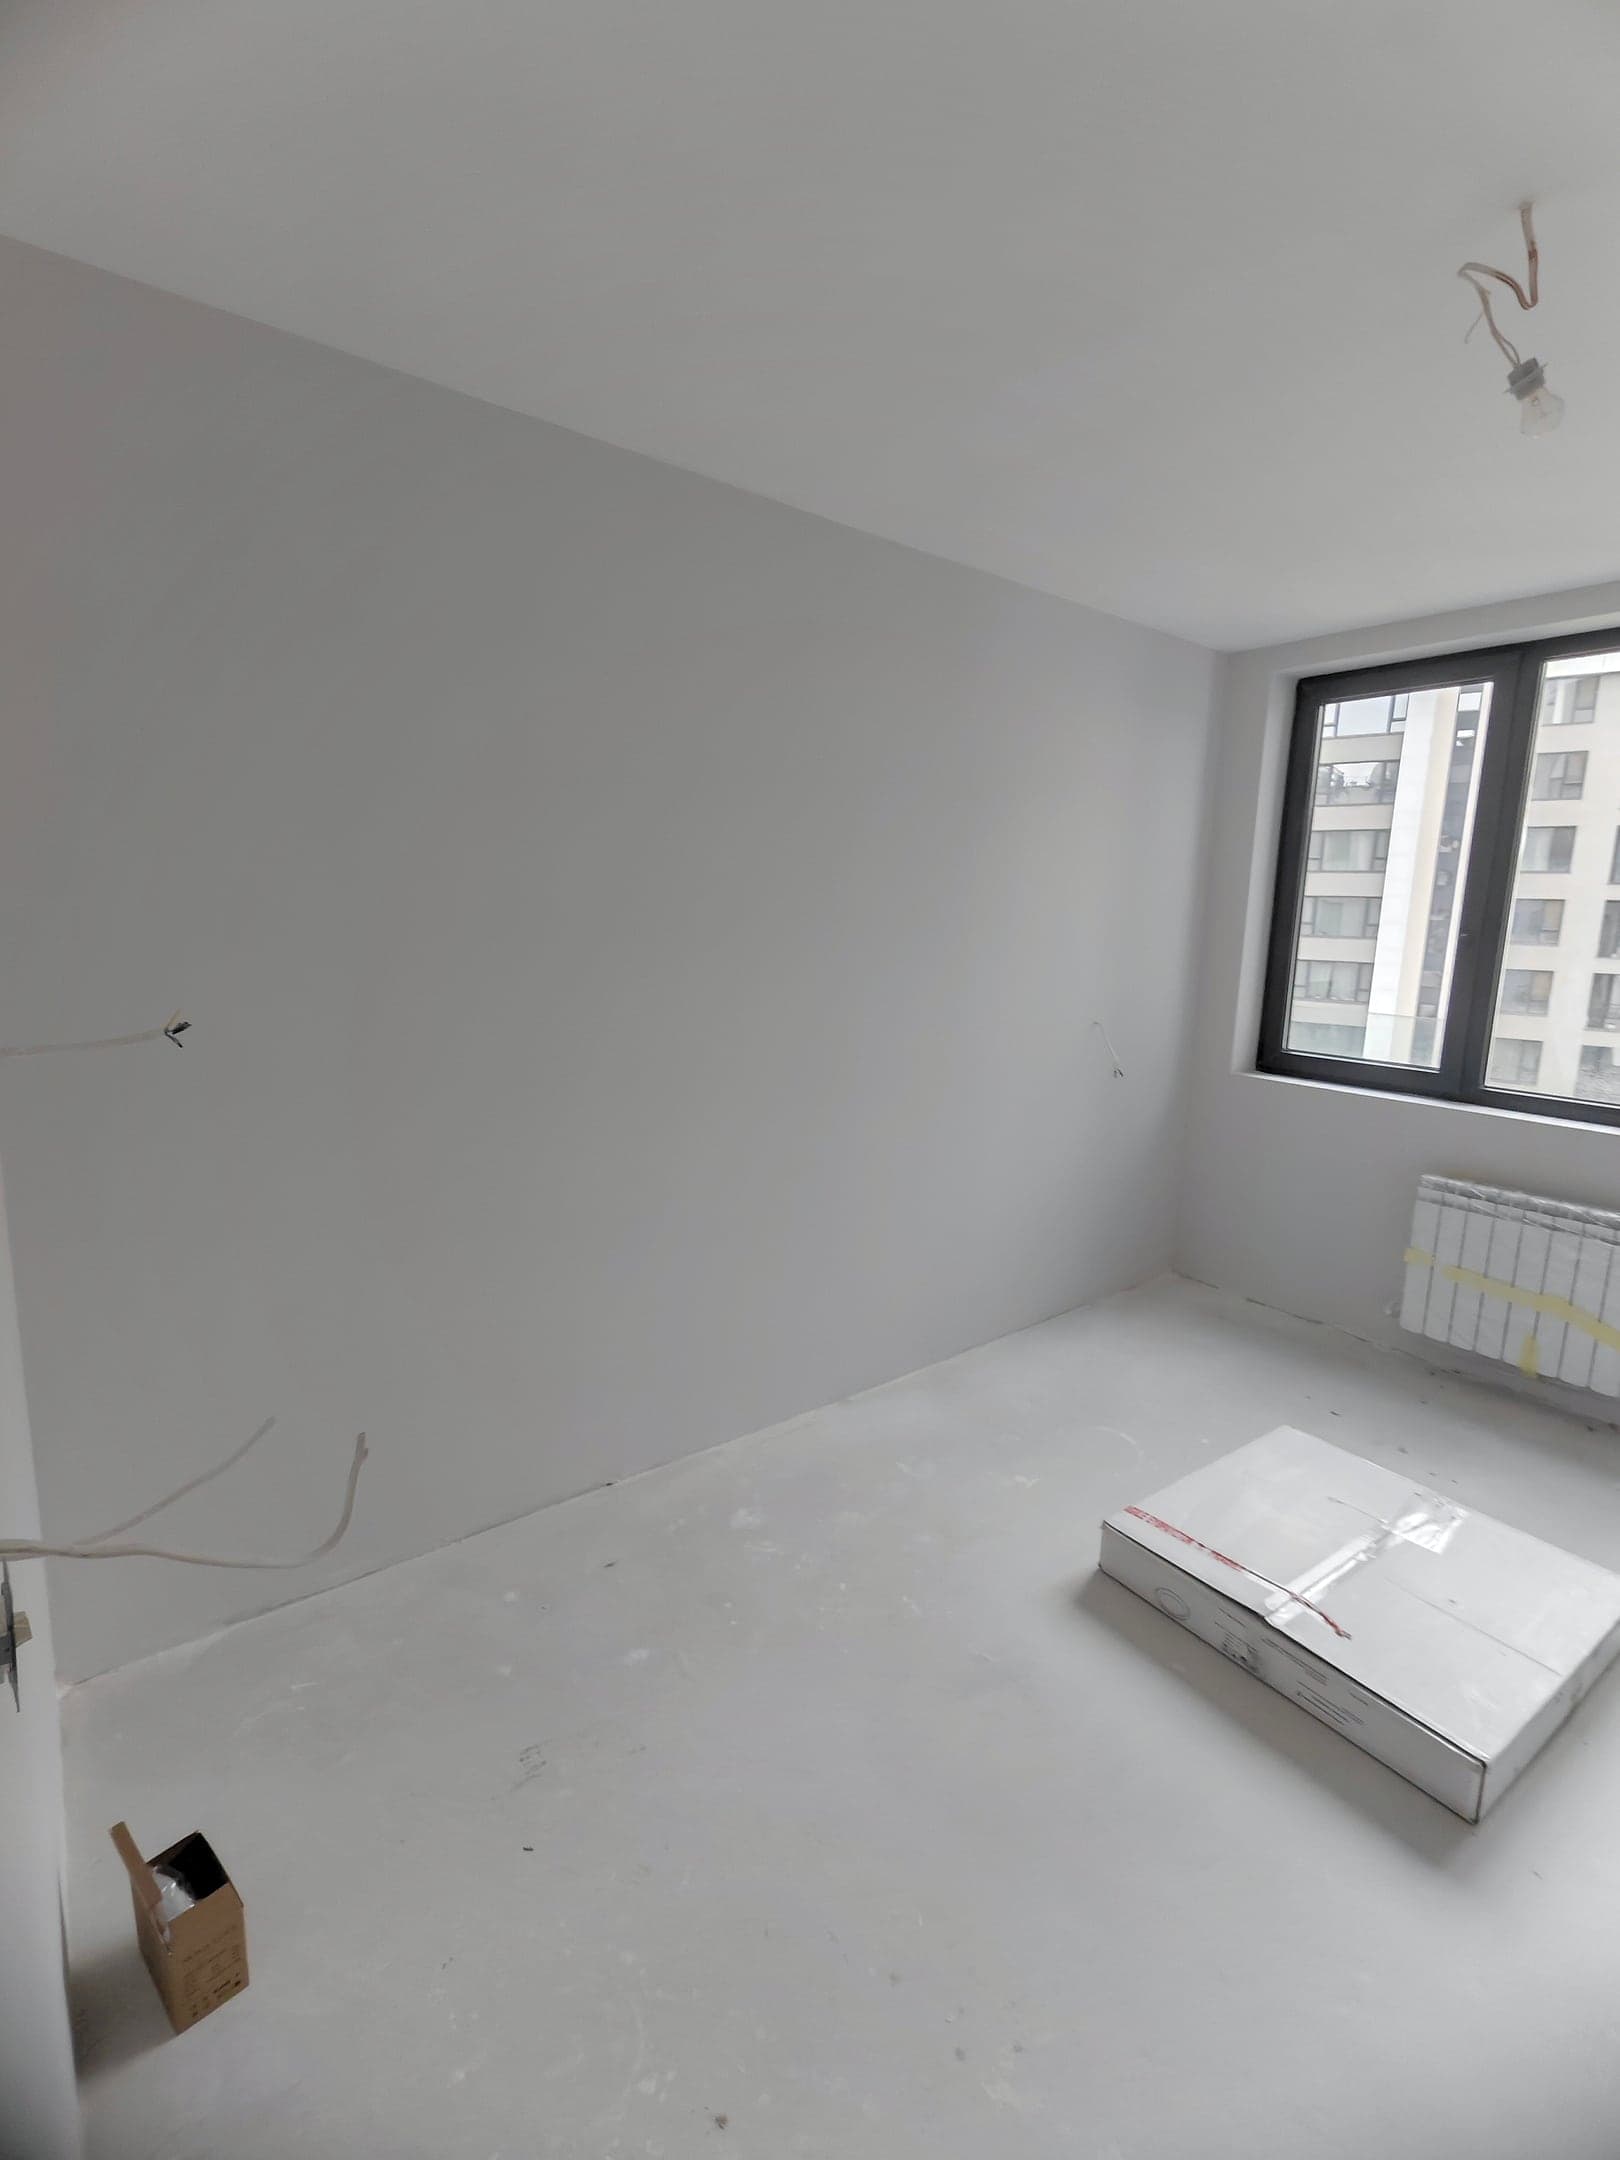 Before
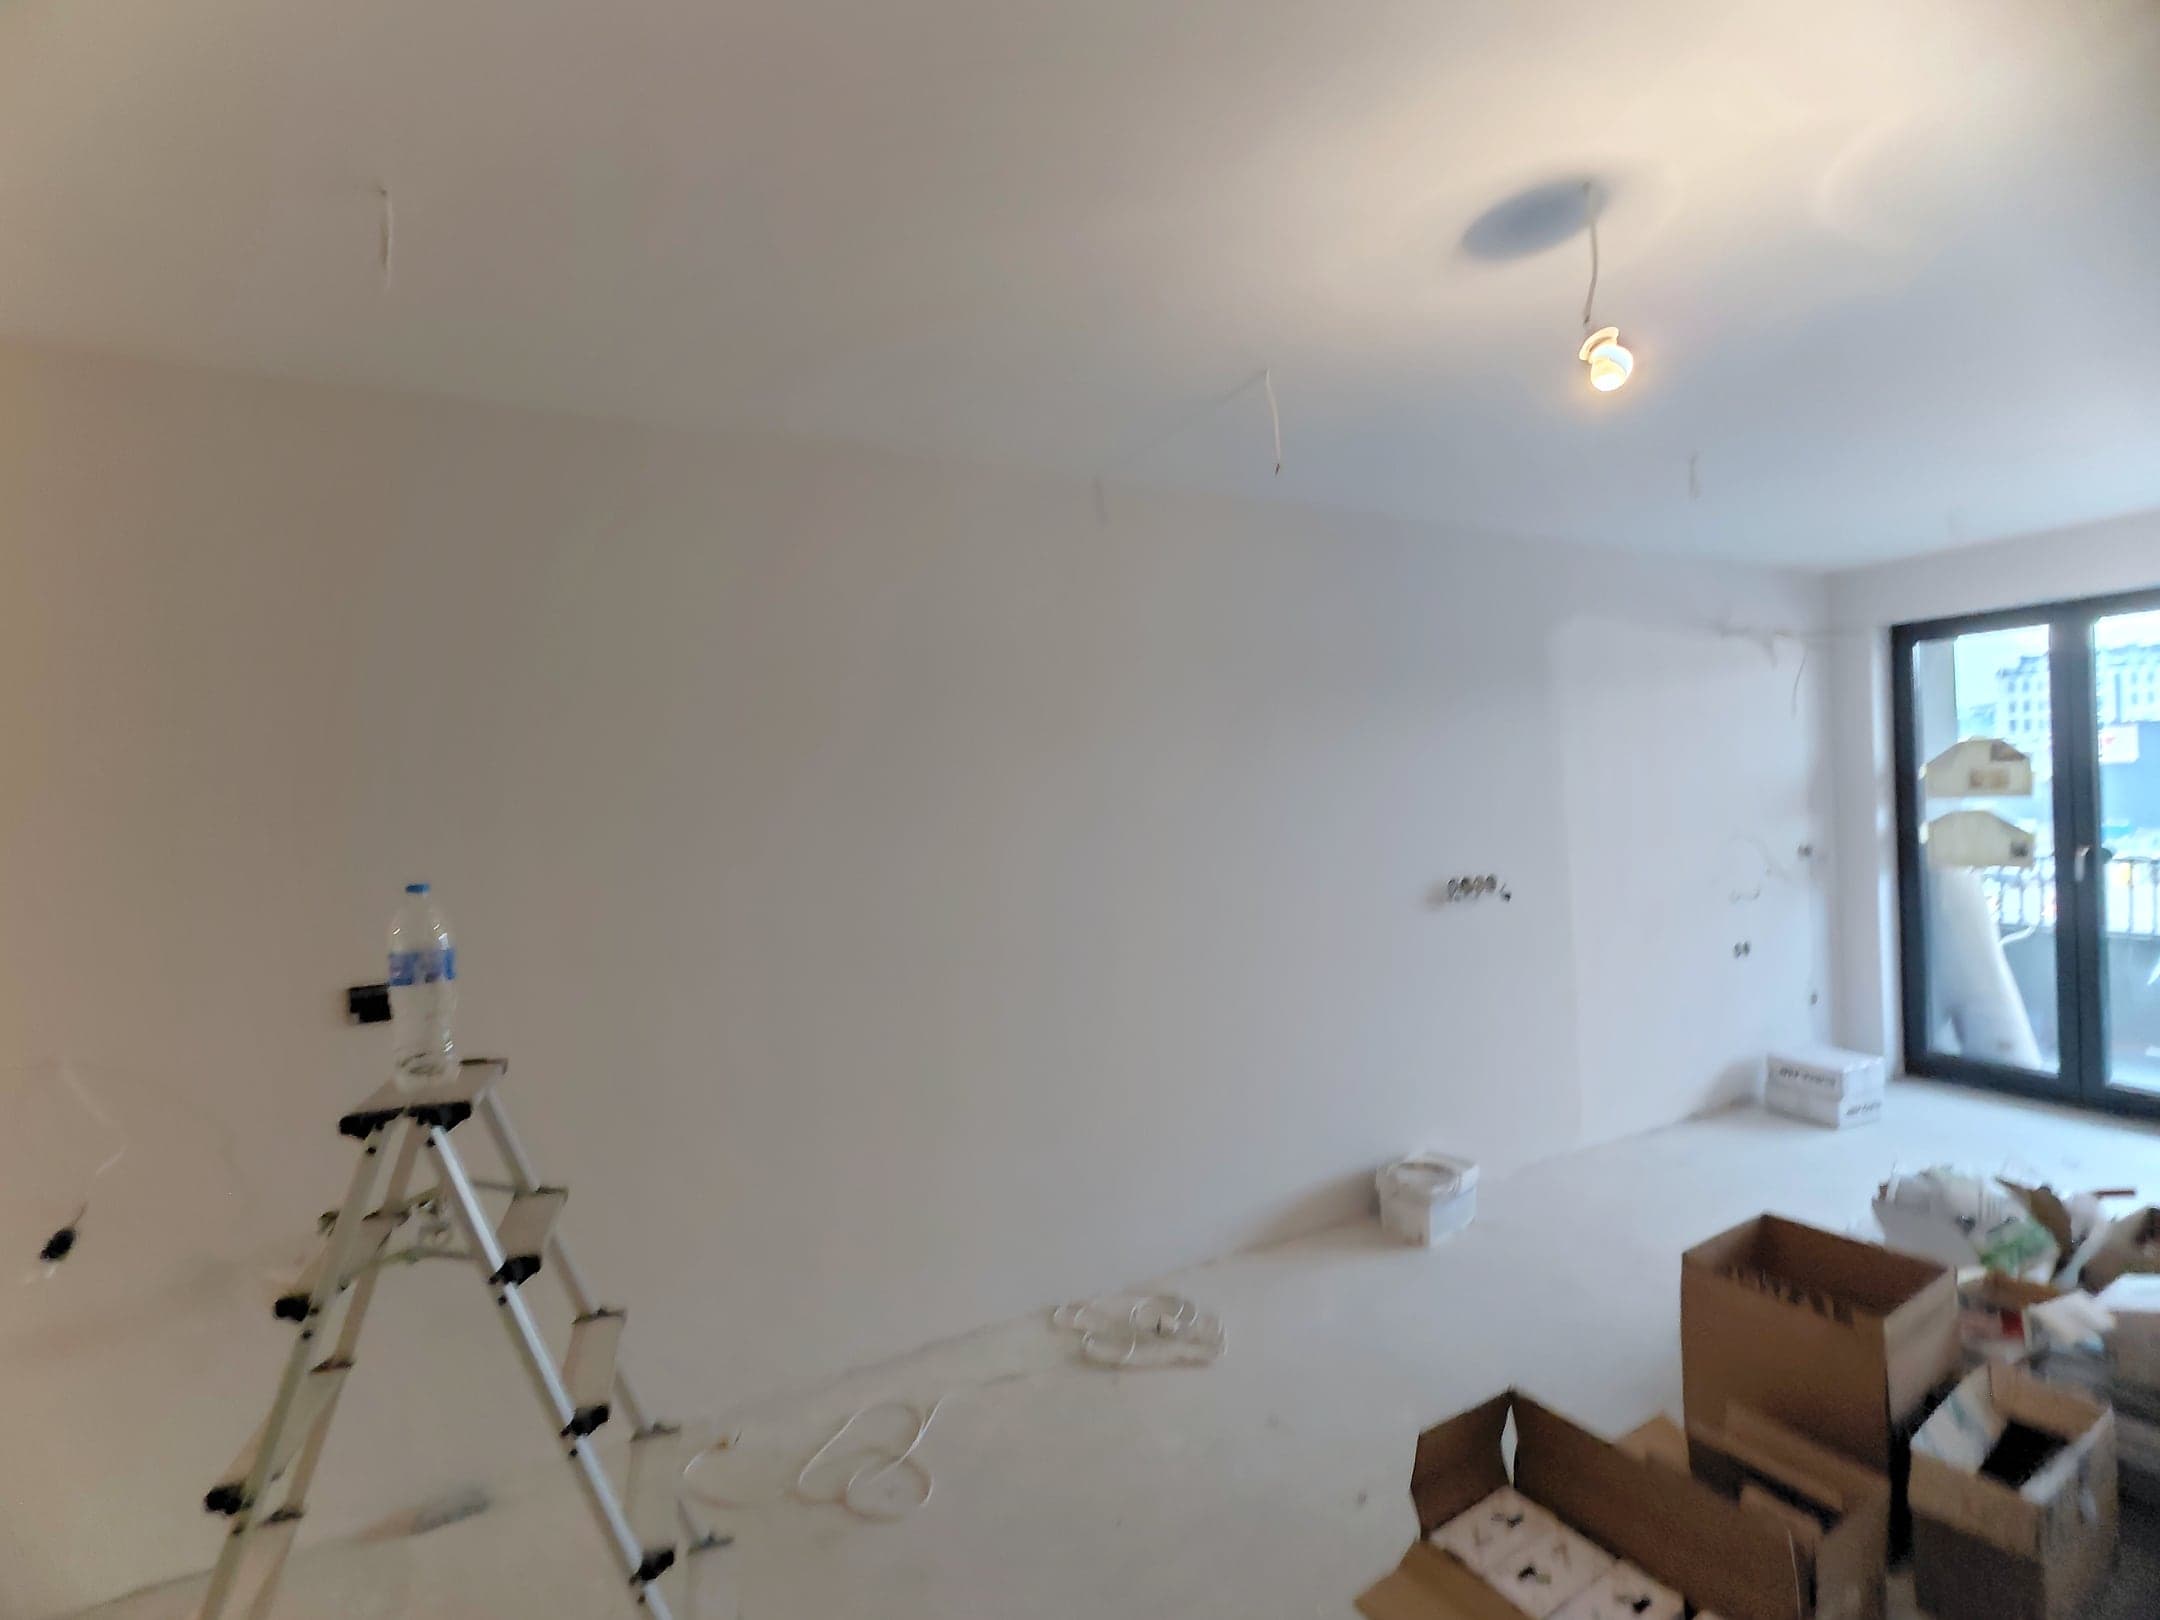
At this stage, anything that will later disappear into the walls and floor can still be changed without breaking anything out. Below, the decisions follow the order in which the work reaches them – the bathroom, the floors, the furniture – but each has its own deadline: the wardrobes, for example, are fitted last but decided among the first. How we organise the finishing of a new-build home is described on the new-build apartment renovation page.
Decision 1: the shower niche – before the waterproofing
The bathroom is tiled with large-format dark grey tiles. In the shower area there is a long horizontal niche, lined with the same tiles. Below it is the concealed mixer – all you can see of it is the round trim plate with its two handles – and the hand shower, and above it is the round rain shower head. The shower area has no tray, just a linear drain in the floor.
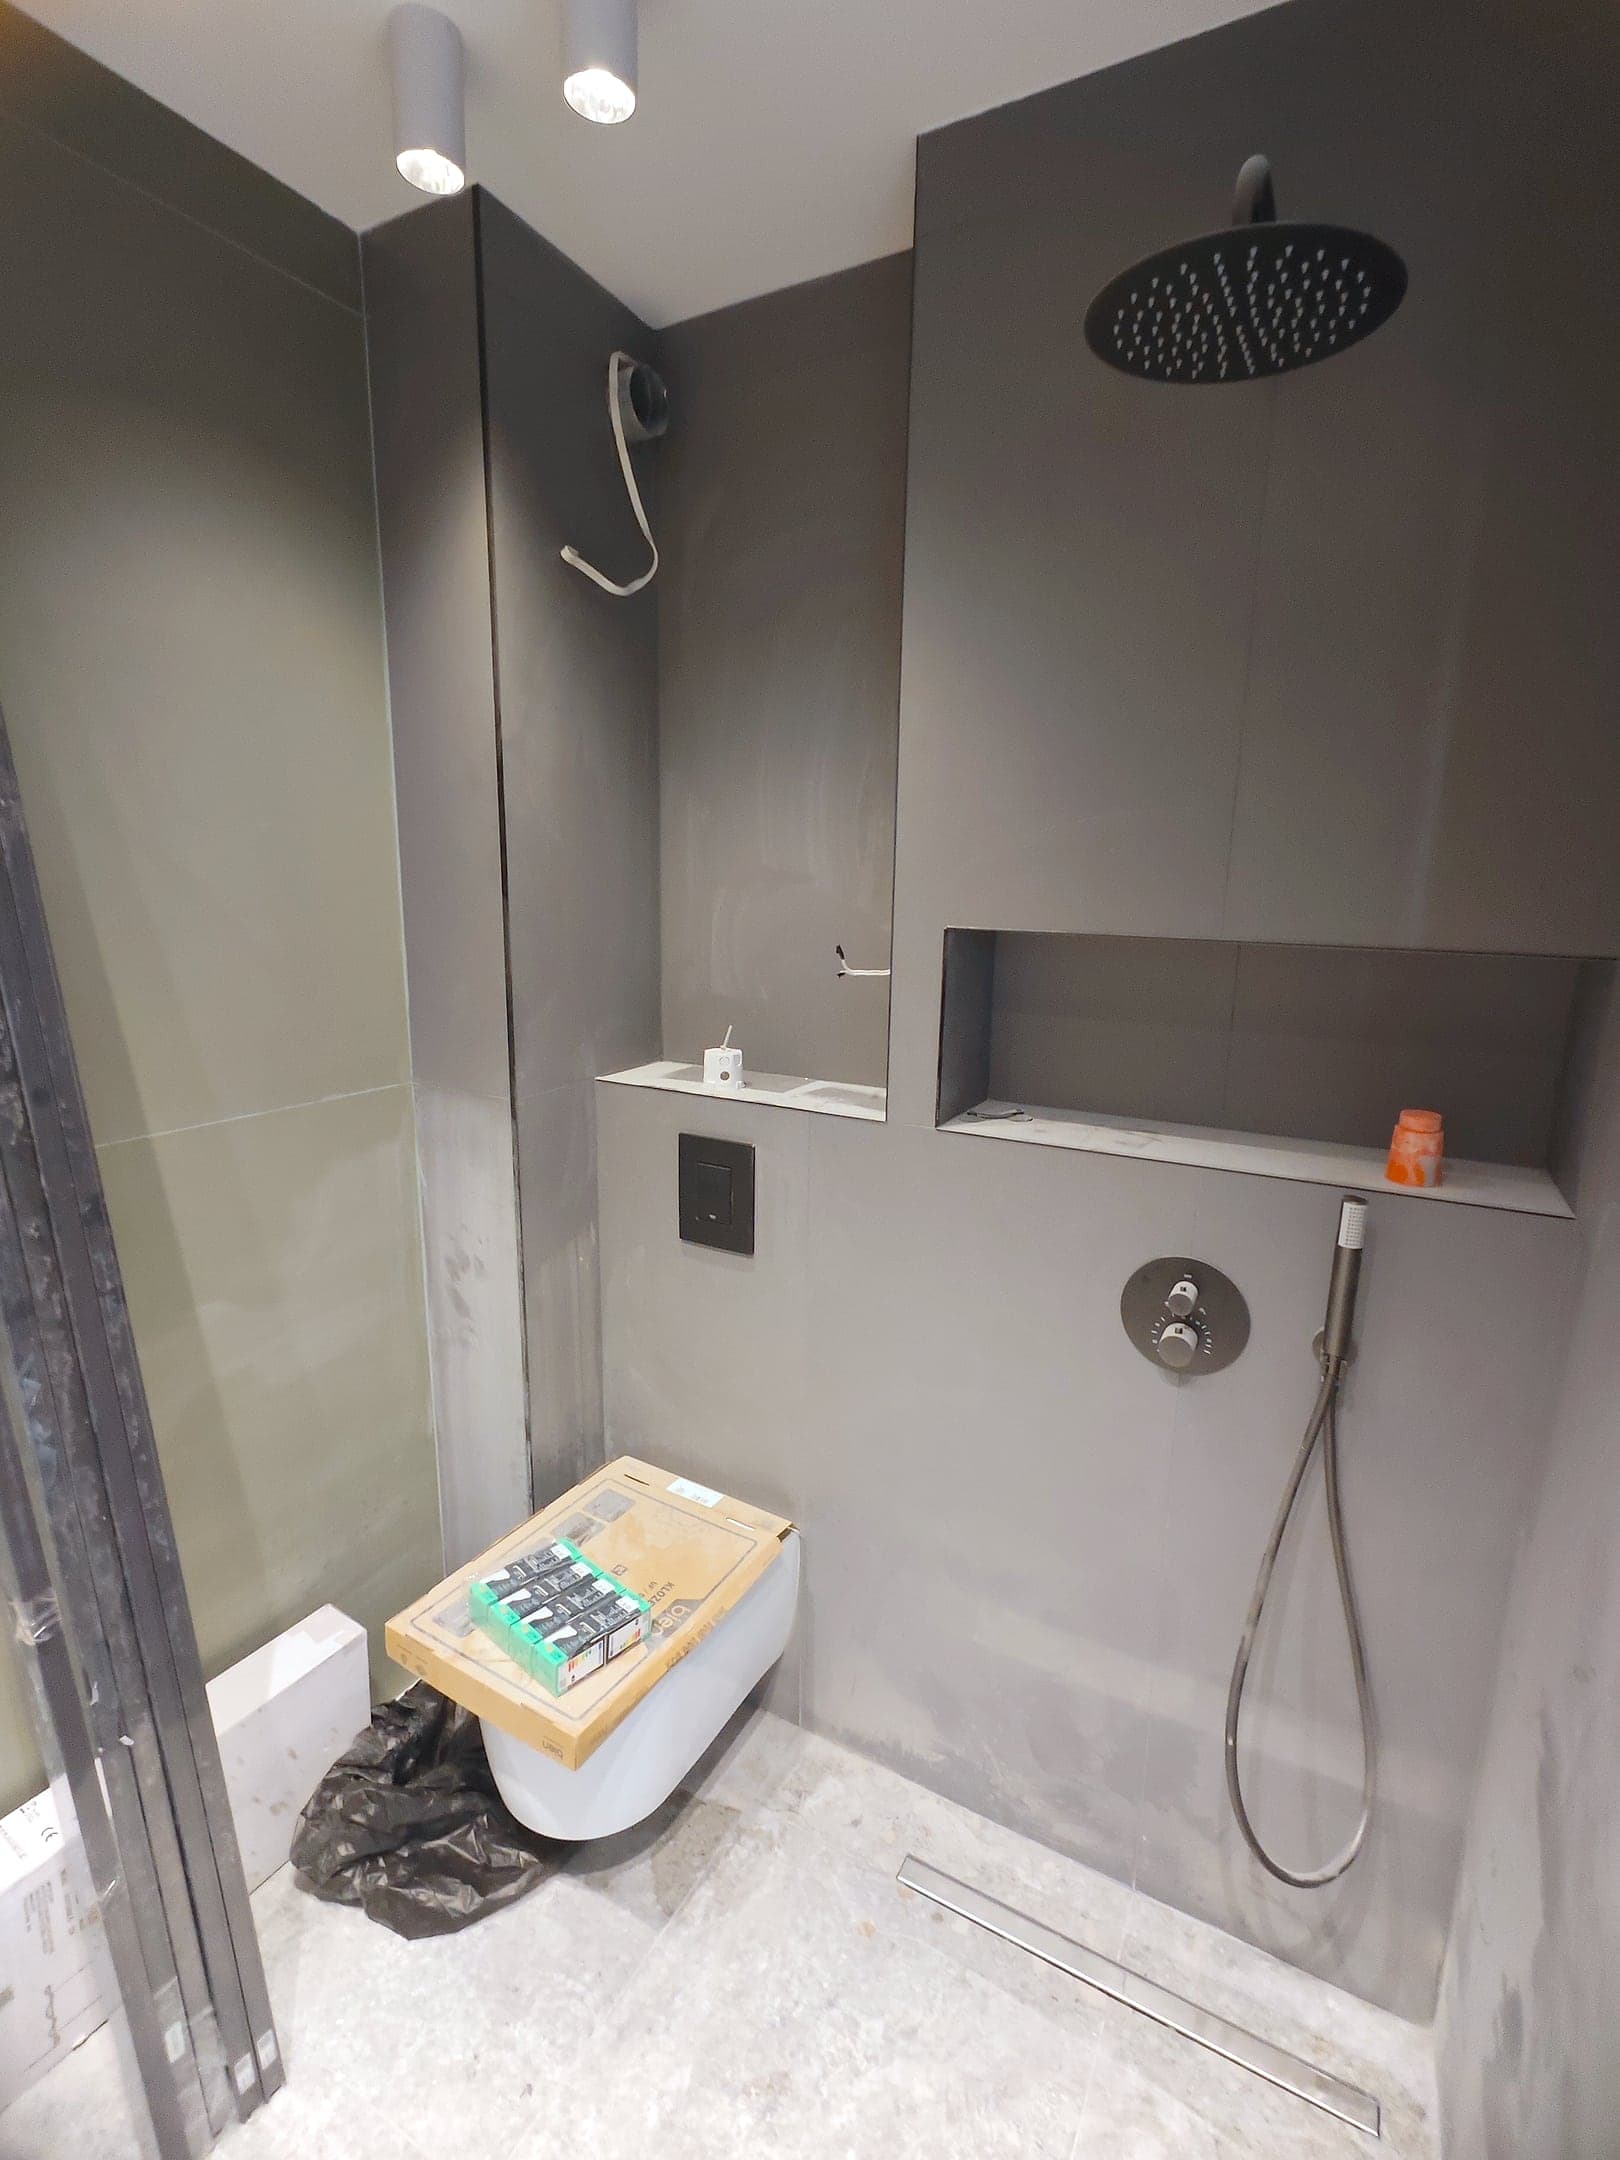
The niche has to be decided early because it is built while the wall is still open: it is formed, waterproofed and only then tiled. Added after the tiling, it means cutting into finished tiles. With large-format tiles its position relative to the joints matters too, so its size is settled together with the tile layout.
The concealed shower is decided at the same time: the in-wall body of the mixer is set into the wall with the plumbing points, so the positions of the mixer, the shower head and the niche are measured together. You choose and buy the mixer and the showers yourself, so the model has to be settled by then.
Decision 2: the concealed cistern – before the plumbing points
To the left of the shower is the black flush plate of the concealed cistern. The cistern is inside the wall and the toilet is wall-hung – in the photo it still has a box on top. Above the flush plate, the tiled boxing-in forms a narrow shelf.
The separate toilet is done the same way: a concealed cistern with a black flush plate and a wall-hung toilet, and next to them a black access panel and a bidet spray. Here the tiling is two-tone: the dark grey tiles reach the height of the shelf above the cistern, and above them the wall is painted white. The floor has terrazzo-effect tiles.
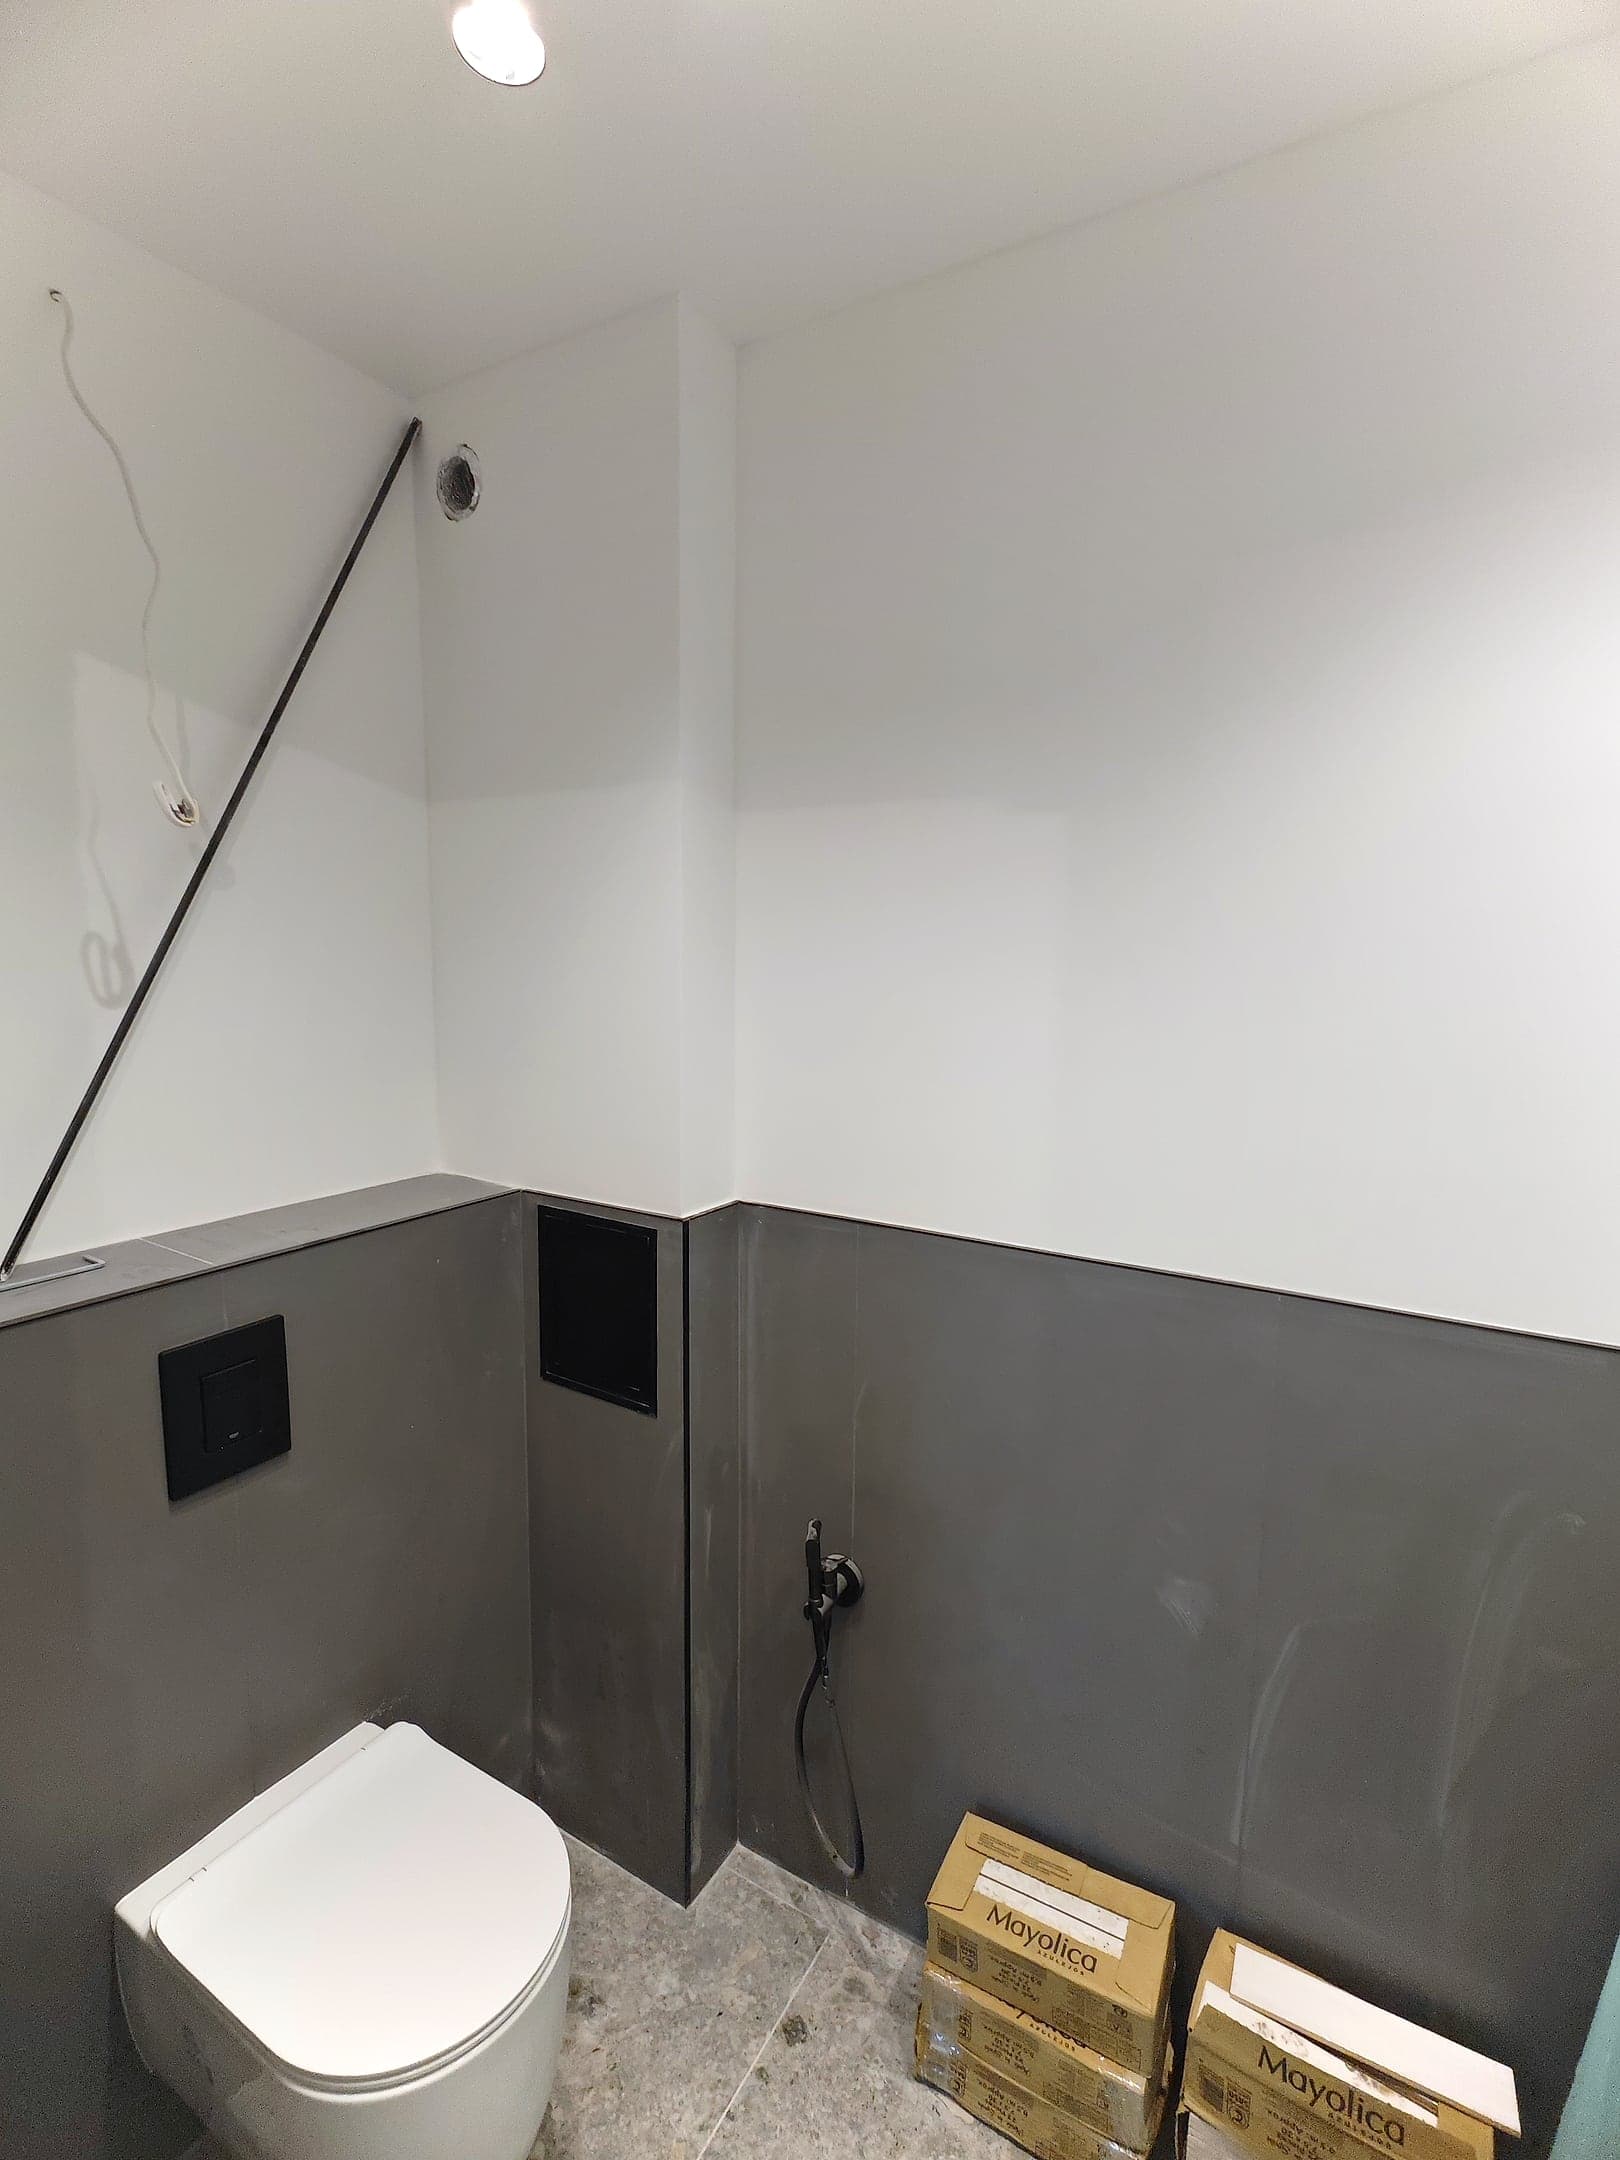
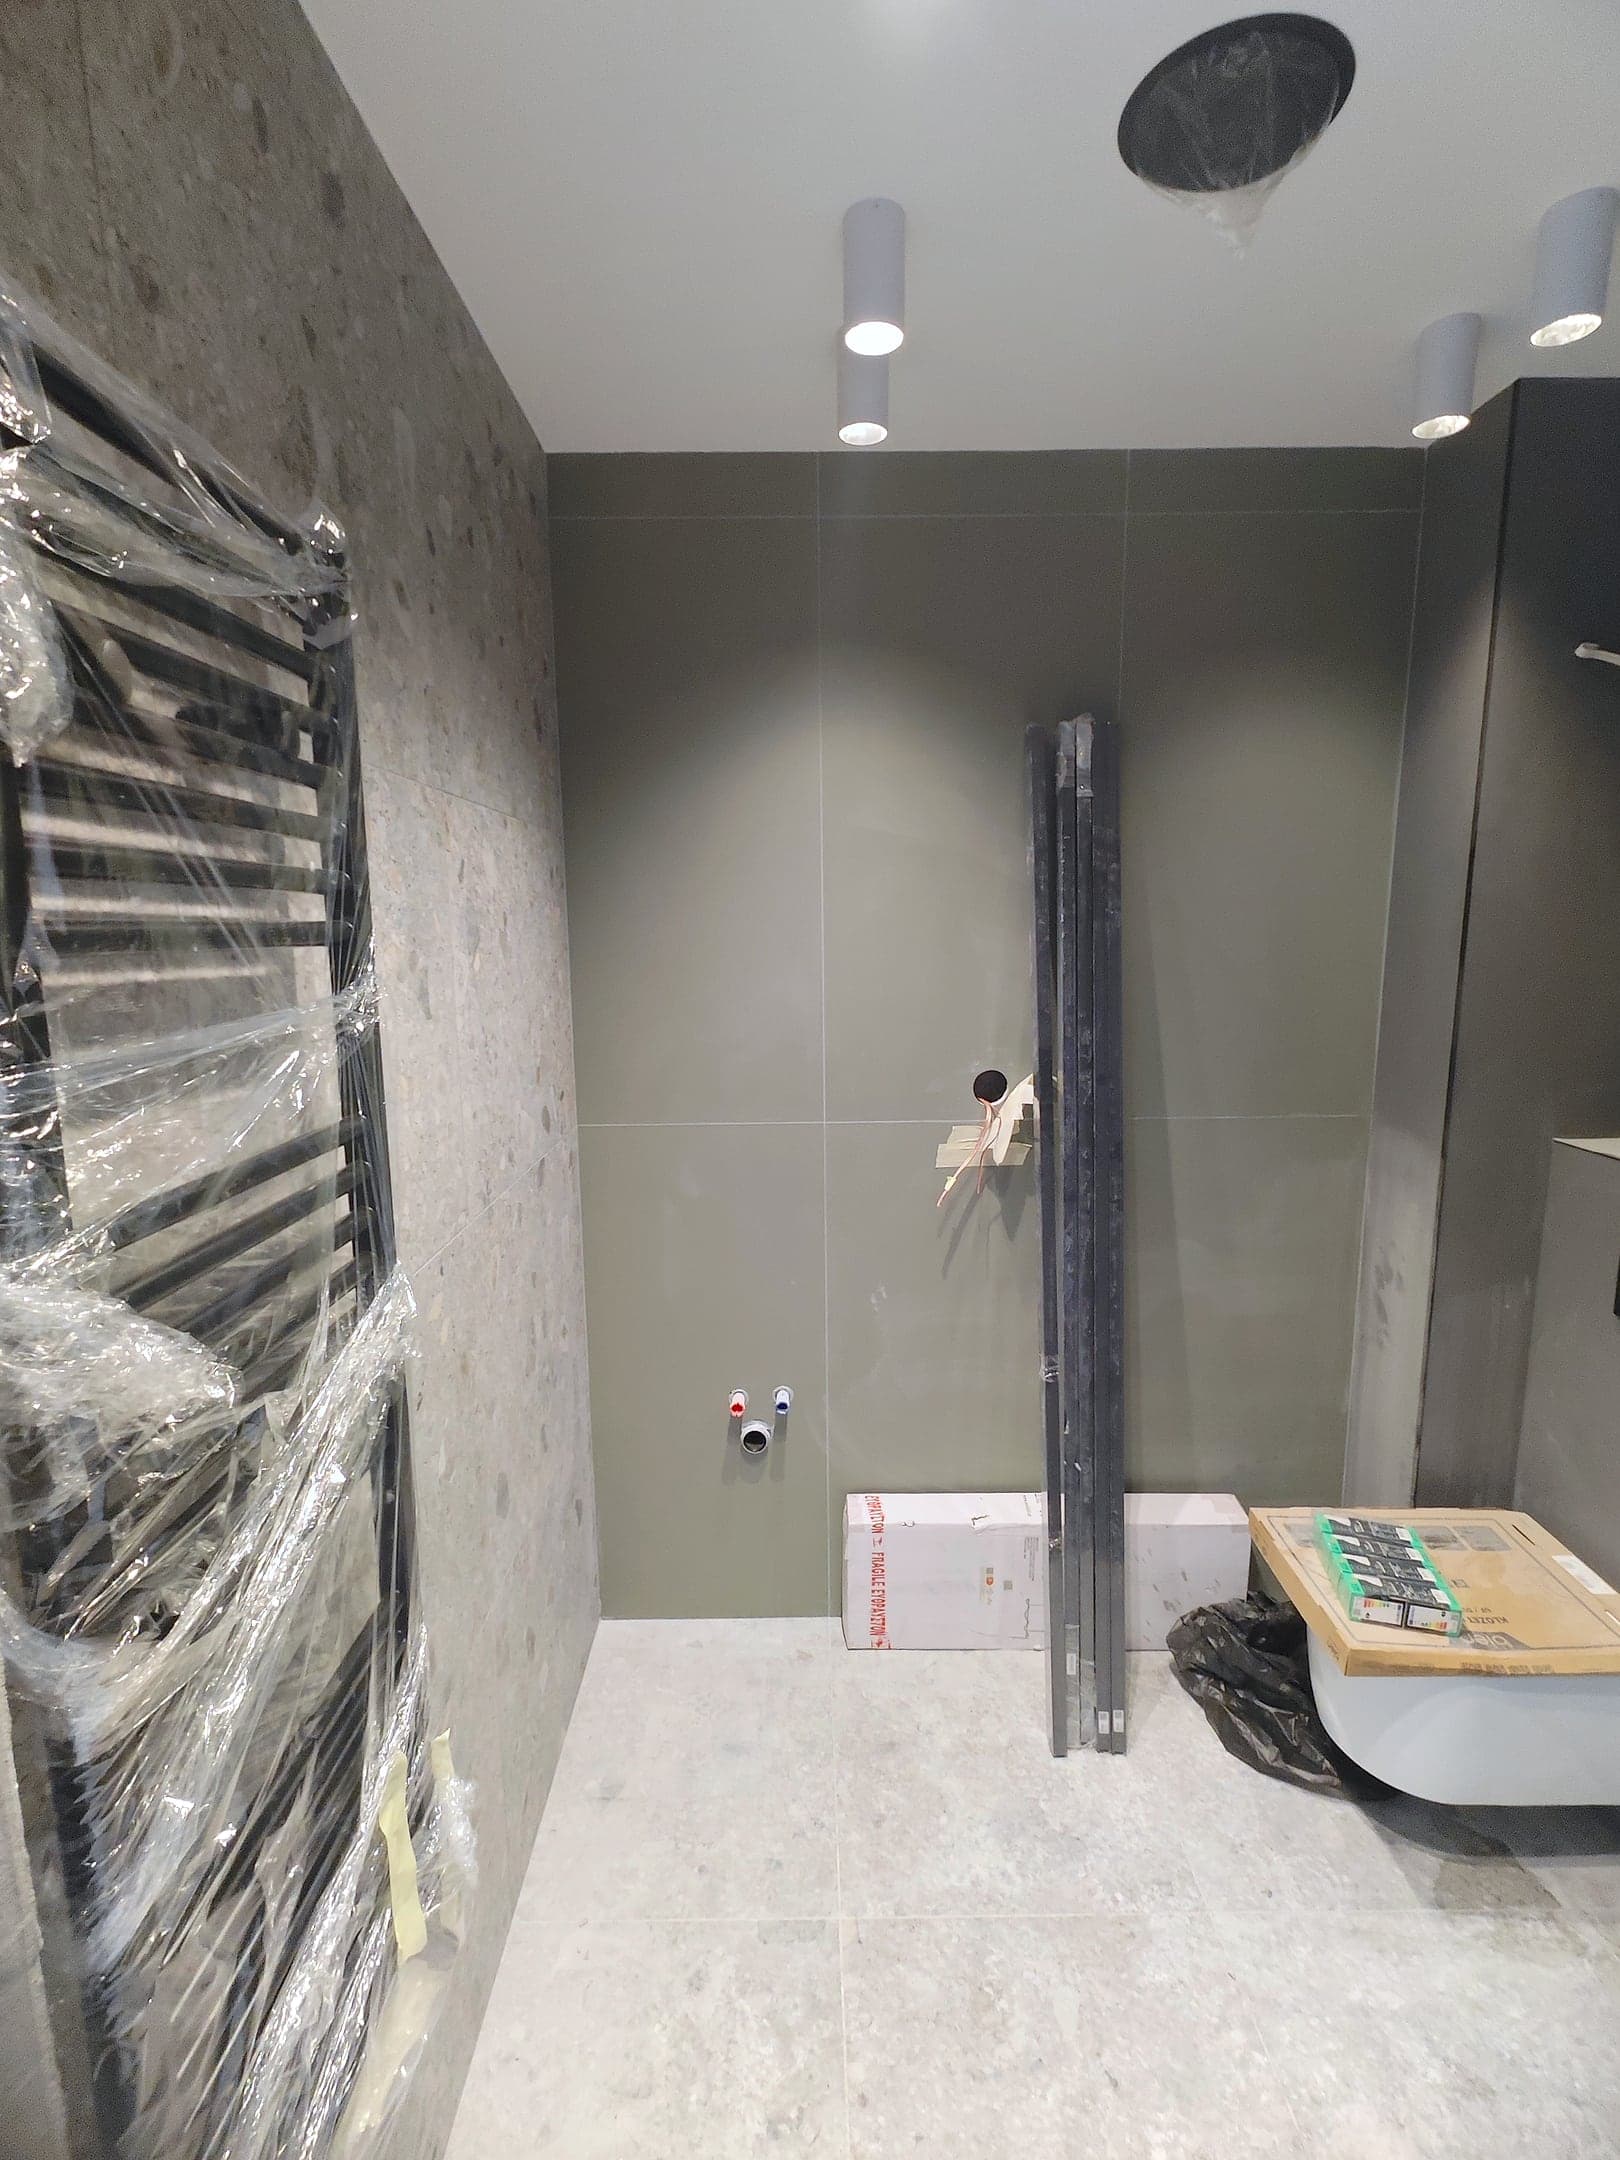
The cistern is decided before the plumbing points: the concealed frame that carries the toilet is fitted and connected in an open wall, and it fixes the height of the toilet and the position of the flush plate. The same goes for the washbasin outlets in the photo on the right – the tiles are laid around them.
What the labour for these details costs
These are the price-list items for the details in the bathroom. They are the price of each detail on its own, not the bill for this project.
| Task | Price for labour |
|---|---|
| Building plasterboard niches | €140.00 each |
| Tiling a niche | €107.37 each |
| Setting in the in-wall body for a concealed shower | €241.59 each |
| Installing a concealed shower | €107.37 each |
| Installing a concealed frame + plasterboard cladding | €187.90 each |
| Installing a wall-hung toilet | €59.05 each |
- A shower niche: €140.00 + €107.37 = €247.37 for labour.
- A concealed shower: €241.59 + €107.37 = €348.96 for labour.
- A concealed cistern with a wall-hung toilet: €187.90 + €59.05 = €246.95 for labour.
You choose and buy the sanitaryware – the mixer, the showers, the toilet, the frame with its flush plate – and the tiles yourself, while construction materials appear on a separate line in our quote. The full breakdown for a bathroom, with a worked example for 4 m², is in the article on the labour cost of a bathroom renovation, and how we work is on the bathroom renovation page.
Decision 3: terrazzo-effect tiles in the hallway and kitchen – before the floors
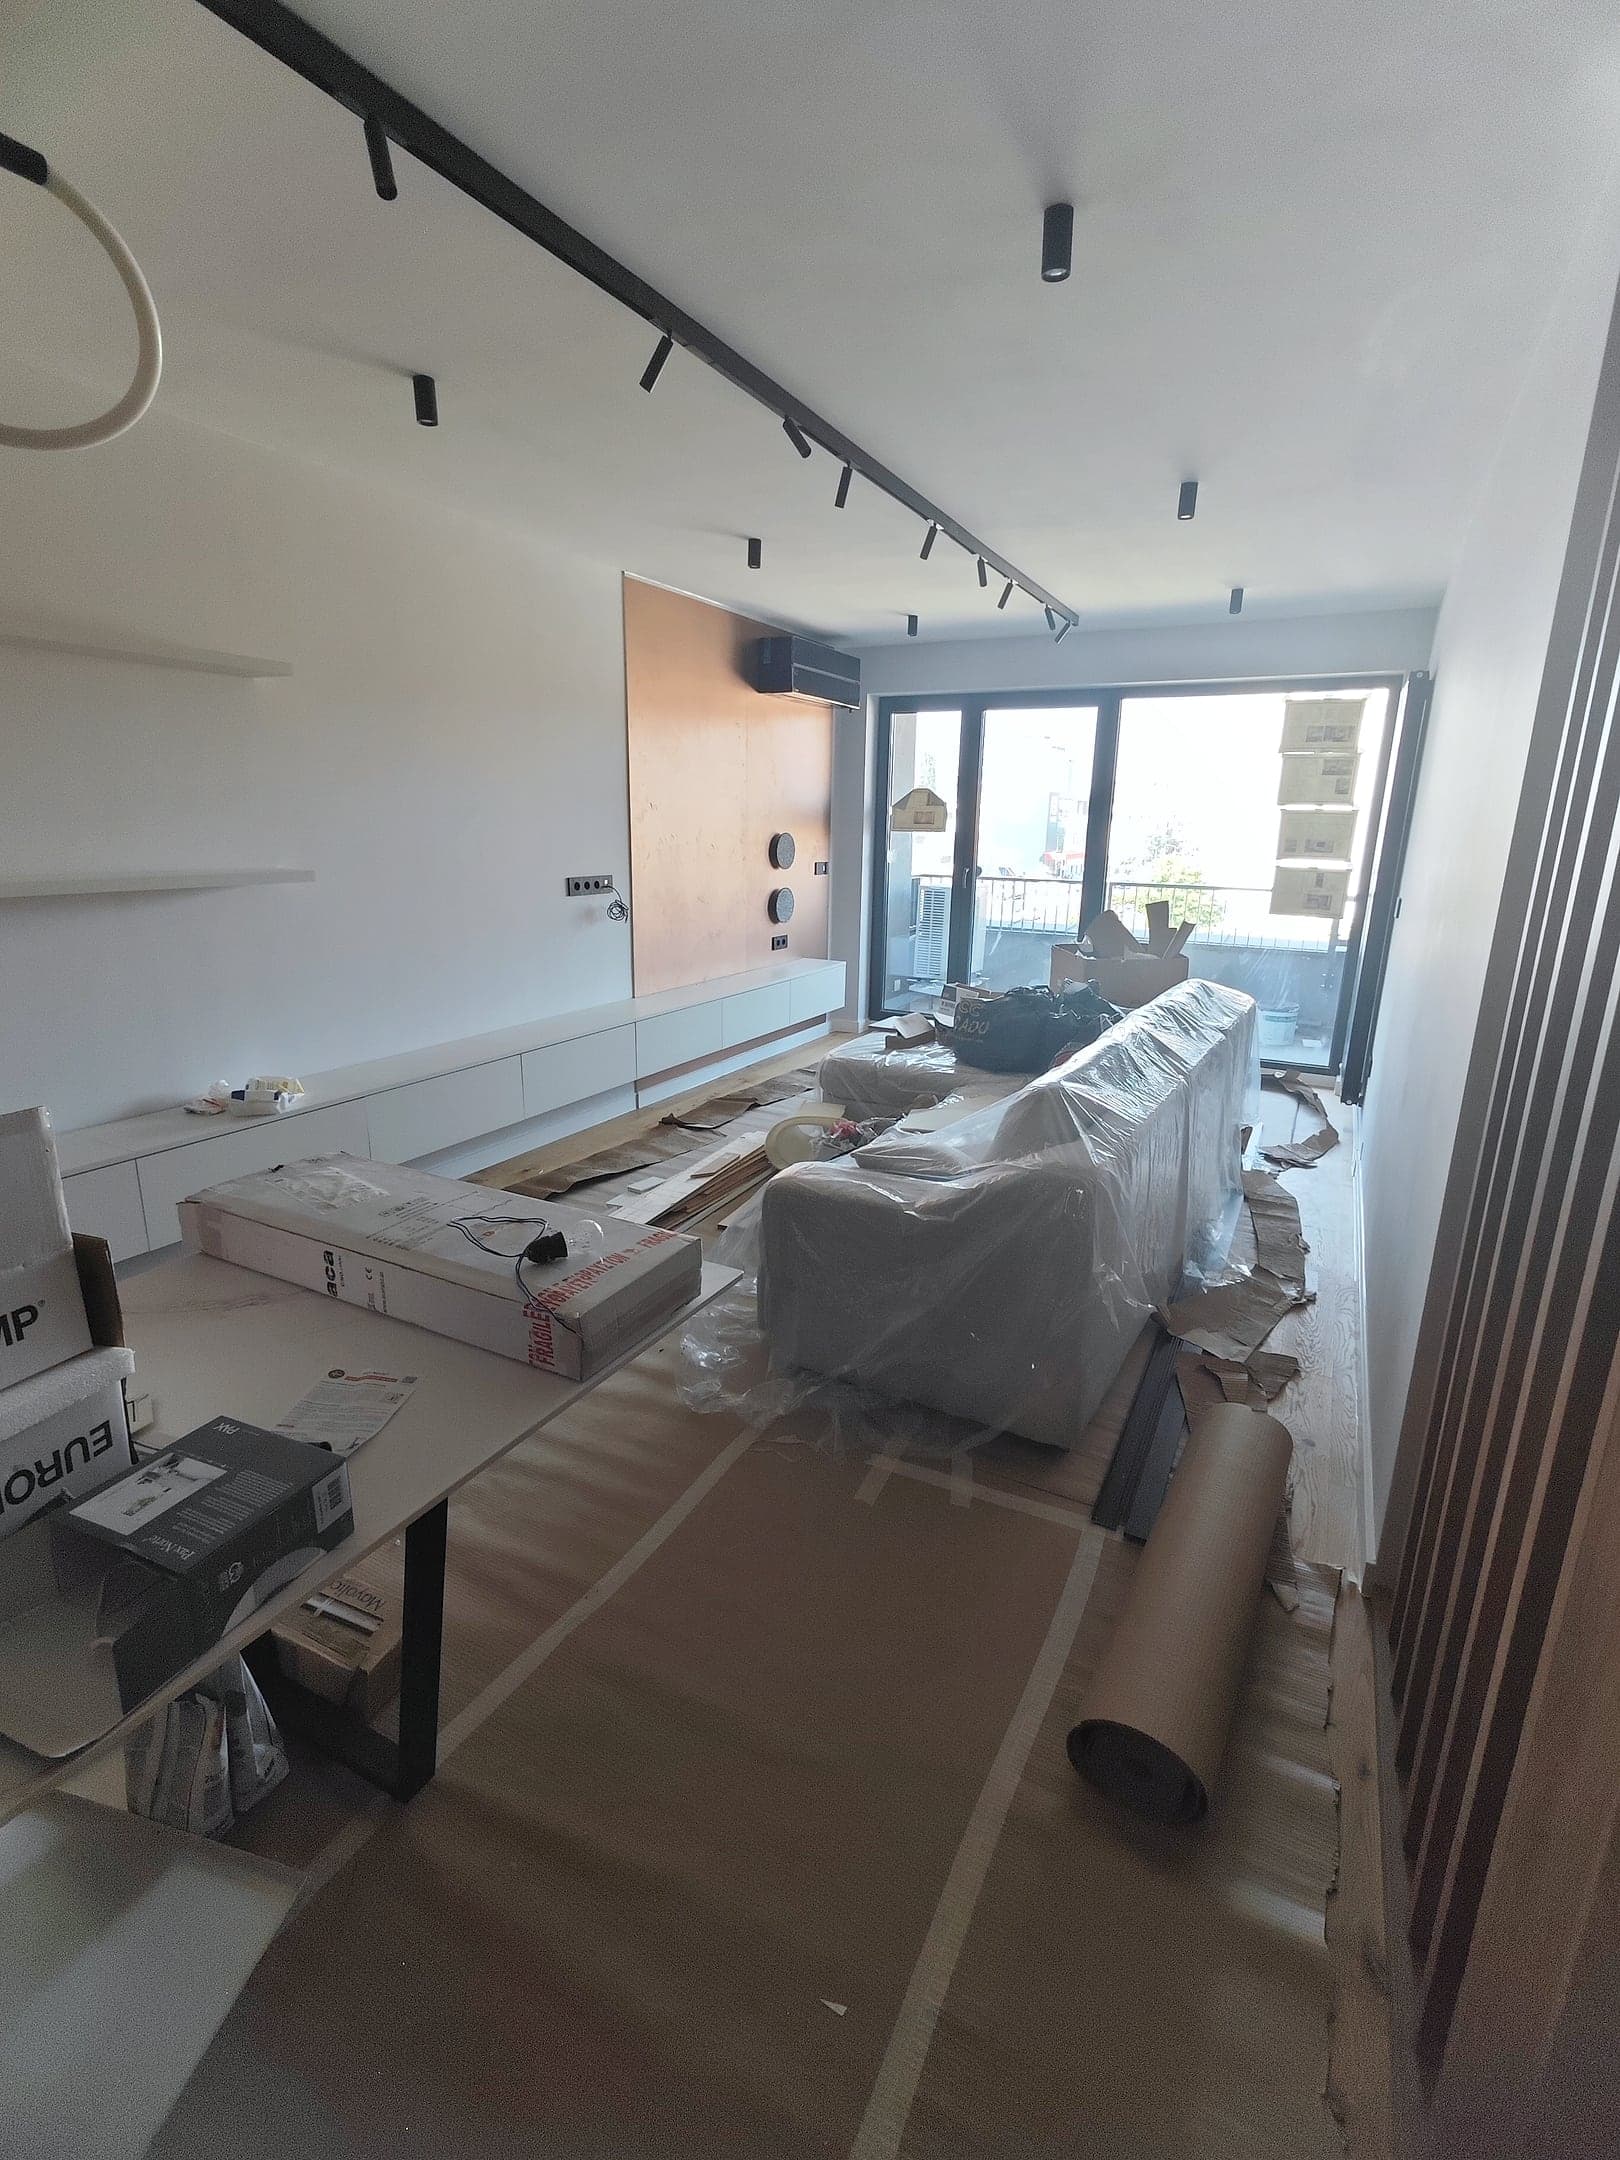
The hallway and the kitchen have large-format terrazzo-effect tiles – grey, with lighter and darker chips. The toilet floor and one of the bathroom walls have a terrazzo effect too. The living room and the bedrooms have a wood-effect floor.
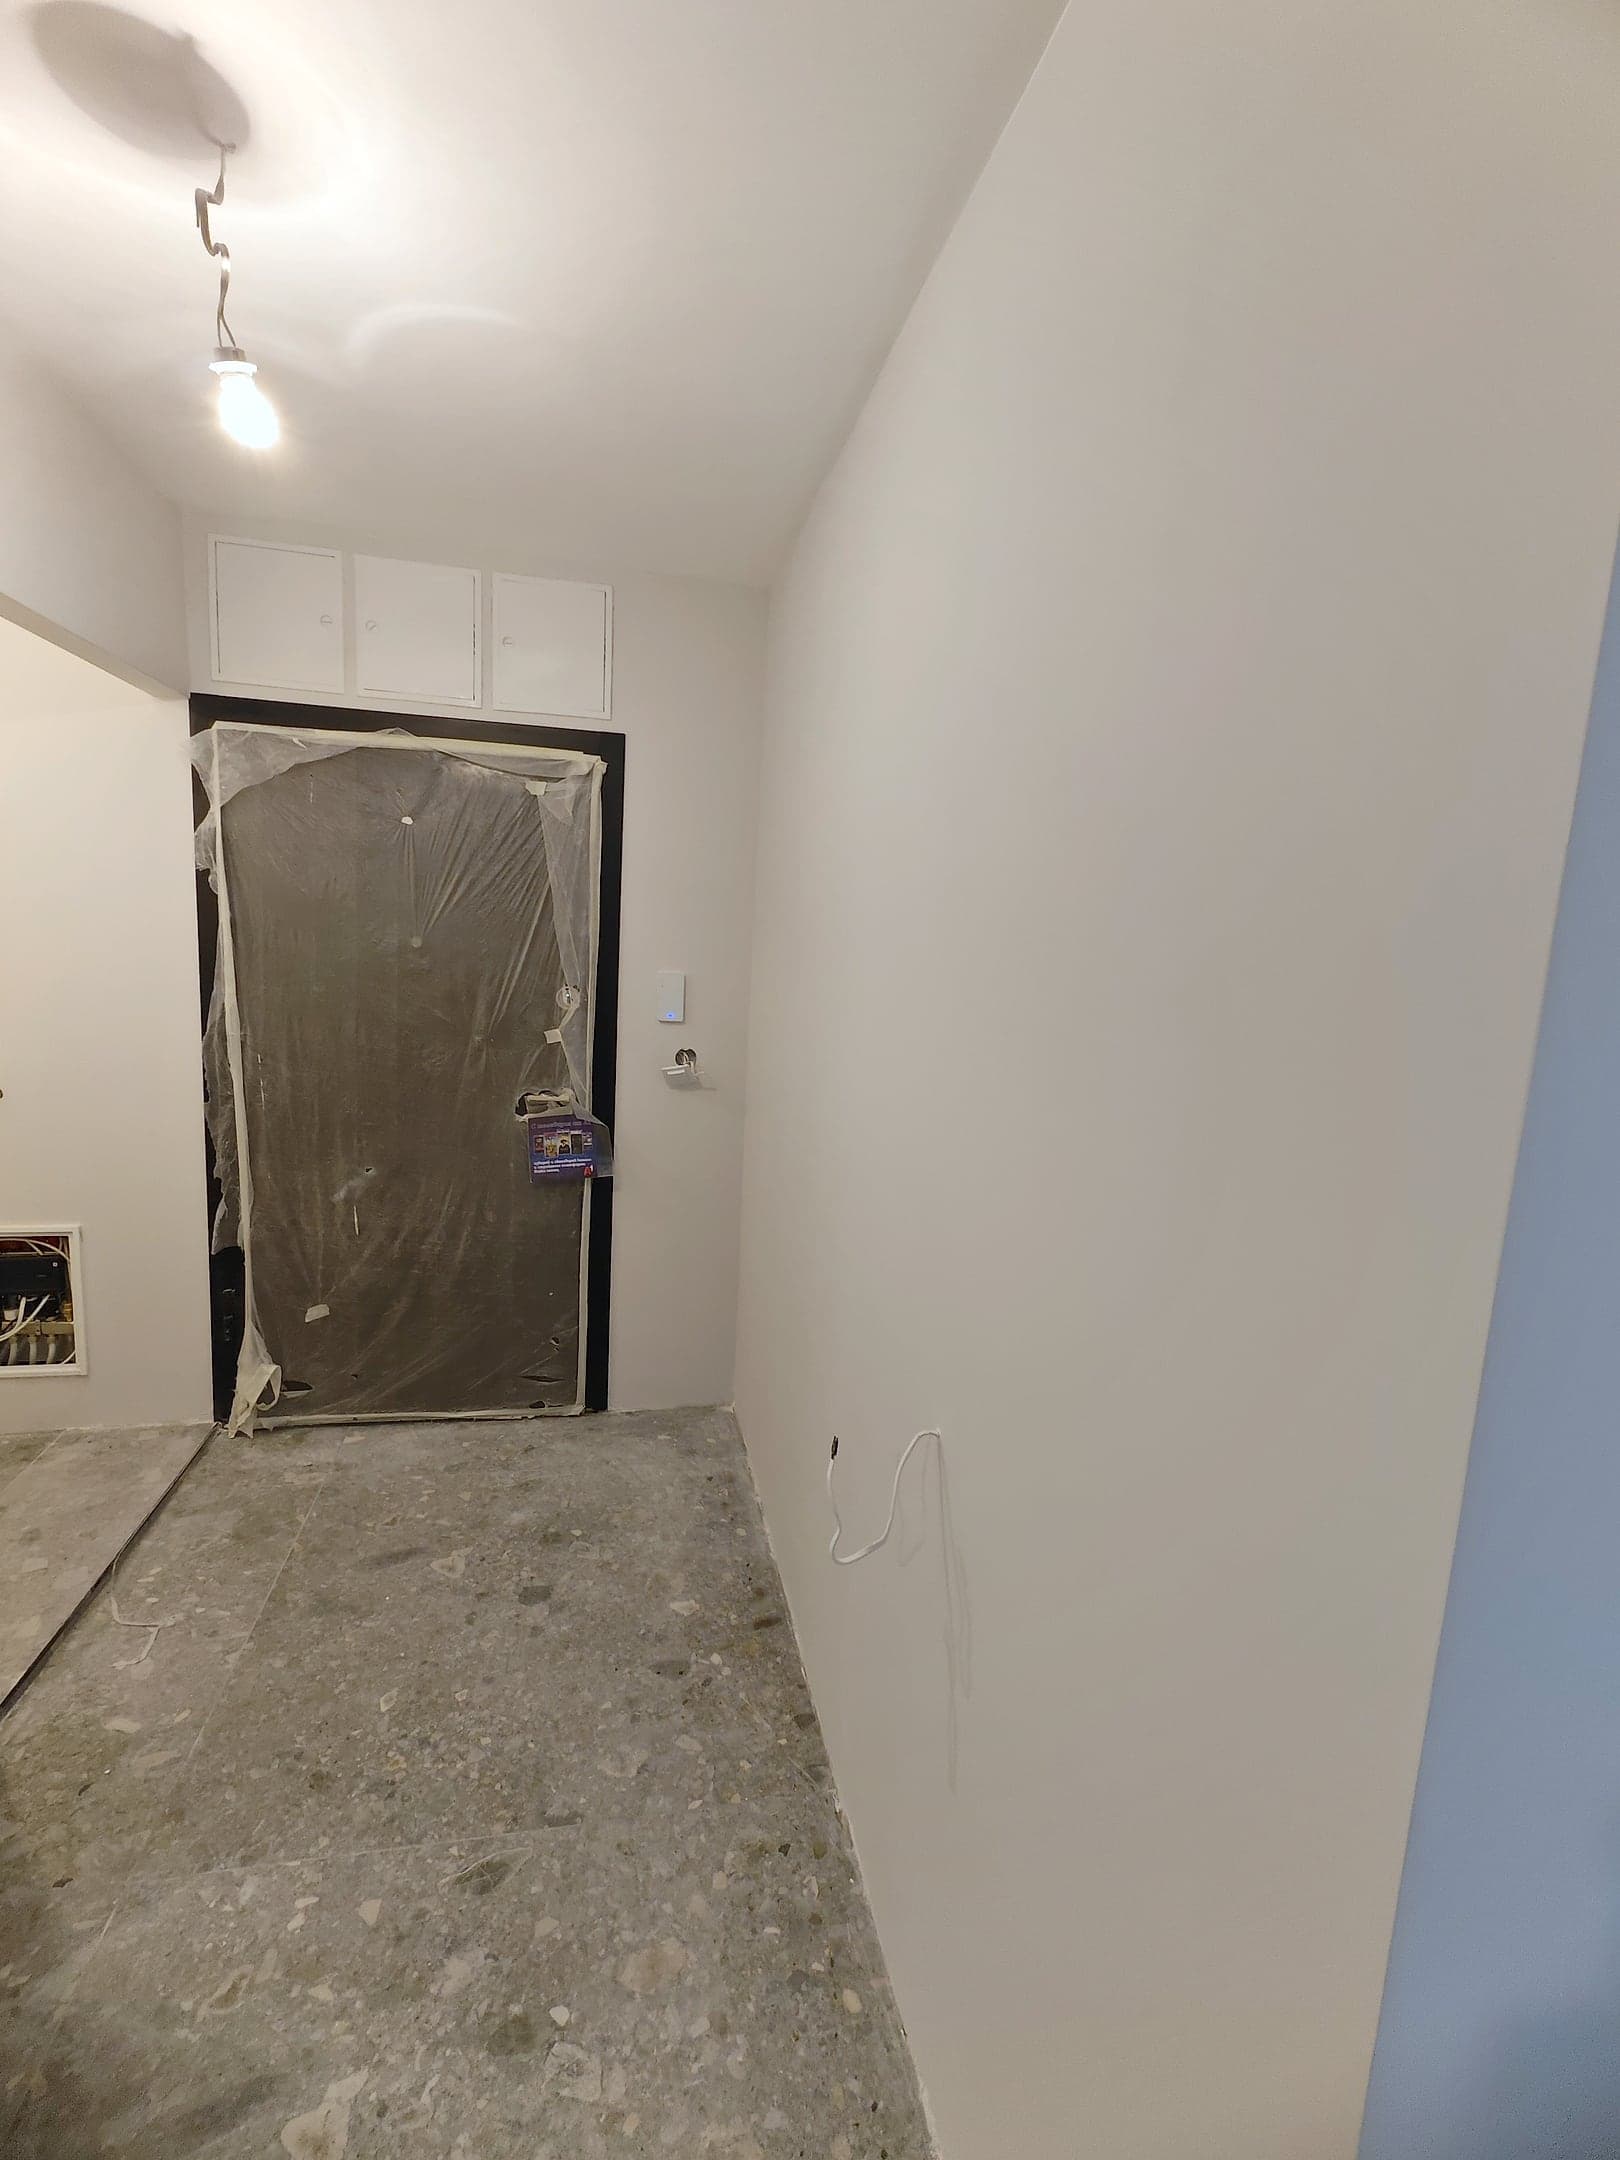
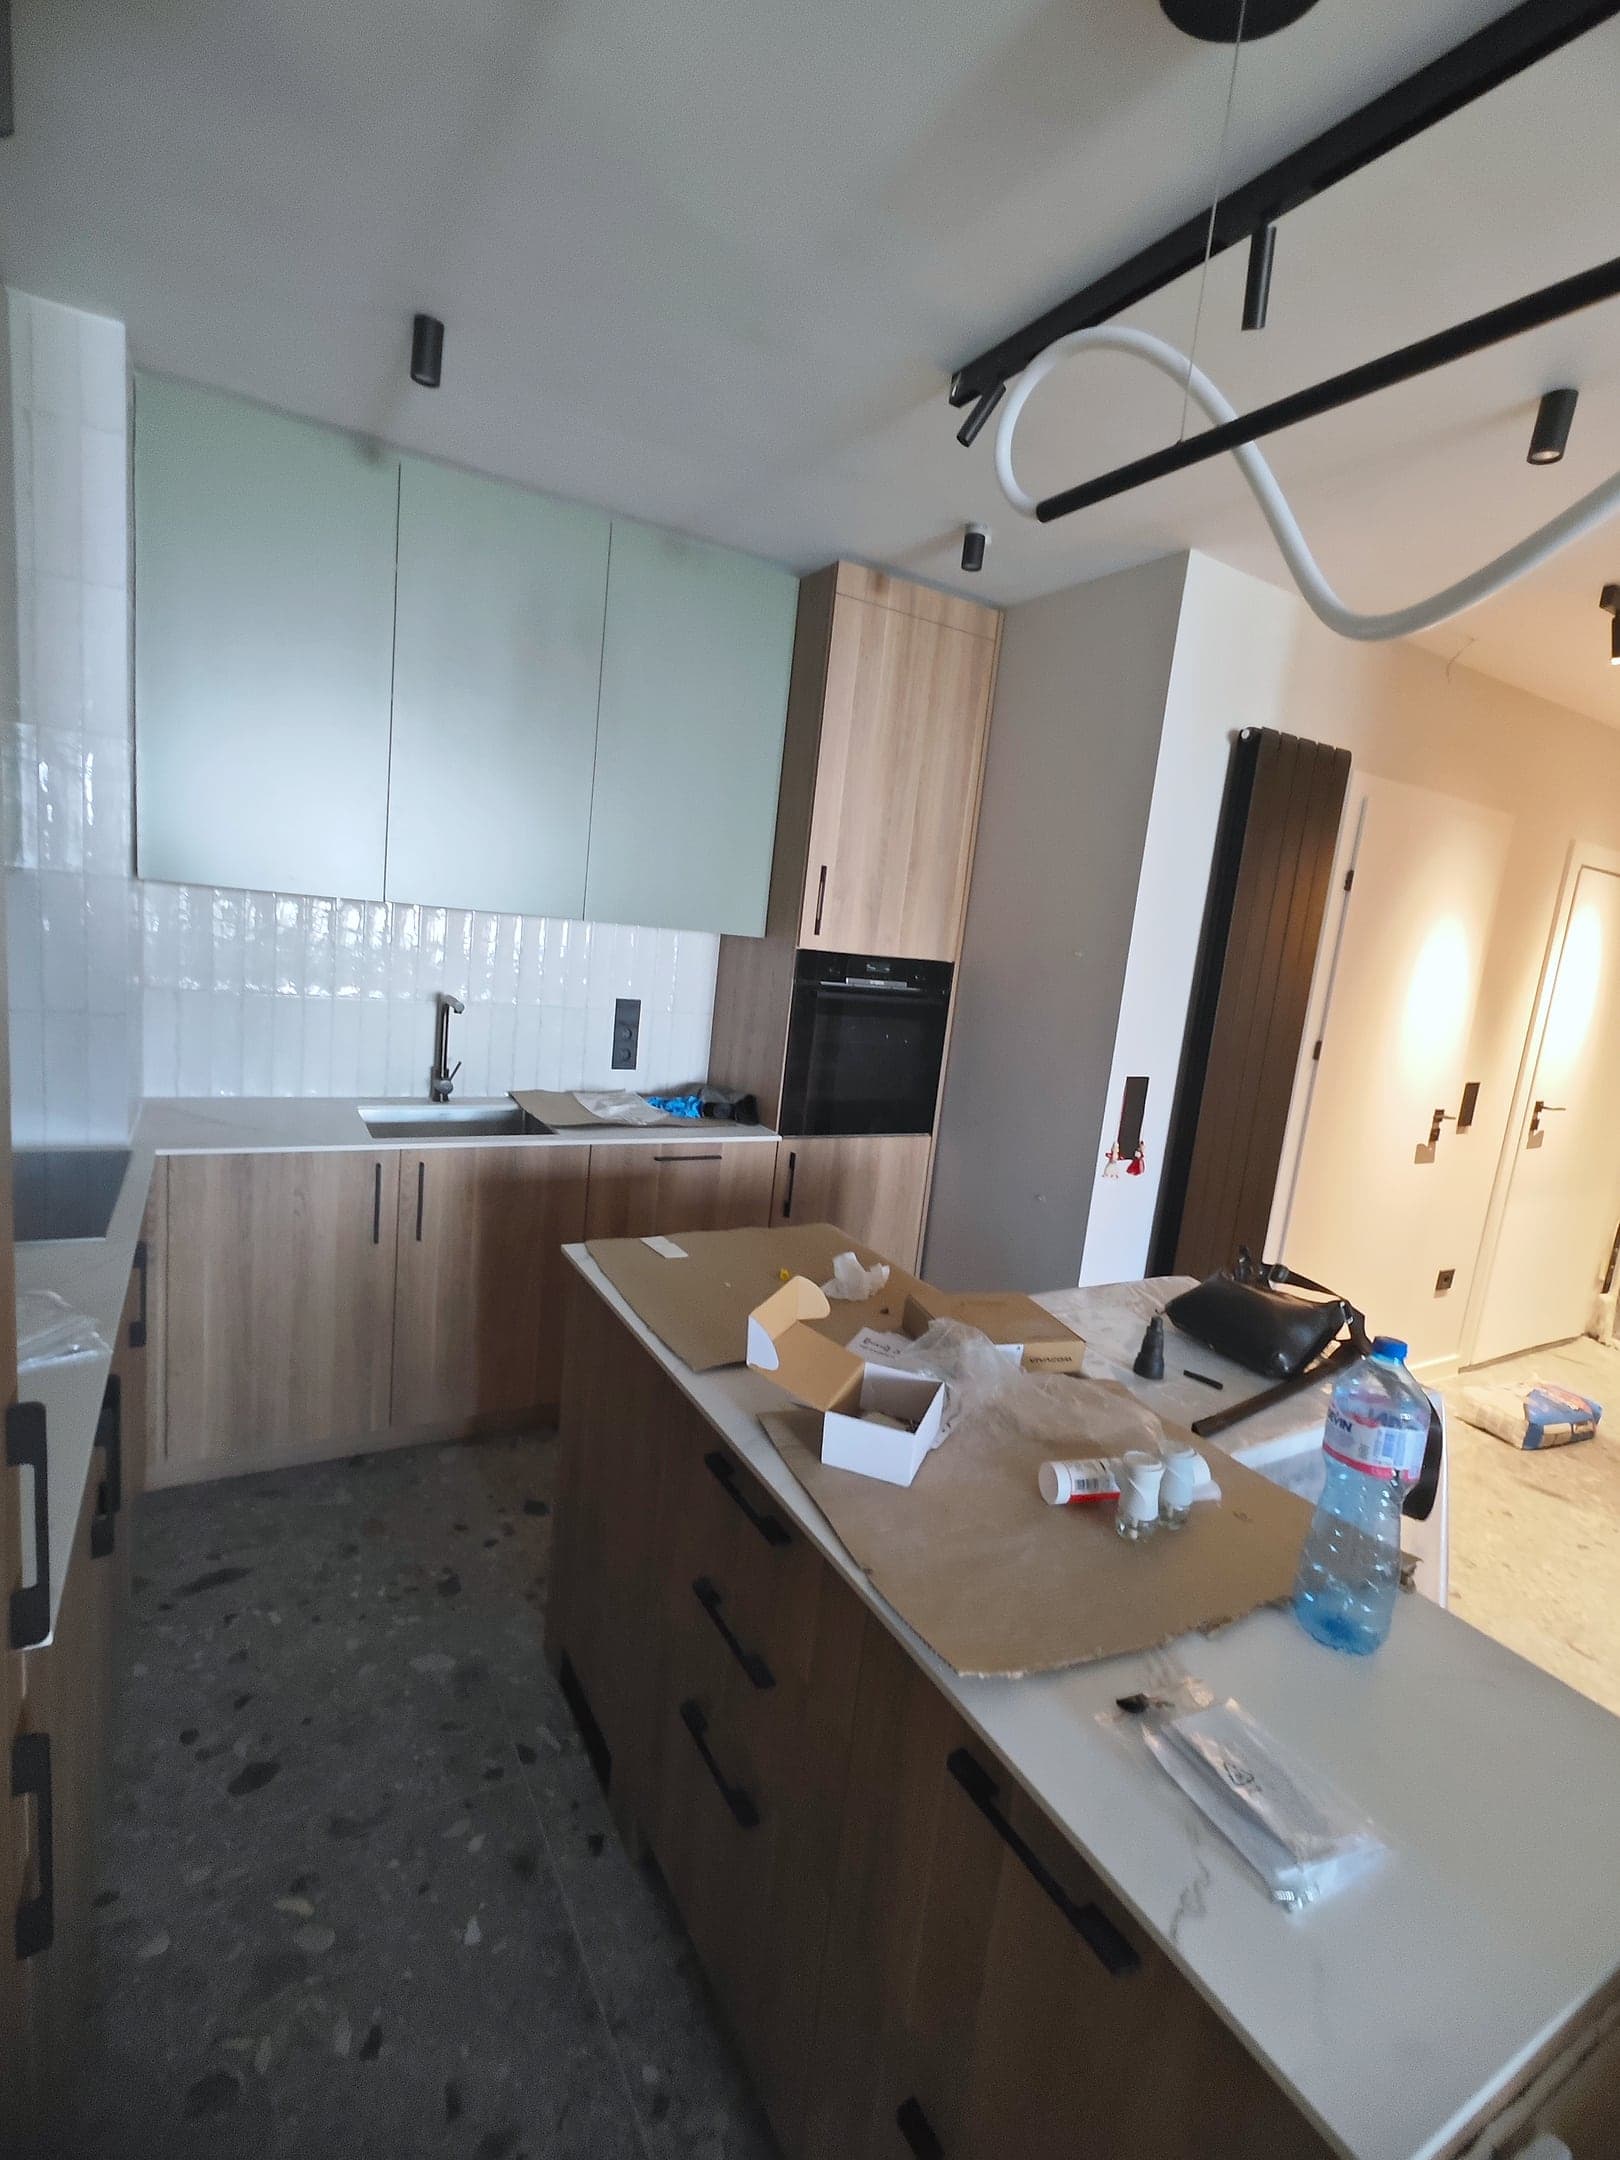
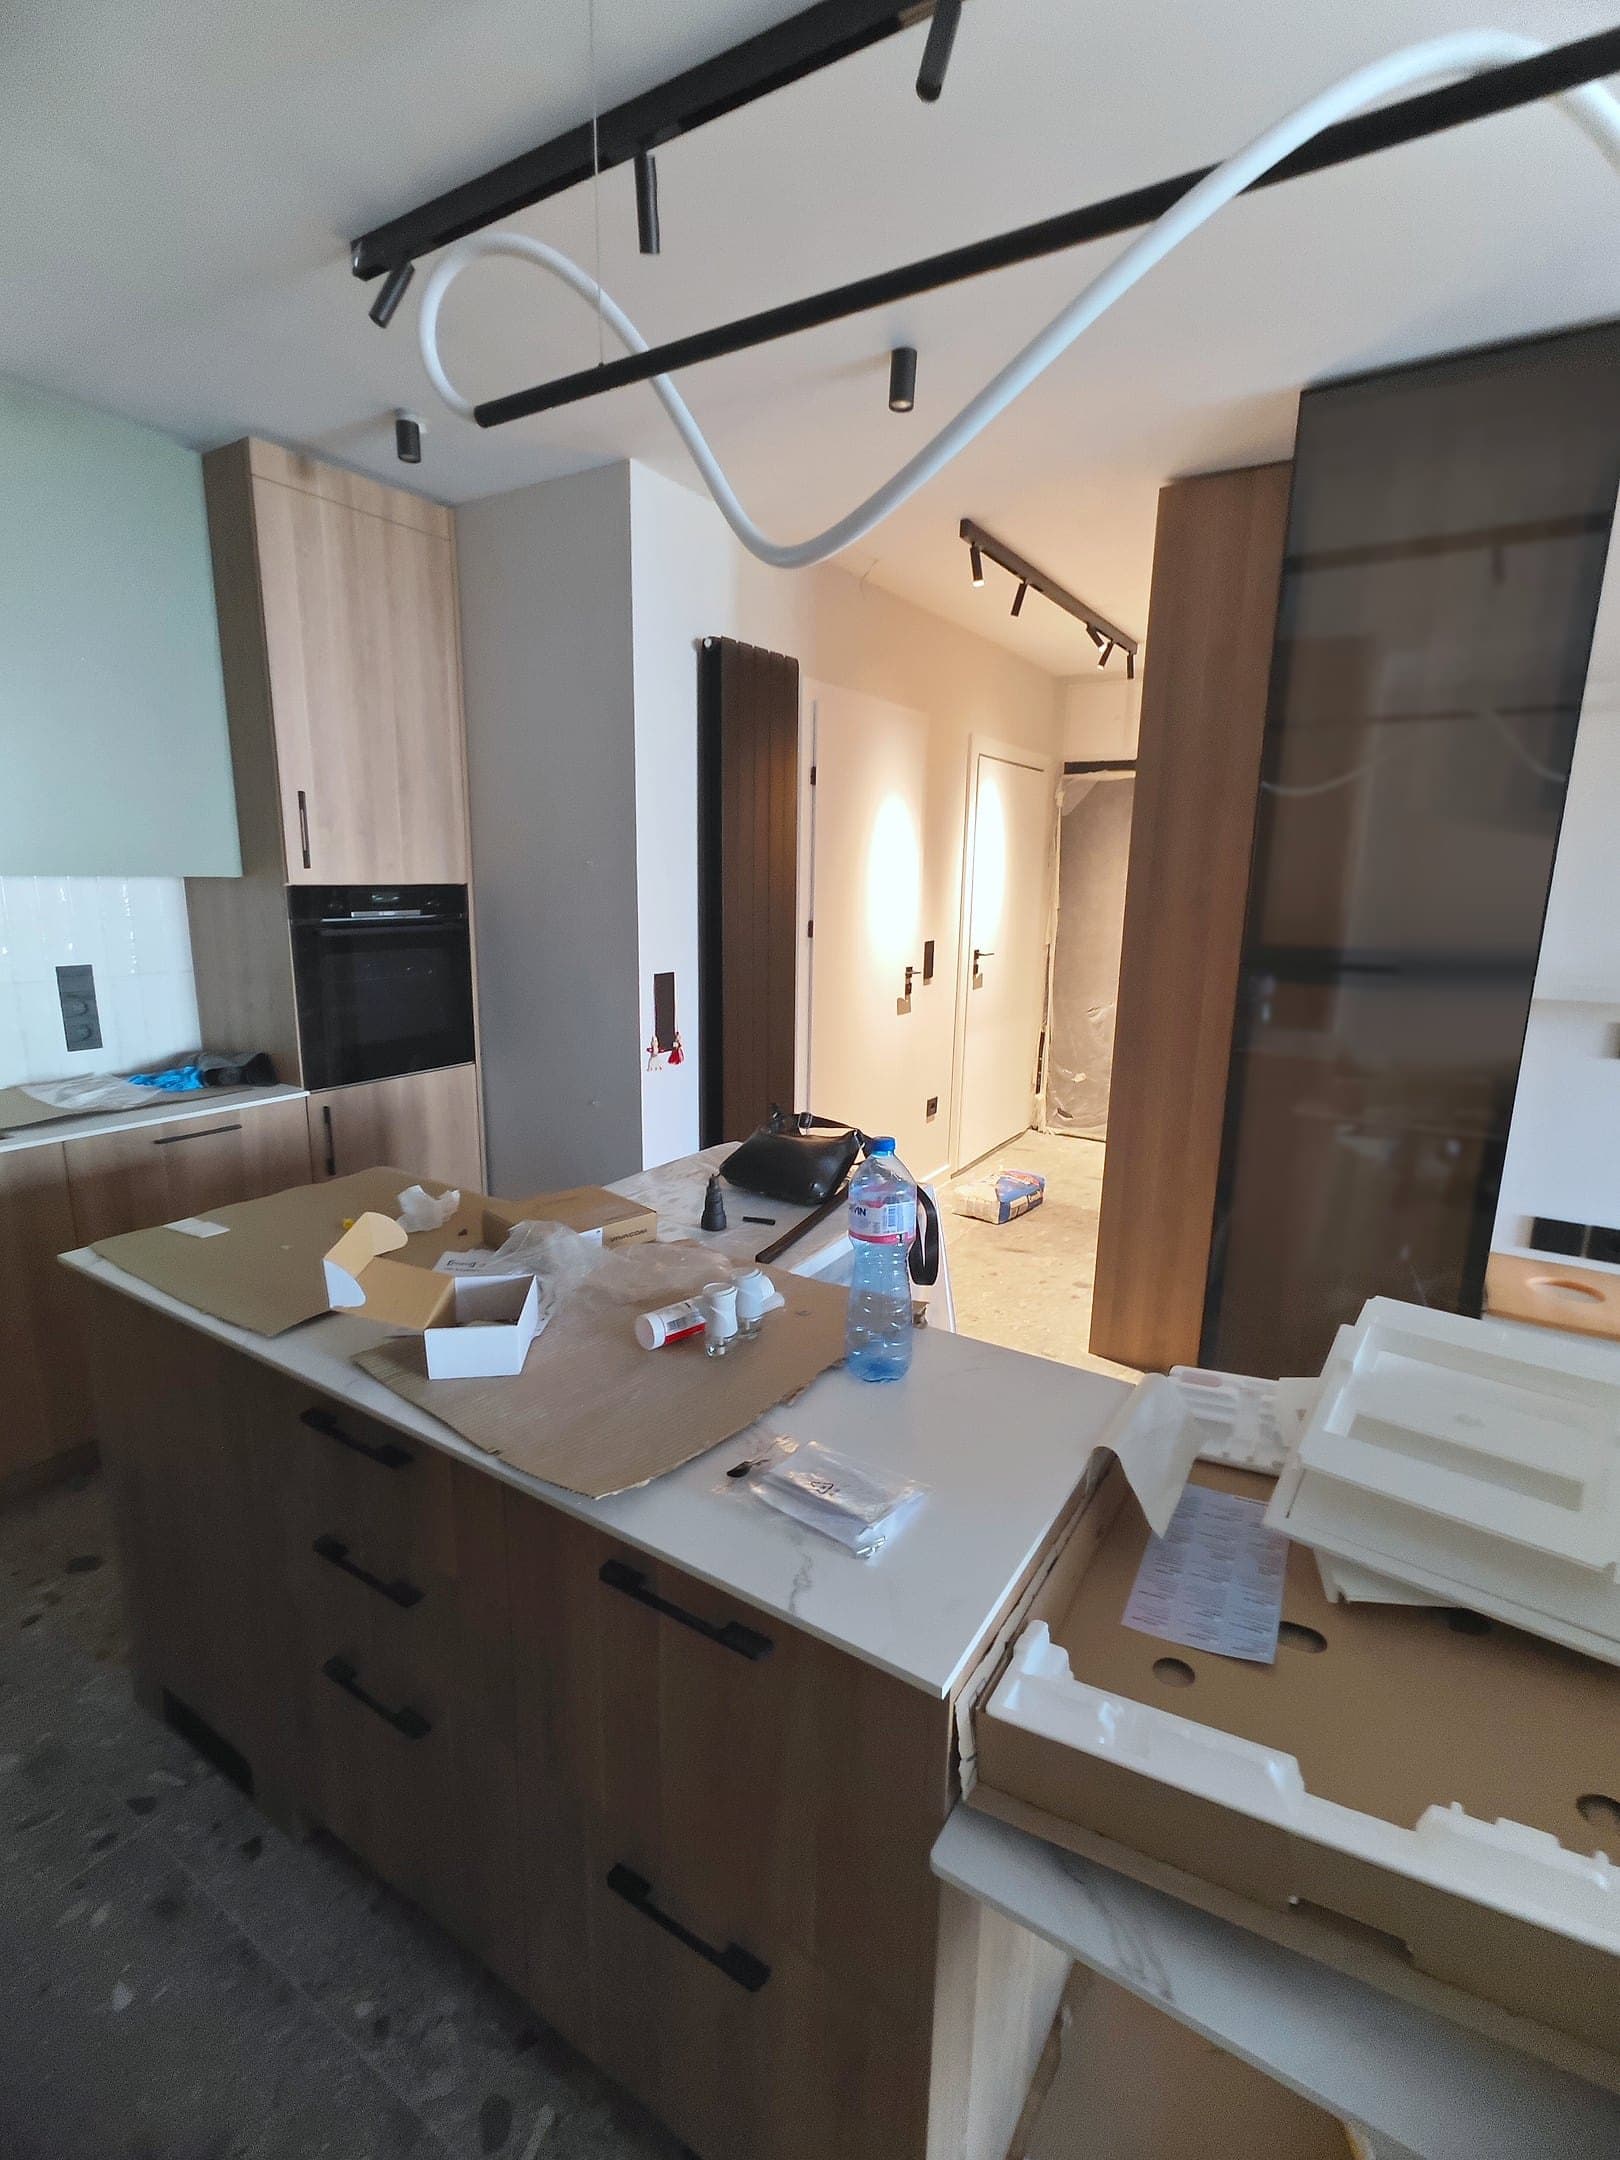
The type of floor in each room is decided before the flooring starts, for two reasons. The first is the boundary: where the tiles end and the wood-effect floor begins – under a door leaf, for example, or along the edge of the kitchen. The second is the levels: tiles on adhesive and a wood-effect floor are different thicknesses, and the transition between them has to be free of a step.
What the floors, painting, doors and tiles cost for a new apartment is worked out in the article on what finishing a new-build apartment costs.
Decision 4: the built-in wardrobes – before the electrical points
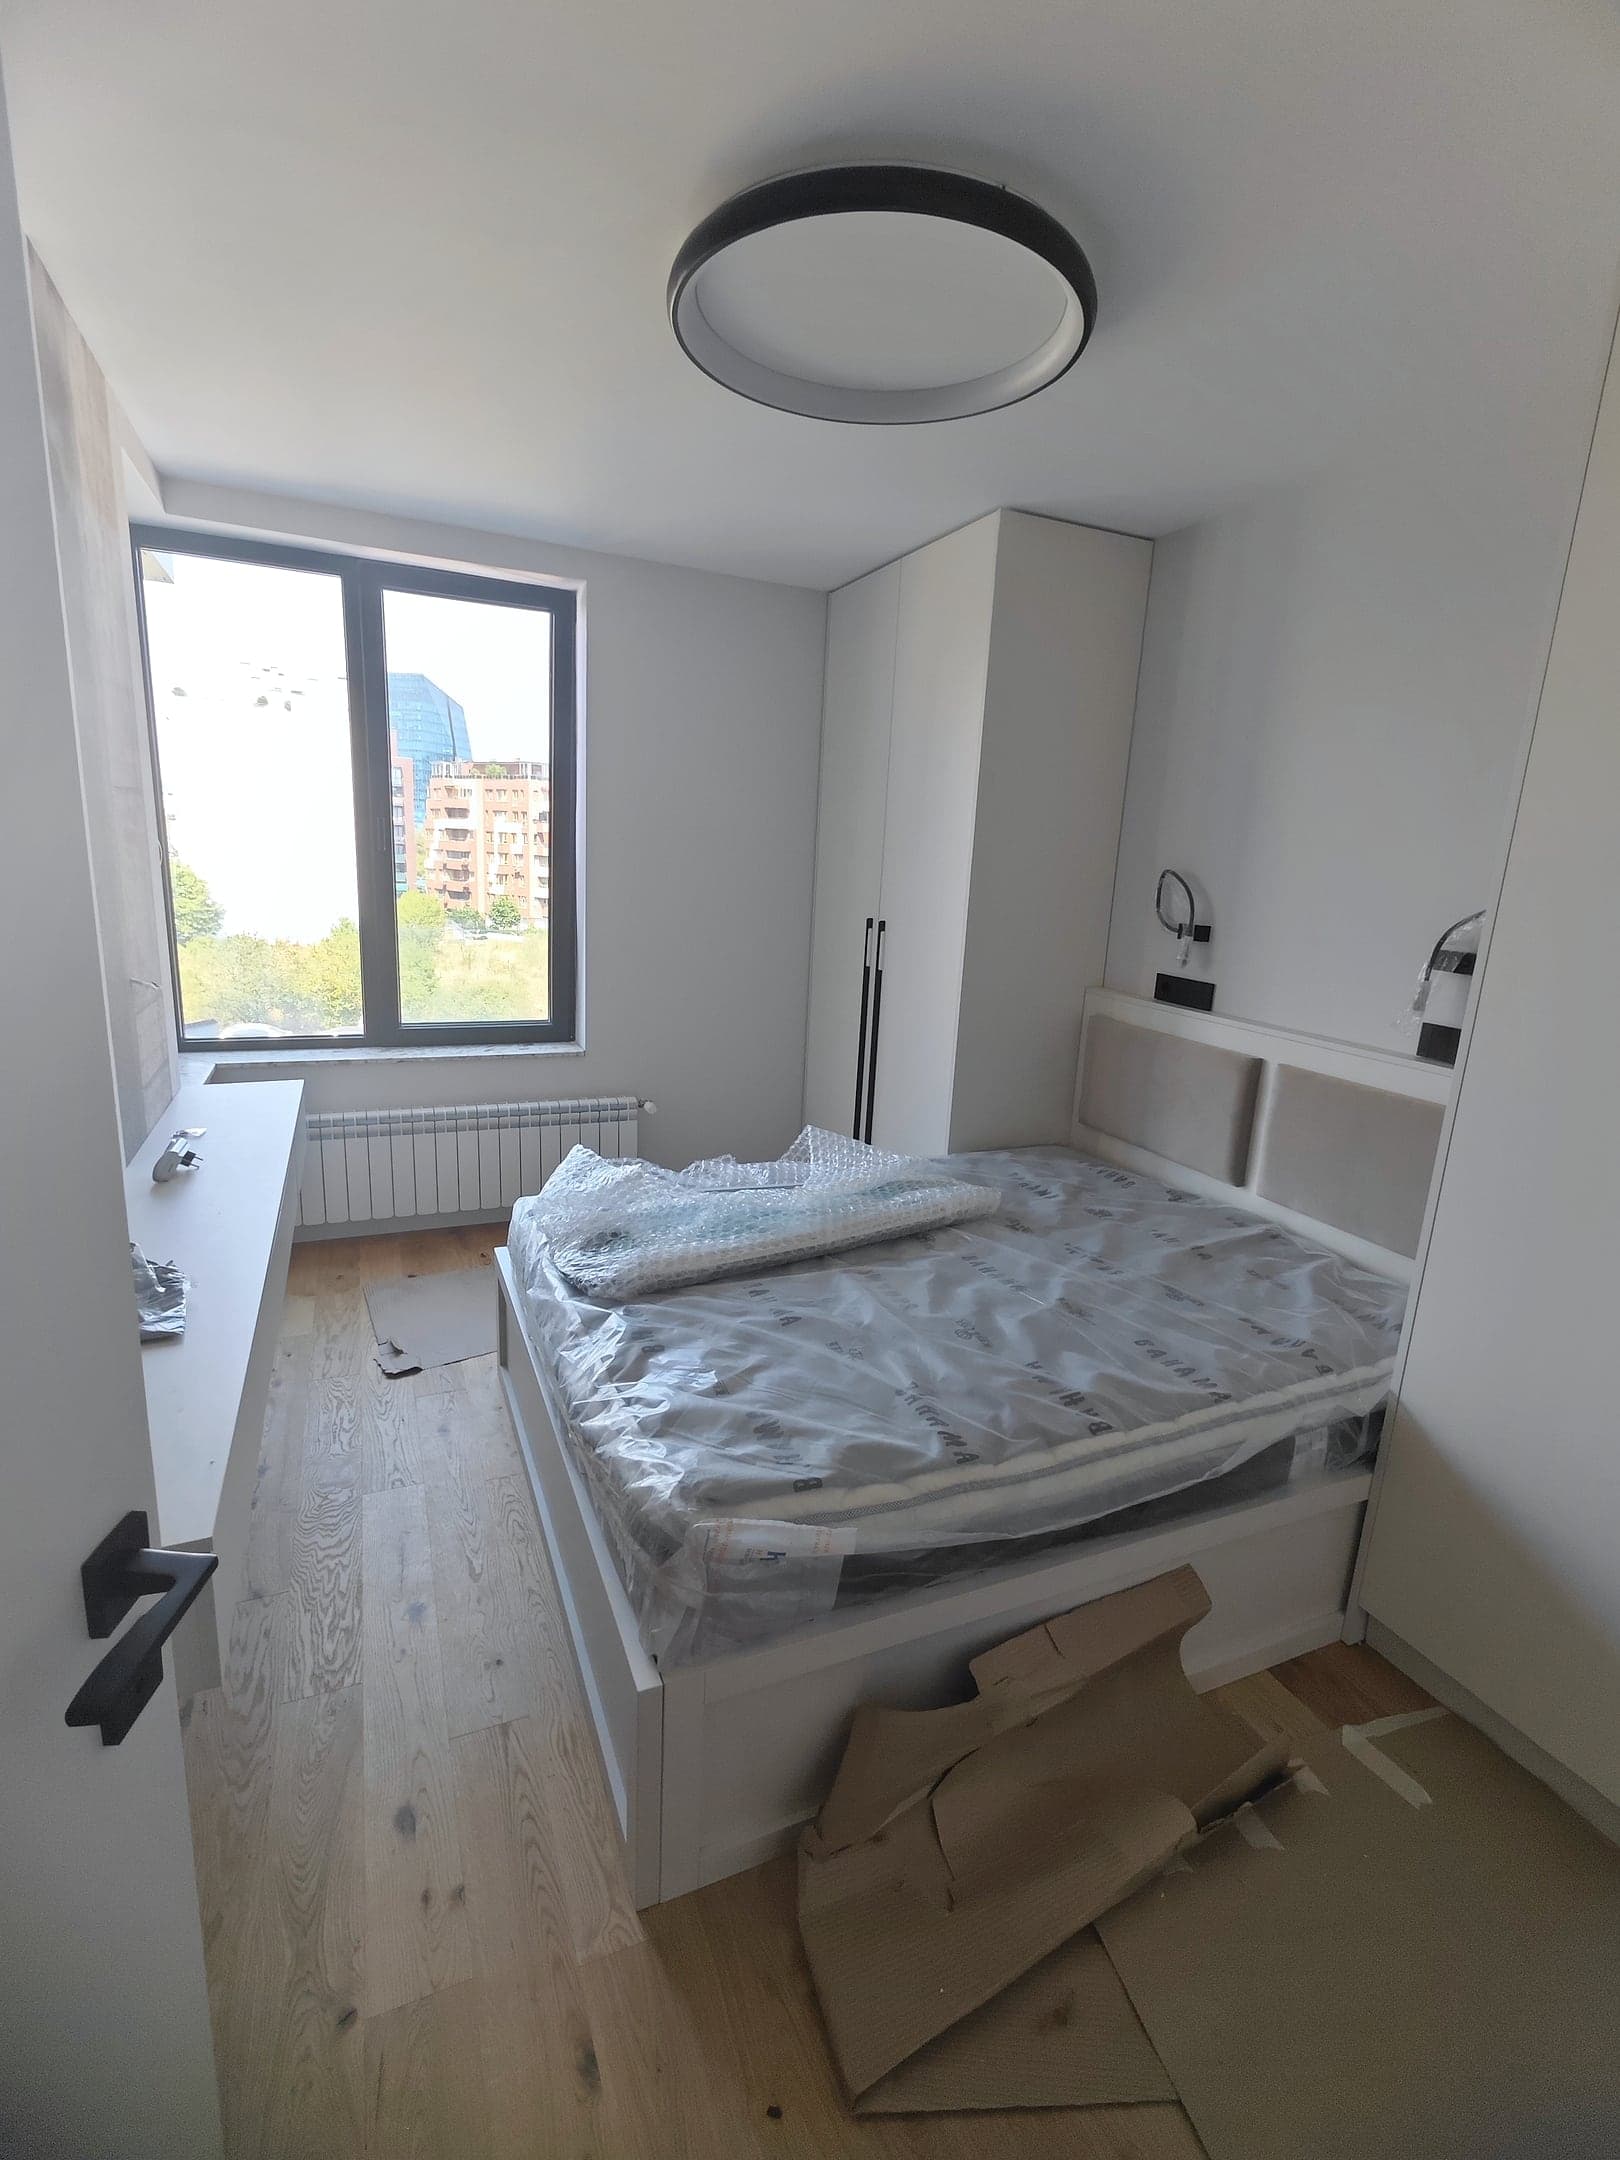
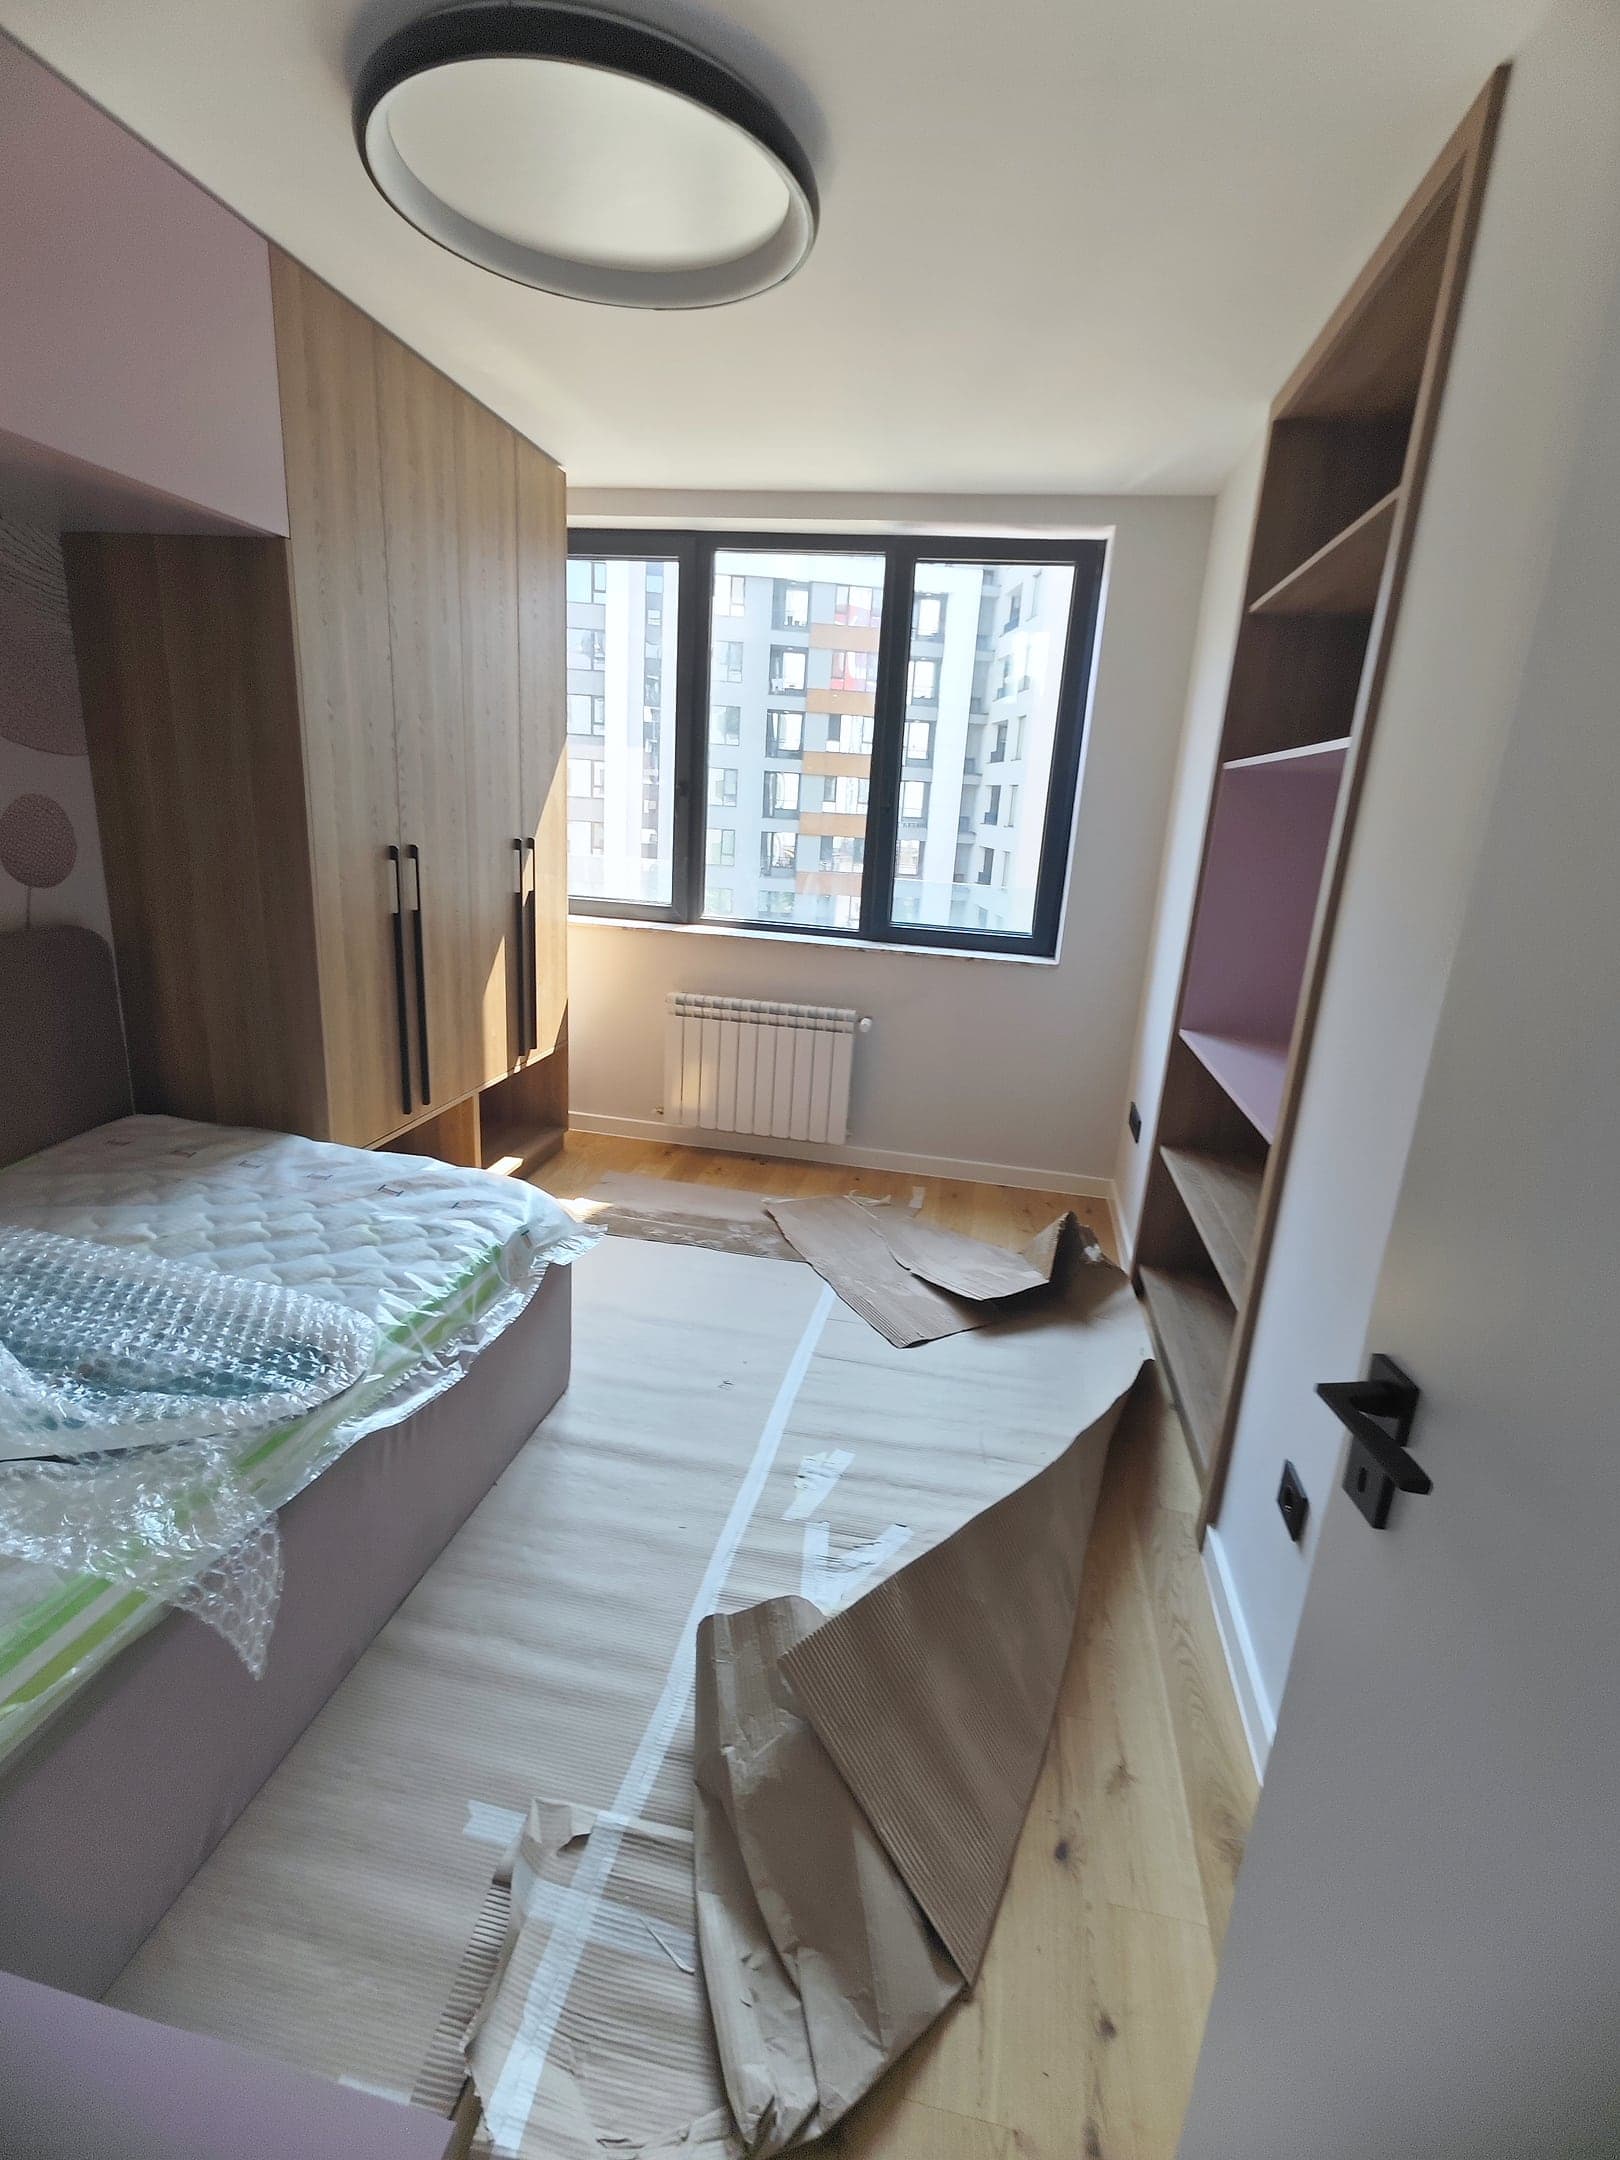
The wardrobes in the bedrooms are built in, from floor to ceiling. In one bedroom they are white, and the headboard is part of the unit – upholstered panels and a shelf, with the two reading lamps above it. In the other, the wardrobe has a wood effect, and on the opposite wall there are open shelves set into a recess, with a lilac back.
 Before
 After
The wardrobes are fitted last – made to exact measurements once the walls are painted and the floor is down. But they are decided among the first, and the two photos show why: in the ‘before’ photo cables already come out of the wall, and in the ‘after’ photo the headboard and the lamps are on the same wall. If the furniture is decided after the walls are finished, the cables stay where they are – behind a wardrobe or in the middle of the headboard – and moving them means a new channel and fresh skim coating.
The decisions at a glance
| Decision and why | Deadline |
|---|---|
| Shower niche – built in an open wall | before the waterproofing |
| Concealed shower – the mixer’s in-wall body goes into the wall | before the plumbing points |
| Concealed cistern – the frame is fitted in an open wall | before the plumbing points |
| Terrazzo-effect tiles in the hallway and kitchen – boundary and levels with the wood-effect floor | before the floors |
| Built-in wardrobes – the cables come out where the furniture leaves room | before the electrical points |
If your home is a new build too
If you have received the keys to a new-build apartment, book a free site visit or call +359 888 802 618 – we reply to enquiries within 24 hours. After the visit you receive a written quote that sets out the work, the quantities, the price and a stage-by-stage schedule, and the warranty is in writing too: 24 months for the renovation and 72 months for the plumbing and electrical installations. For a rough figure, send a few photos through our estimate from photos service.
Until the end of the year there is also 10% off the whole quote – on the labour and the materials we supply – for contracts signed by 31 December 2026, including quotes we have already sent.
Frequently asked questions
Can a shower niche be added after the tiling?
Only by cutting into the finished tiles and redoing the waterproofing around the opening – and only if the wall allows it. That is why the niche is decided before the bathroom is tiled.
How much does it cost to install a concealed cistern?
The labour comes in two items: ‘Installing a concealed frame + plasterboard cladding’ – €187.90, and ‘Installing a wall-hung toilet’ – €59.05, making €246.95 for labour in total. The frame, the toilet and the flush plate are not included – you buy them yourself.
More articles
All articles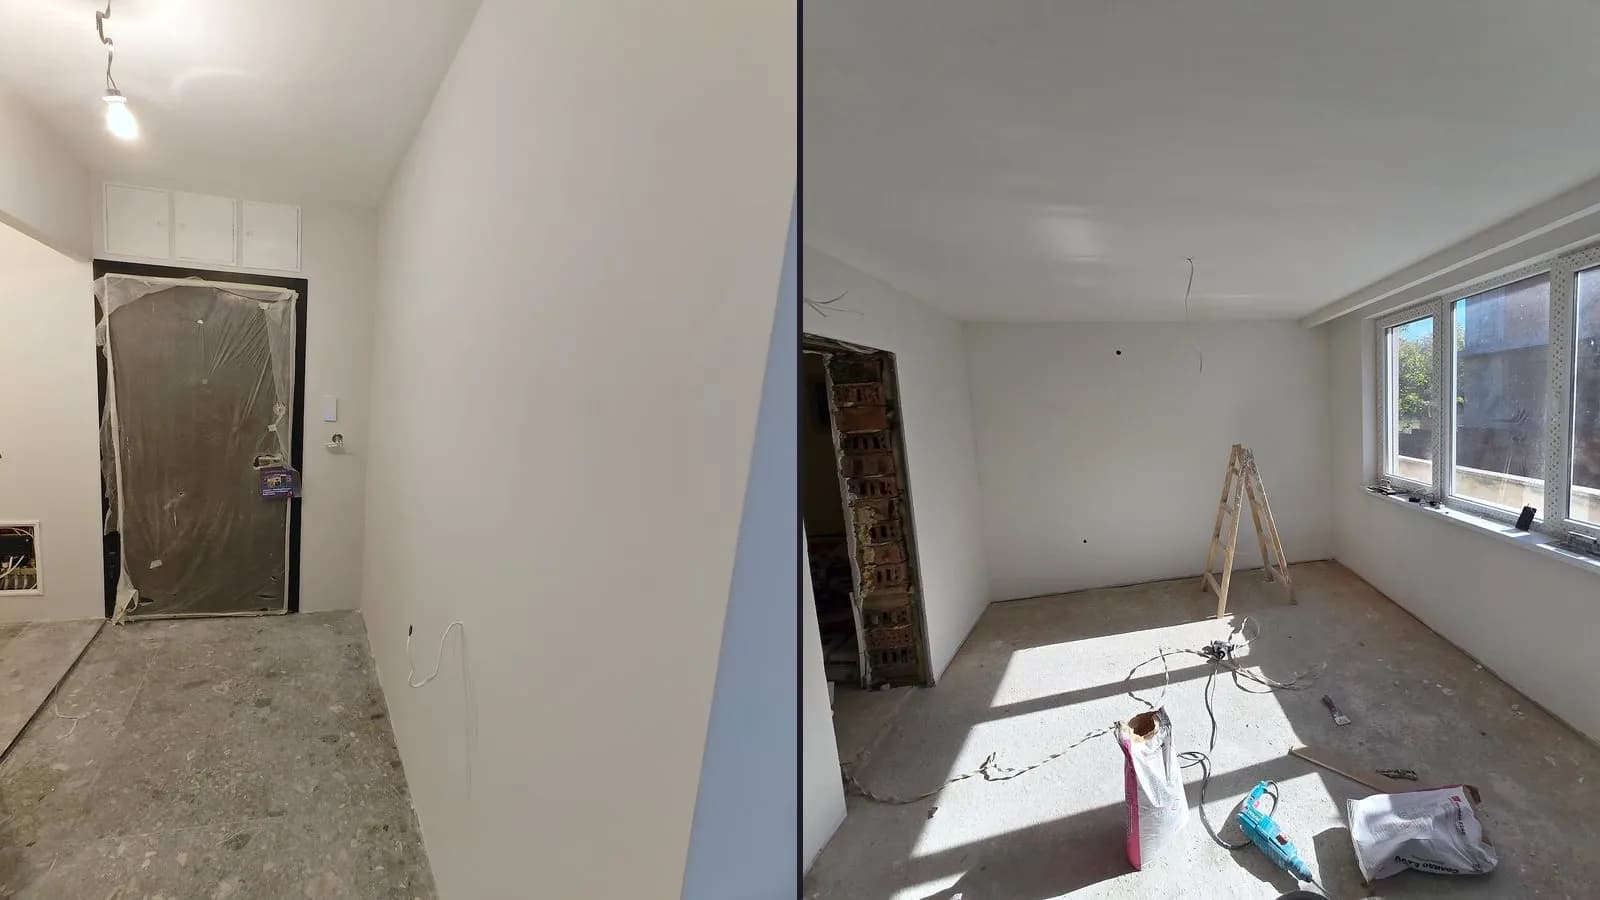 Rules
8 min read
Renovation notice for an apartment: 3 templates for neighbours
Ready-to-use notices for the entrance, the building manager and the noisy days – what to include, when to put them up and how to handle a complaint.
Read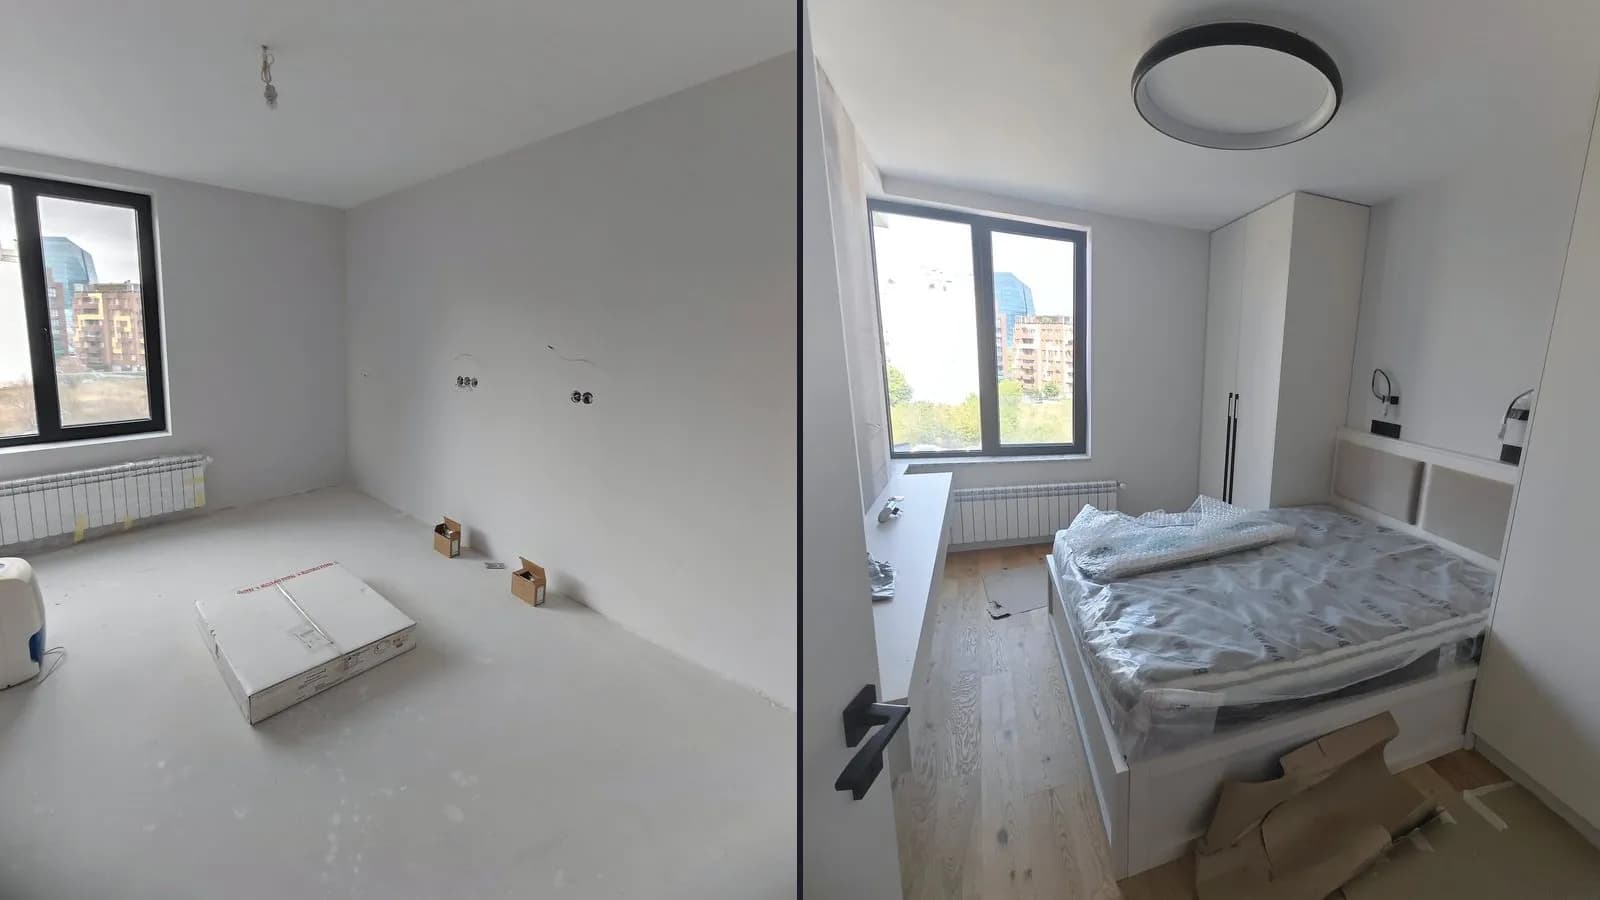 Budget
13 min read
Finishing a new-build apartment: what it costs from skim coat to turnkey (2026)
Price-list maths for a new 65 m² two-room apartment: labour from skim coat to turnkey is €7,585.26, from bare plaster €12,421.70. What is in and what is not.
Read Roofs
10 min read
Tiled roof replacement: cost per m² and an example from Obelya
What a new tiled roof costs by our price list, which items are labour only and which include materials – and the replacement stage by stage in Obelya.
Read