Bathroom renovation in a panel block: riser, walls and what stays
Which walls in a panel-block bathroom must stay intact, where the pipes and cistern go, how the shared riser is handled and what a 3 m² bathroom costs.
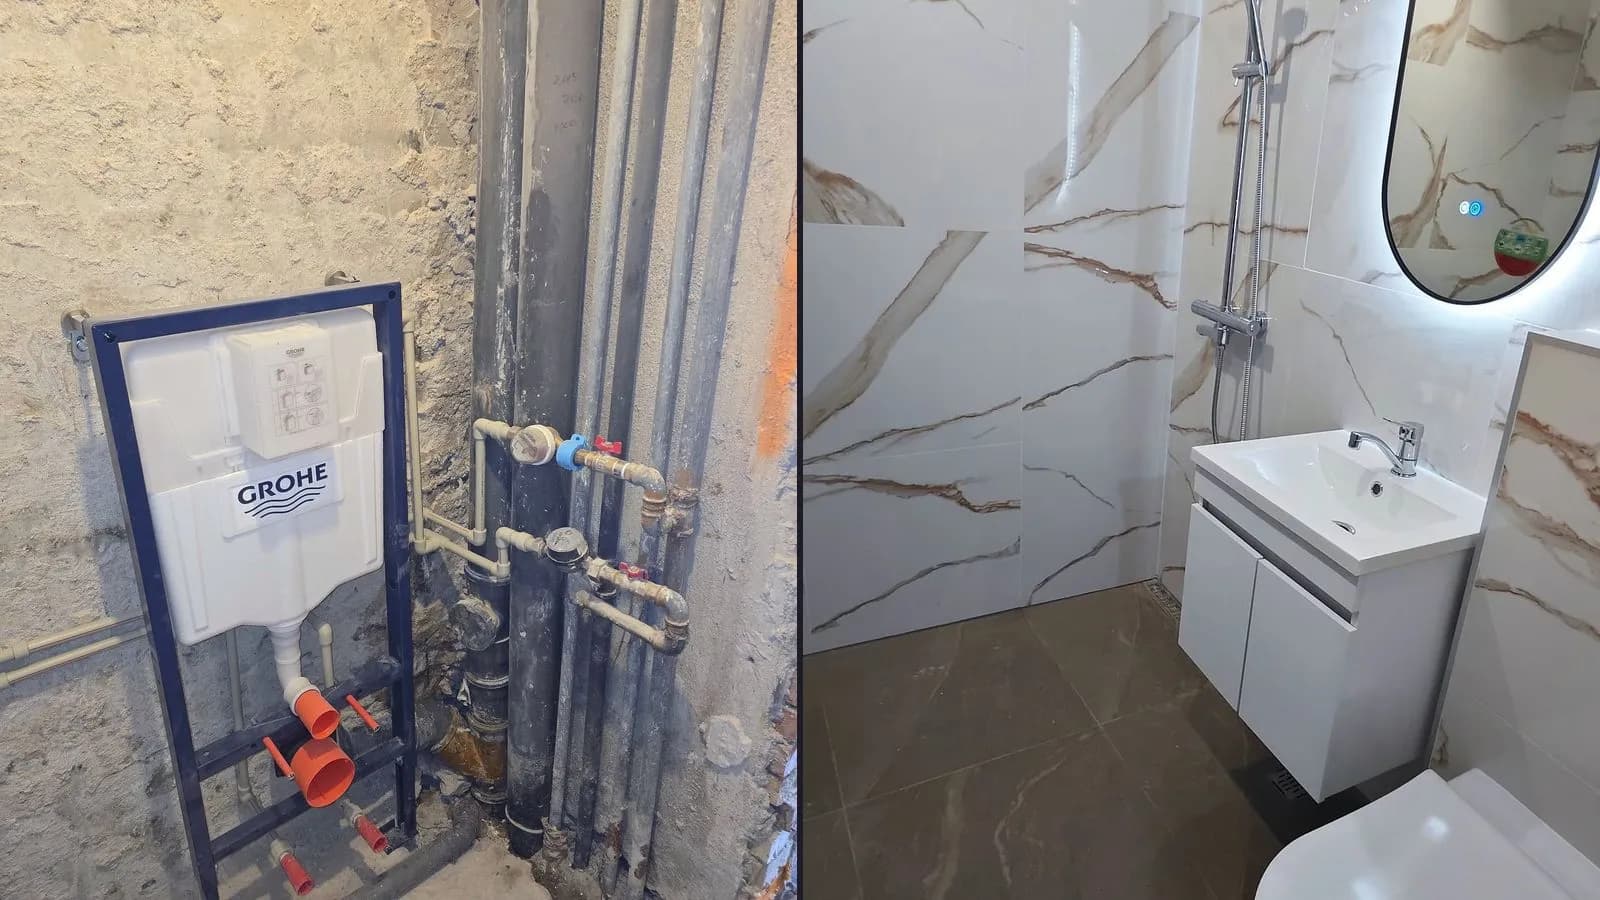
A bathroom in a panel block – one of the prefabricated concrete apartment blocks common in Sofia – often has a floor area of about 3 m². For a bathroom like this, the calculator gives about €4,485 at the standard level (from €4,037 to €4,934). An old 4 m² bathroom at the same level usually comes to €4,500–5,500. Both figures include the labour and the construction materials; you buy the tiles and sanitaryware yourself.
What panel construction changes most is the plan. The pipes and the cistern do not go into the wall; they go behind a lining of moisture-resistant plasterboard. The riser is shared by all the flats stacked one above the other, and in many blocks the ventilation runs through a shared shaft, so some of the decisions affect the neighbours too.
Labour is priced as for any other bathroom – task by task and according to the tiled area. Panel construction adds a few items: the lining, closing up the shaft and an access panel. Below is how we organise the work on a bathroom renovation in a panel-block flat and what these items cost.
What stays intact
The old tiles come off as in any bathroom – removing wall and floor tiles costs €16.11 per m² for labour. The difference lies in what is left underneath.
The load-bearing walls of a panel block are reinforced concrete panels, and they must not be weakened: no deep channels, niches or new openings are cut into them. Work like that can compromise the reinforcement of a wall that carries the floors above you. Nor are channels cut into the floor or ceiling slabs.
Not every wall in the bathroom is load-bearing – some are thin partitions. Which is which can be seen in the building’s design drawings, and if in doubt, a structural engineer decides. The routes for the pipes and cables depend on this too:
- The water supply pipes and the toilet’s concealed frame go in front of the wall, behind a lining of moisture-resistant plasterboard.
- The cables run behind the lining or above the suspended ceiling. A channel in concrete (€12.00 per linear metre for labour) is only cut into a wall that is not load-bearing.
- The waste pipes run above the slab, in the screed or behind the lining, always sloping towards the riser. That is why the positions of the toilet and the shower depend on where the riser is.
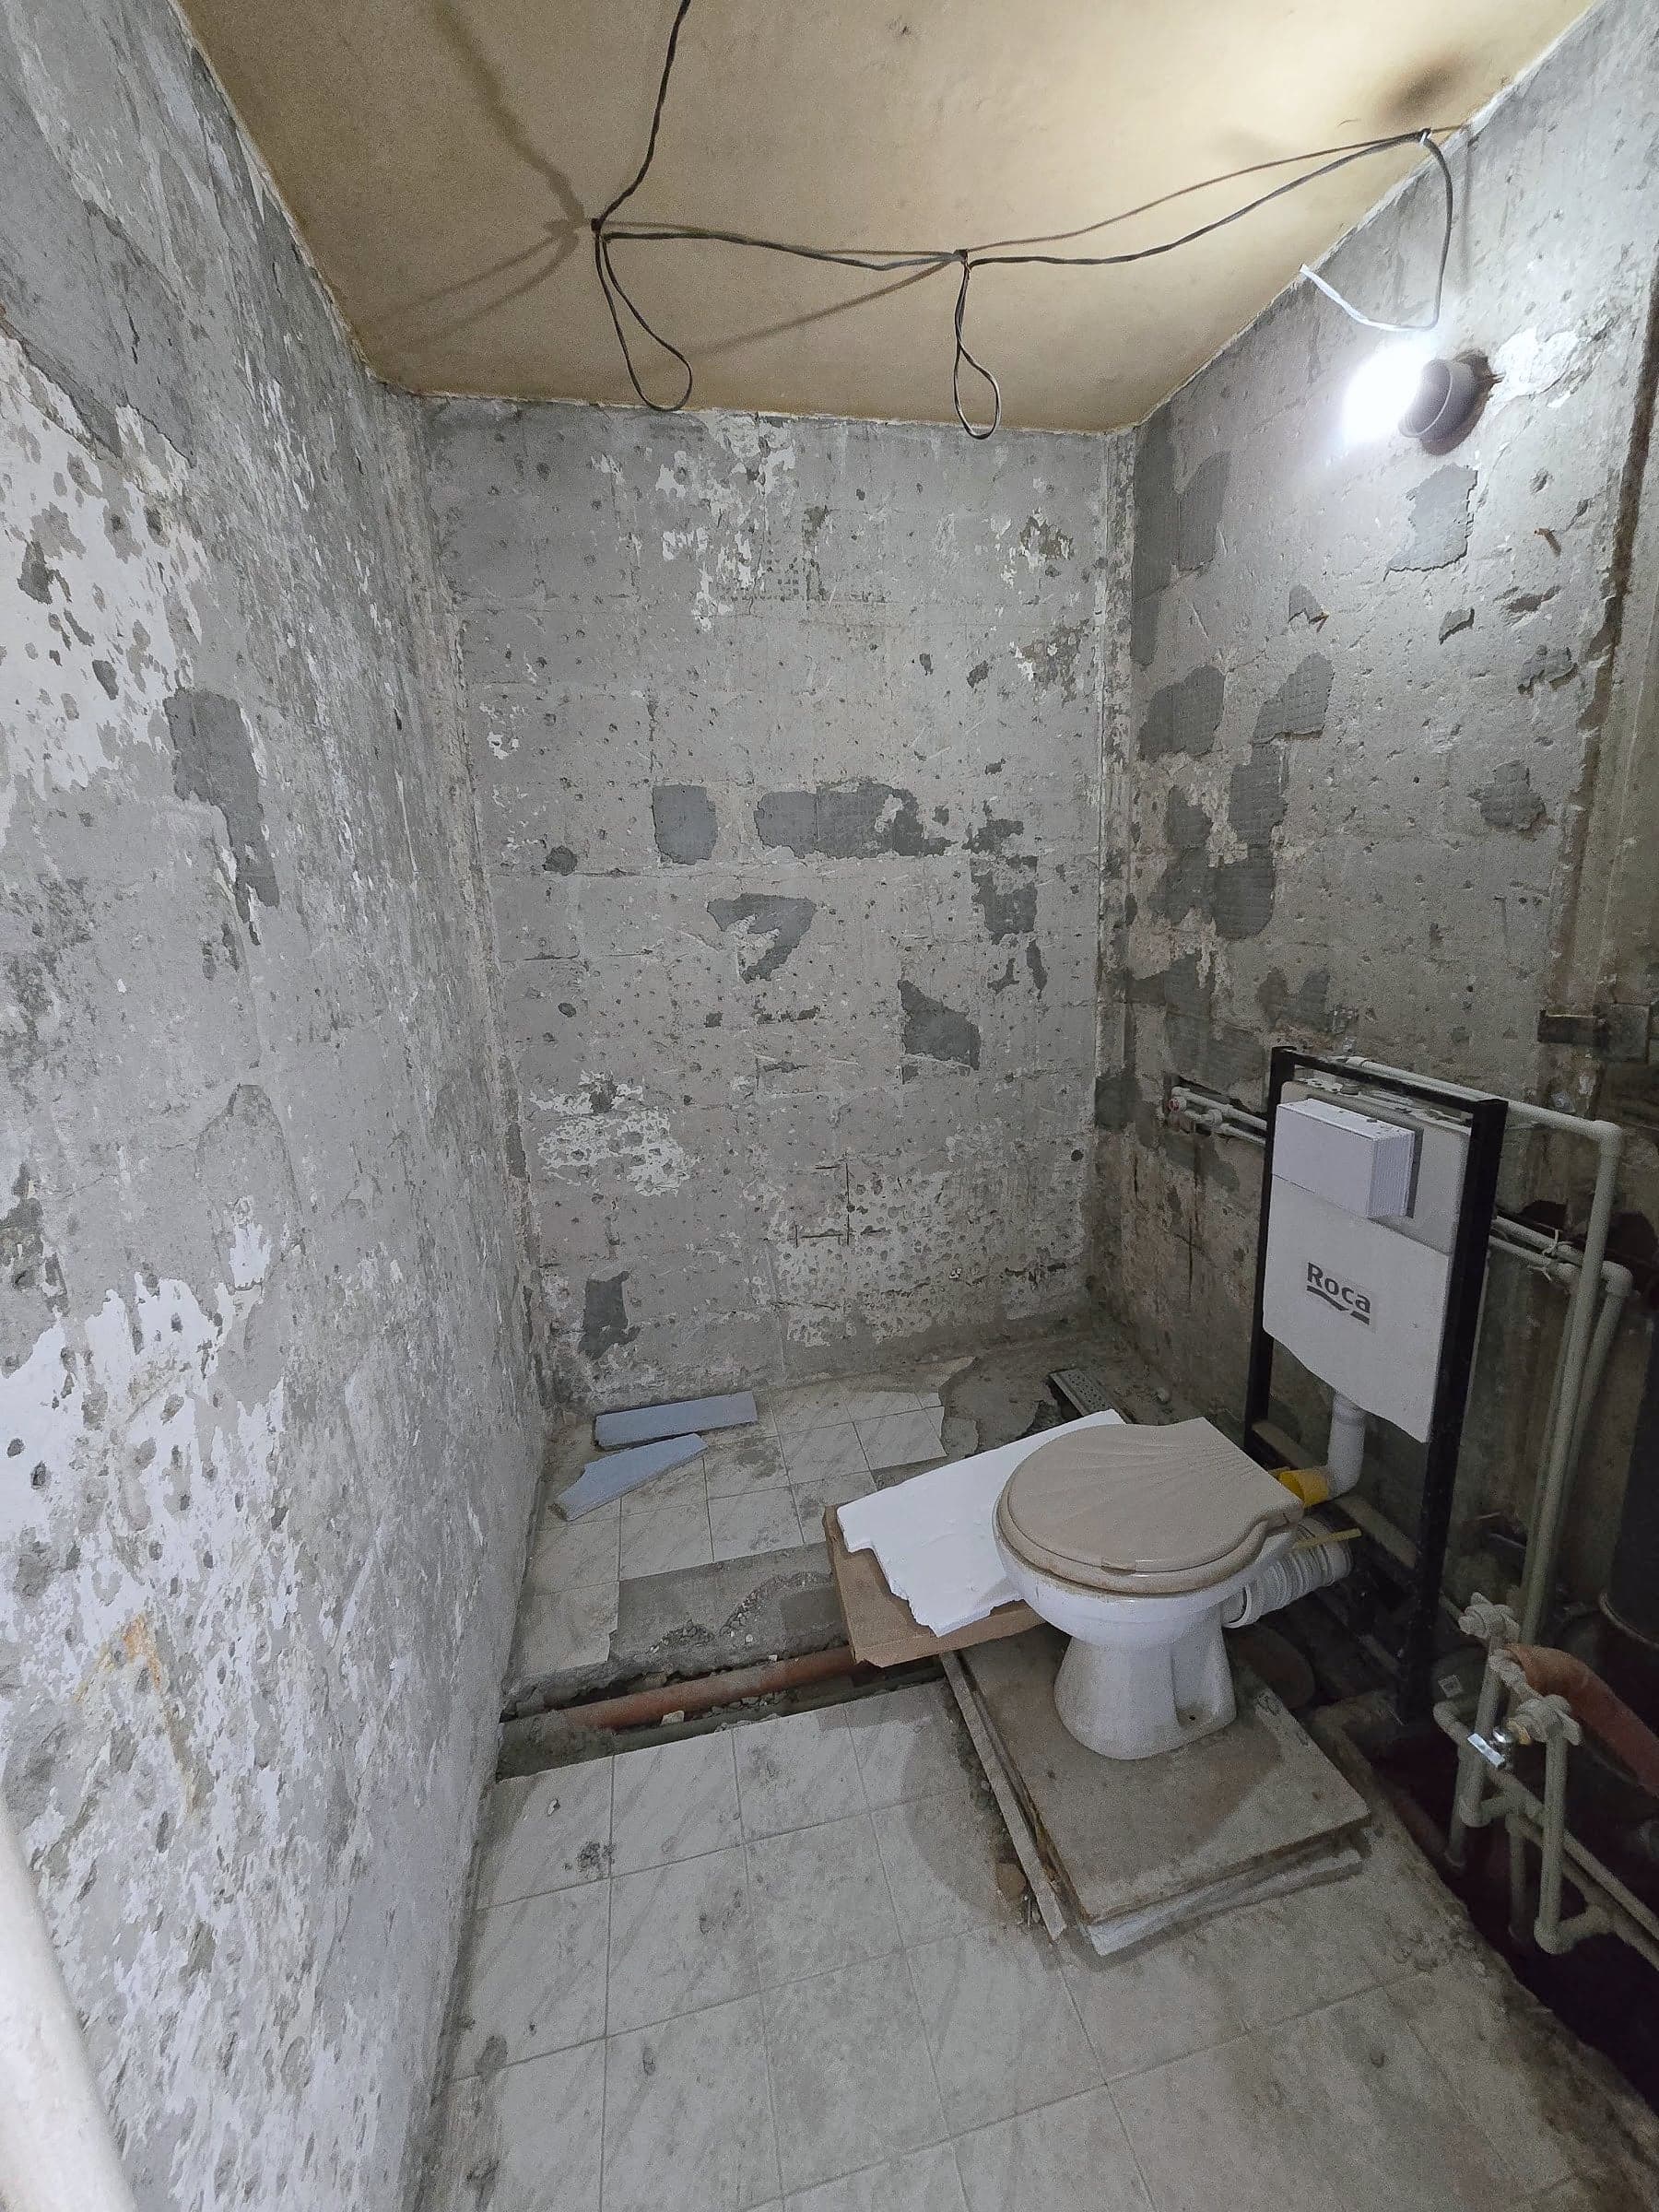 Strip-out
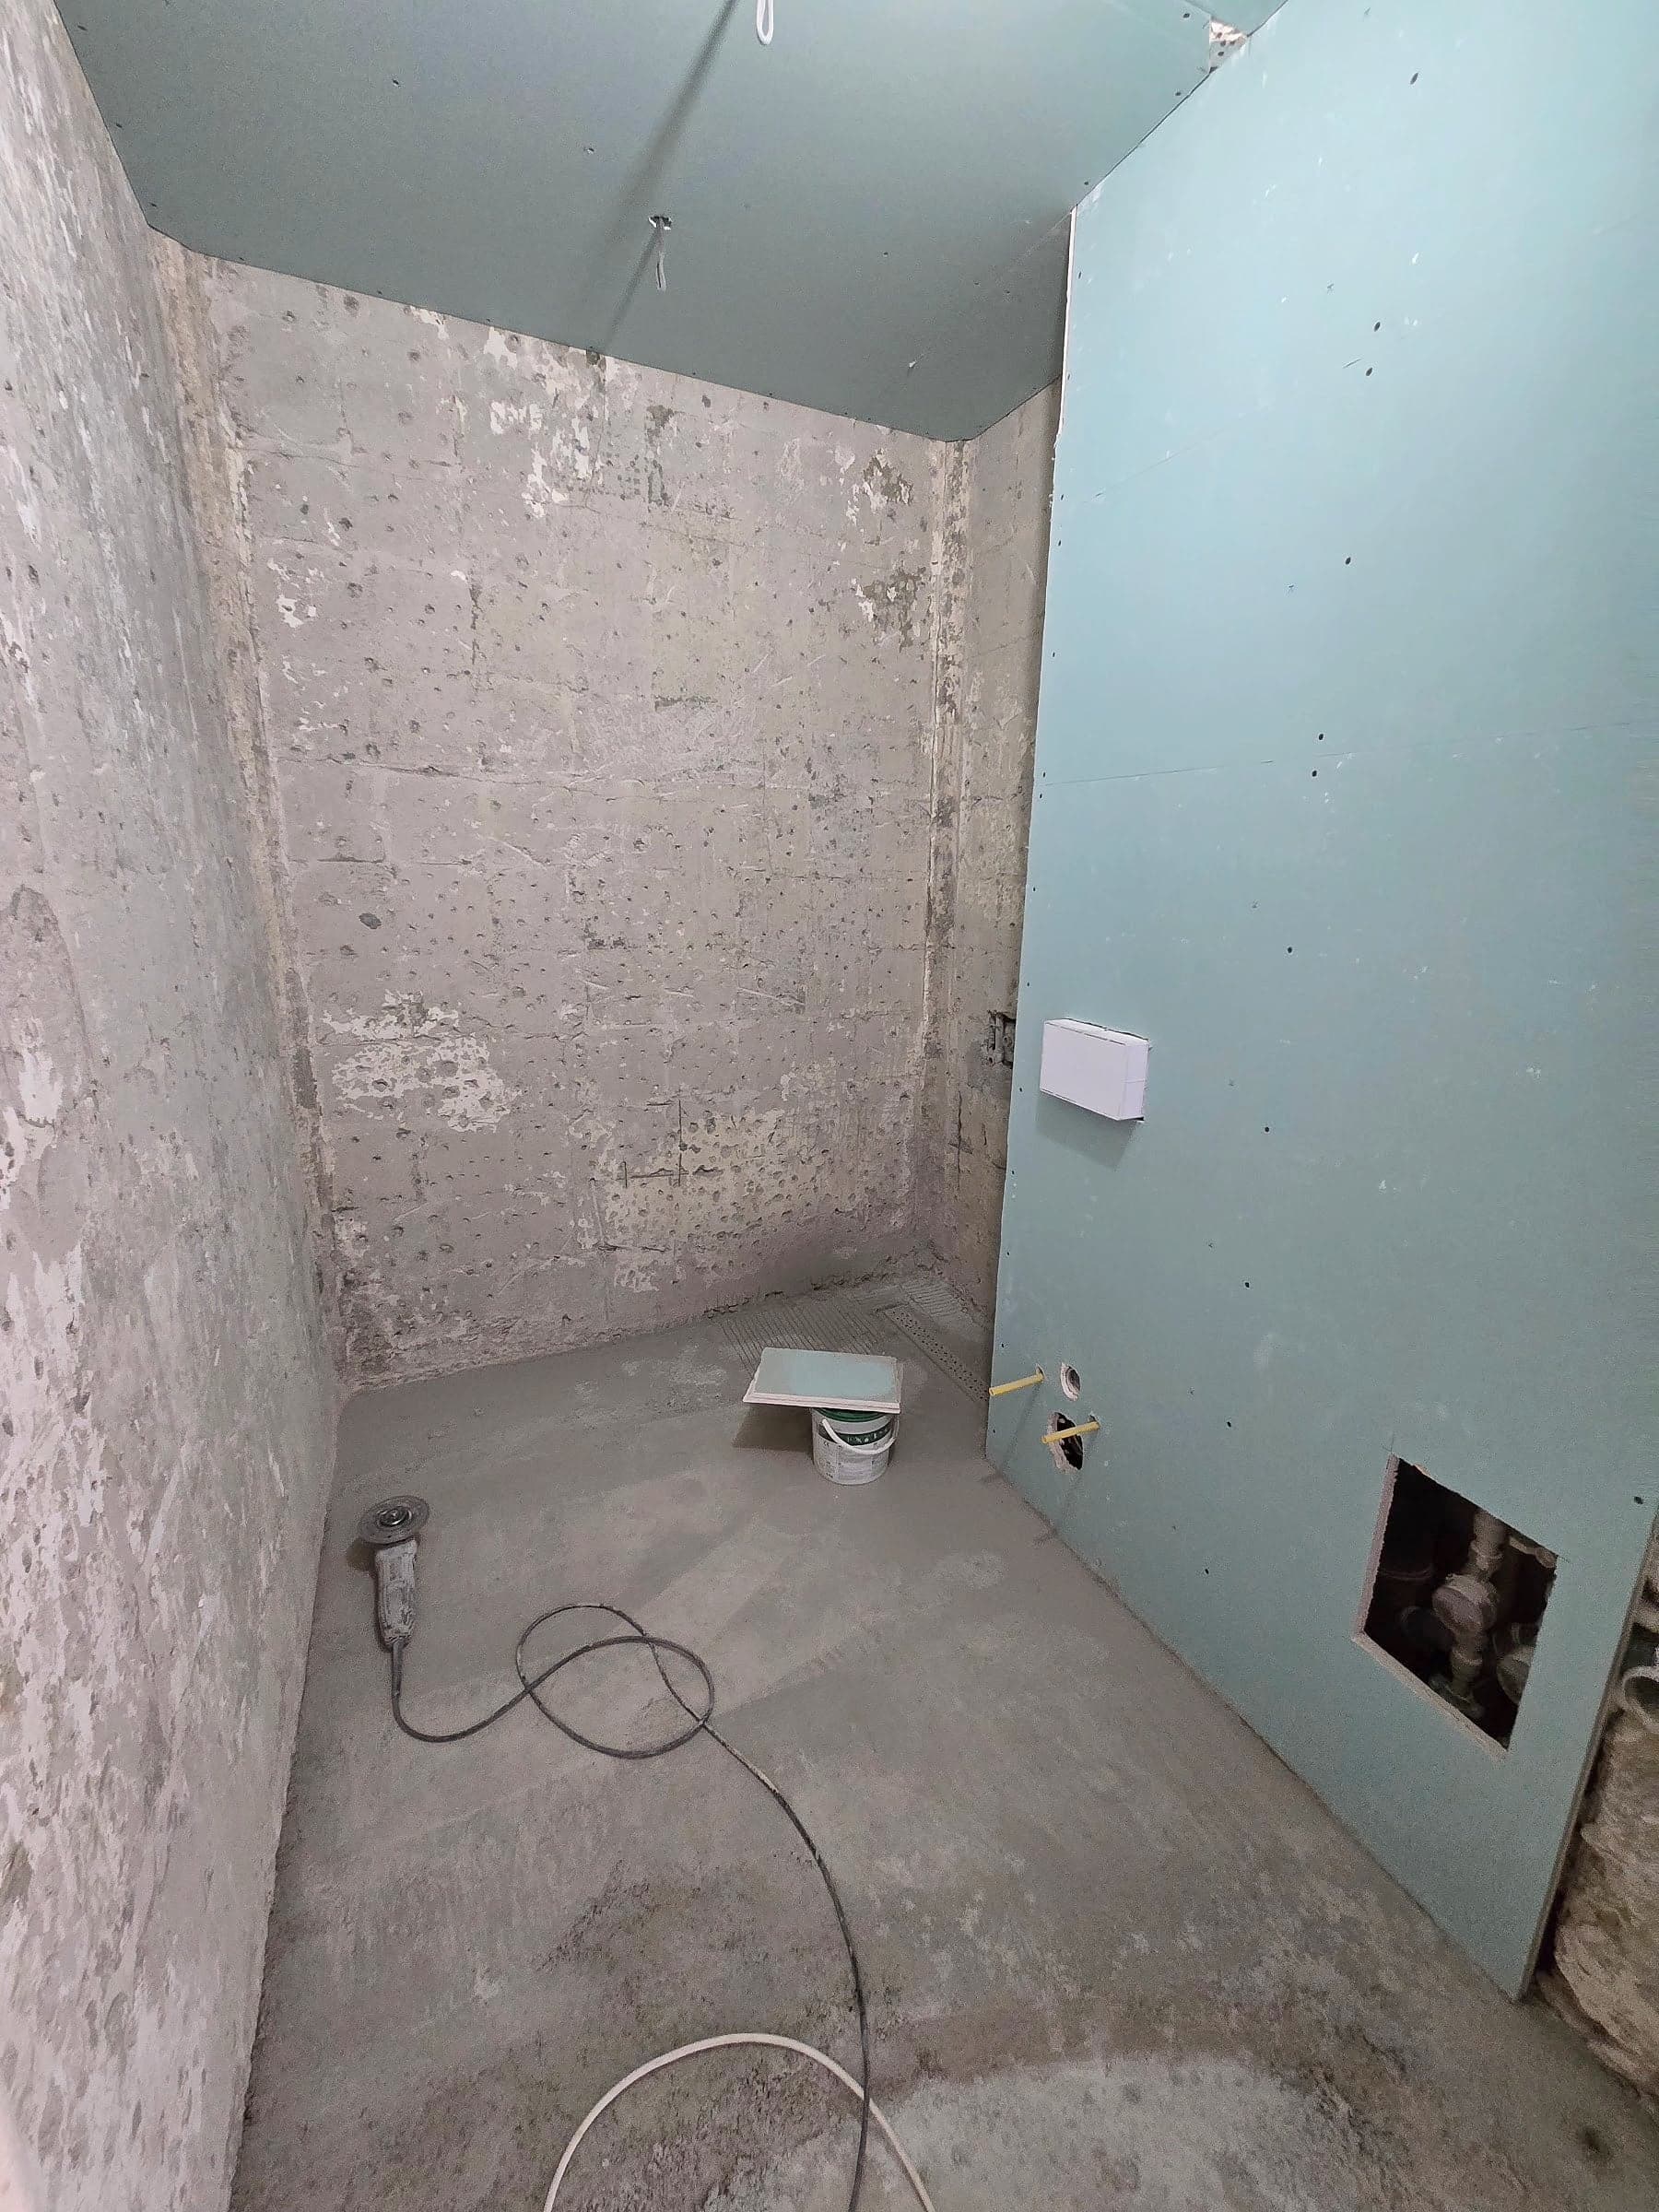 Lining
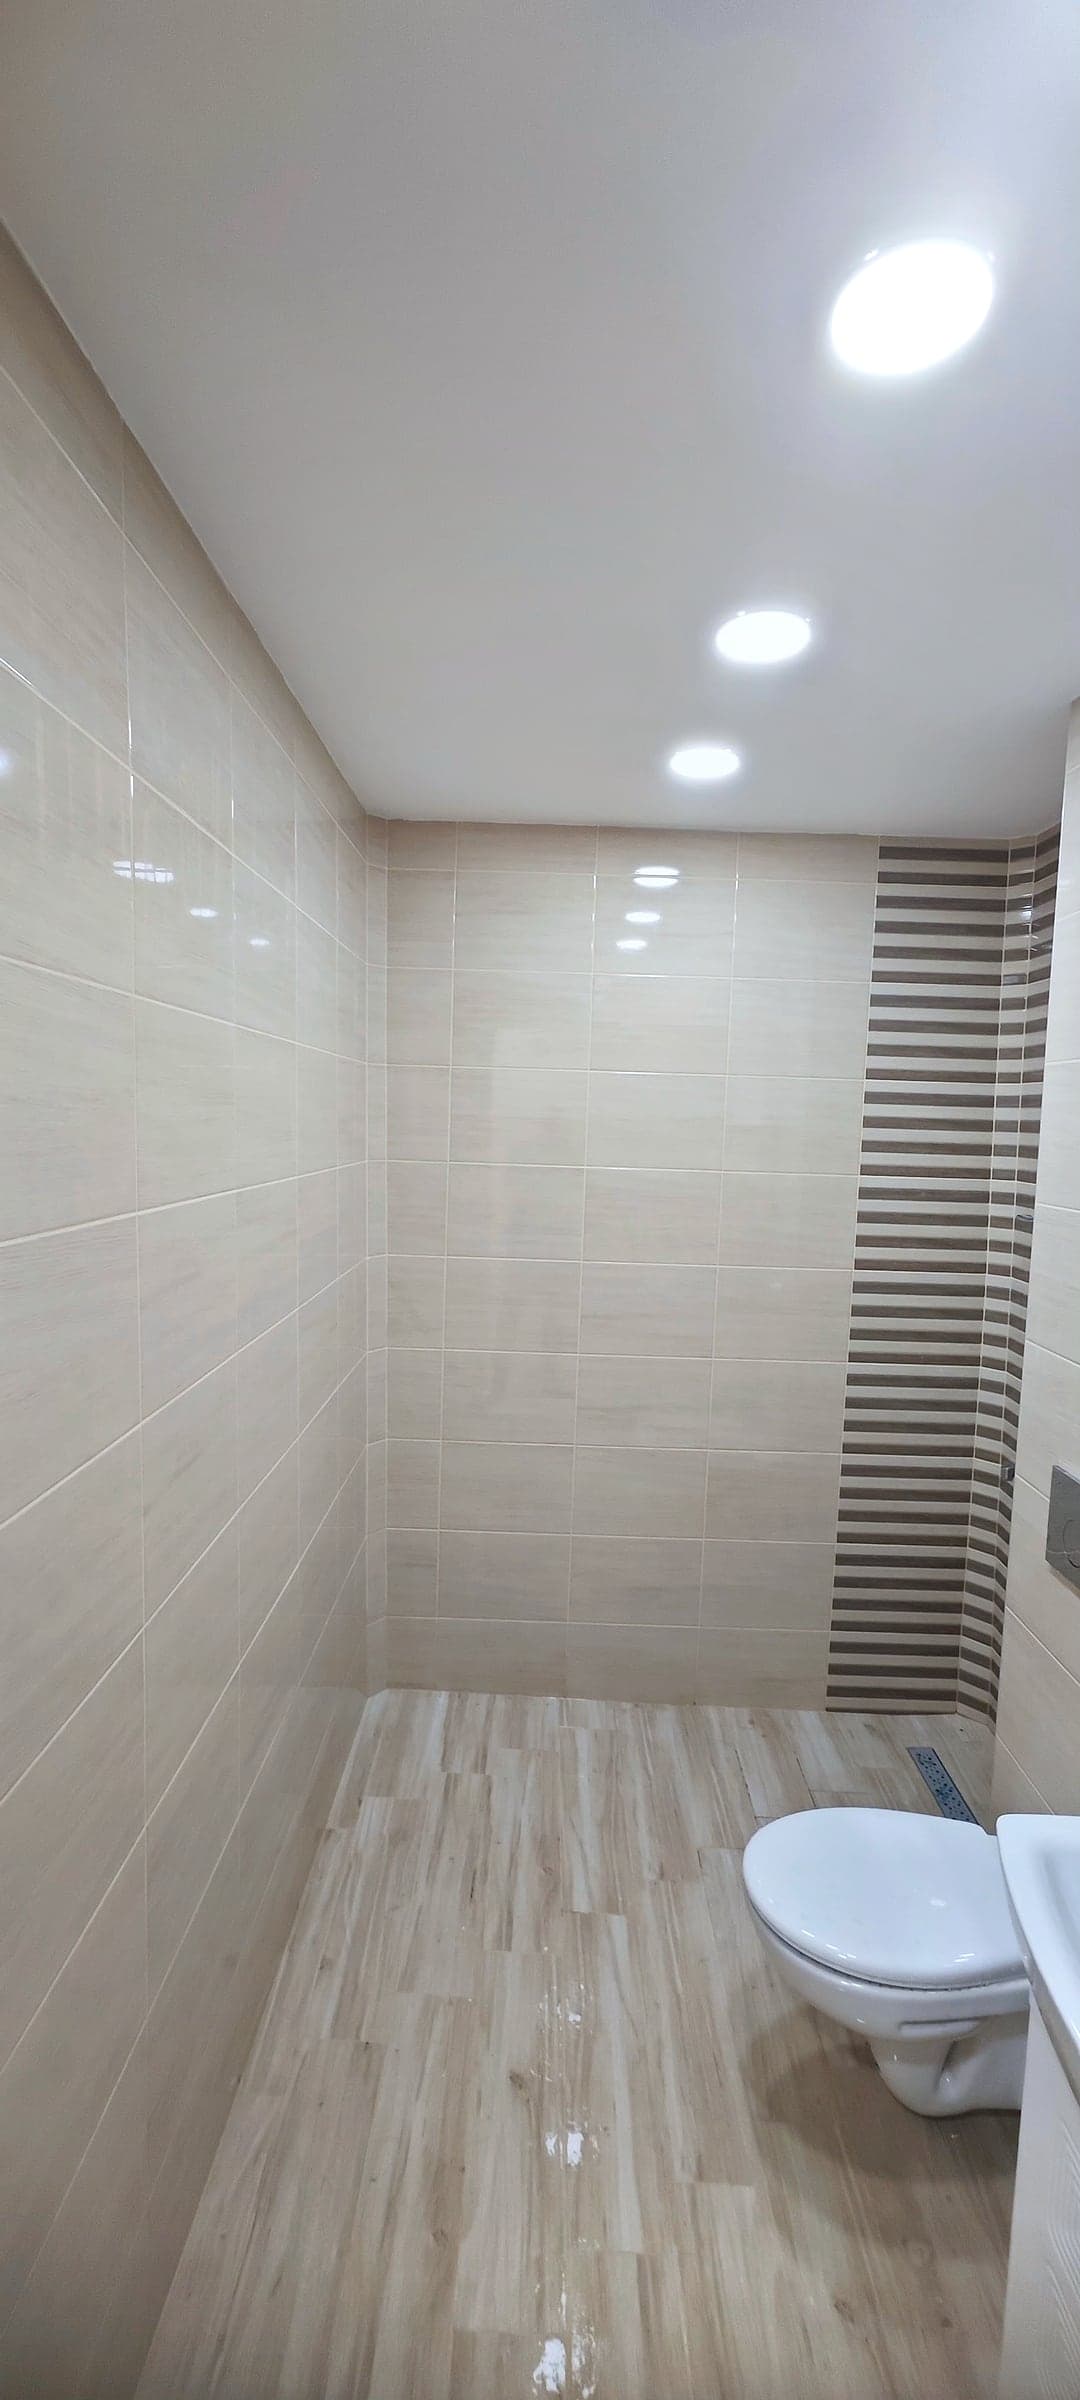 After
AfterThe lining: pipes, cistern and niches
A wall lining is a metal frame built in front of the wall, filled with mineral wool and faced with two layers of moisture-resistant plasterboard. The new pipes run behind it, and the toilet’s concealed frame and cistern are housed there too. Above the frame, the lining can be shaped into a niche or shelves, while the panel behind it stays untouched.
The lining takes up space: a few centimetres in front of the wall, and more around the toilet frame. That is why, in a bathroom of about 3 m², it is usually built on one wall only – the one where the toilet and the pipes are grouped. You can see this in the middle photo above, from the bathroom in Sveta Troitsa: the wall with the toilet is lined, and the pipes, the cistern and the water meters are behind it.
Moisture-resistant plasterboard tolerates damp, but it is not waterproofing. The waterproofing covers the whole floor and, in the shower area, the walls as well – including the plasterboard – with tape along the corners. We test it with water before the tiles are laid, and we pressure-test the new pipes before the lining closes them in.
The lining fixes the positions of the connection points, so the decisions have to be made before it goes up: a shower or a bath, where the washing machine and the water heater go, how many niches. In a small bathroom, a walk-in shower with a linear drain and a wall-hung toilet save space – there are examples from our projects in the article on small bathrooms of 2–4 m². Whether the shower can be level with the floor depends on the height at which the waste pipe enters the riser, and this becomes clear at the site visit.
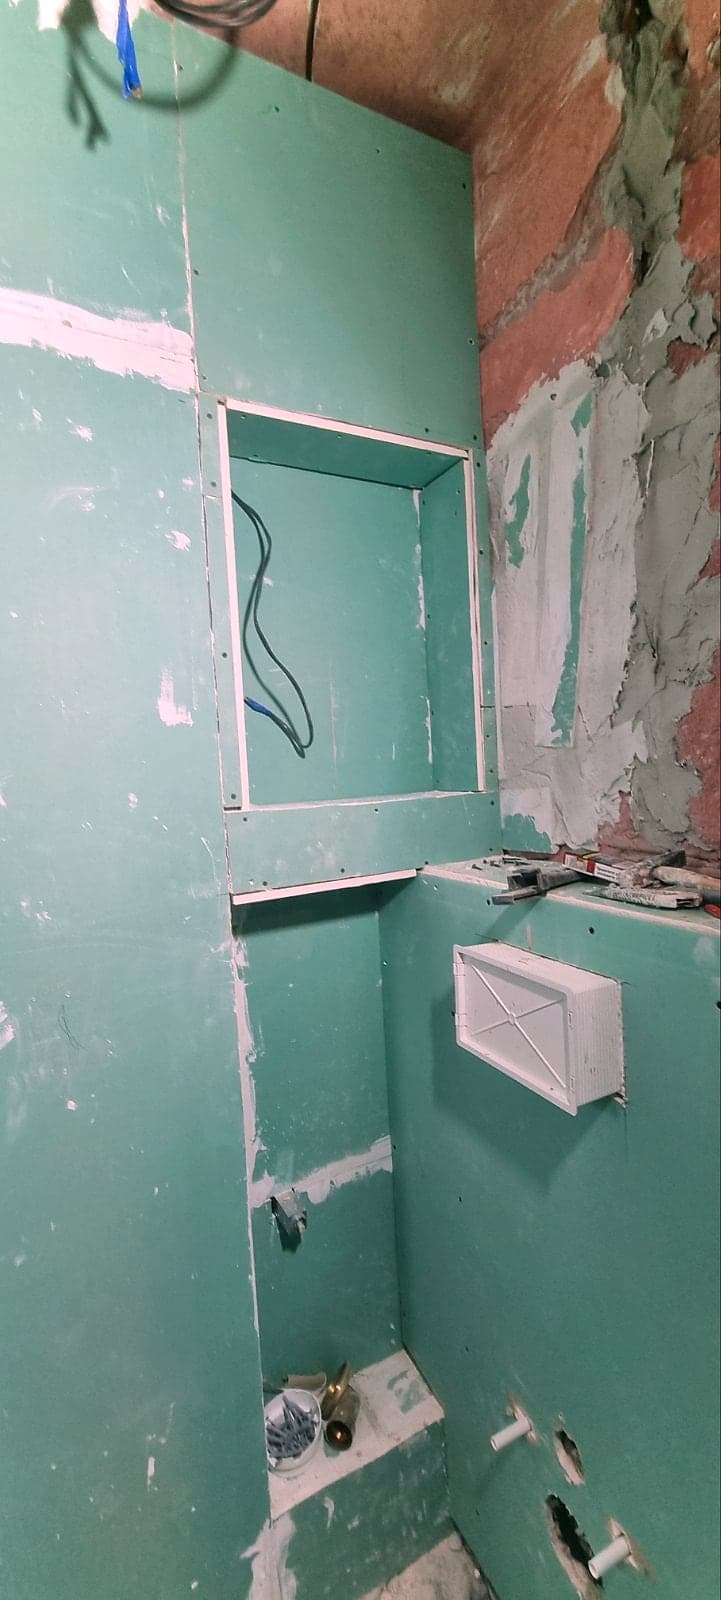
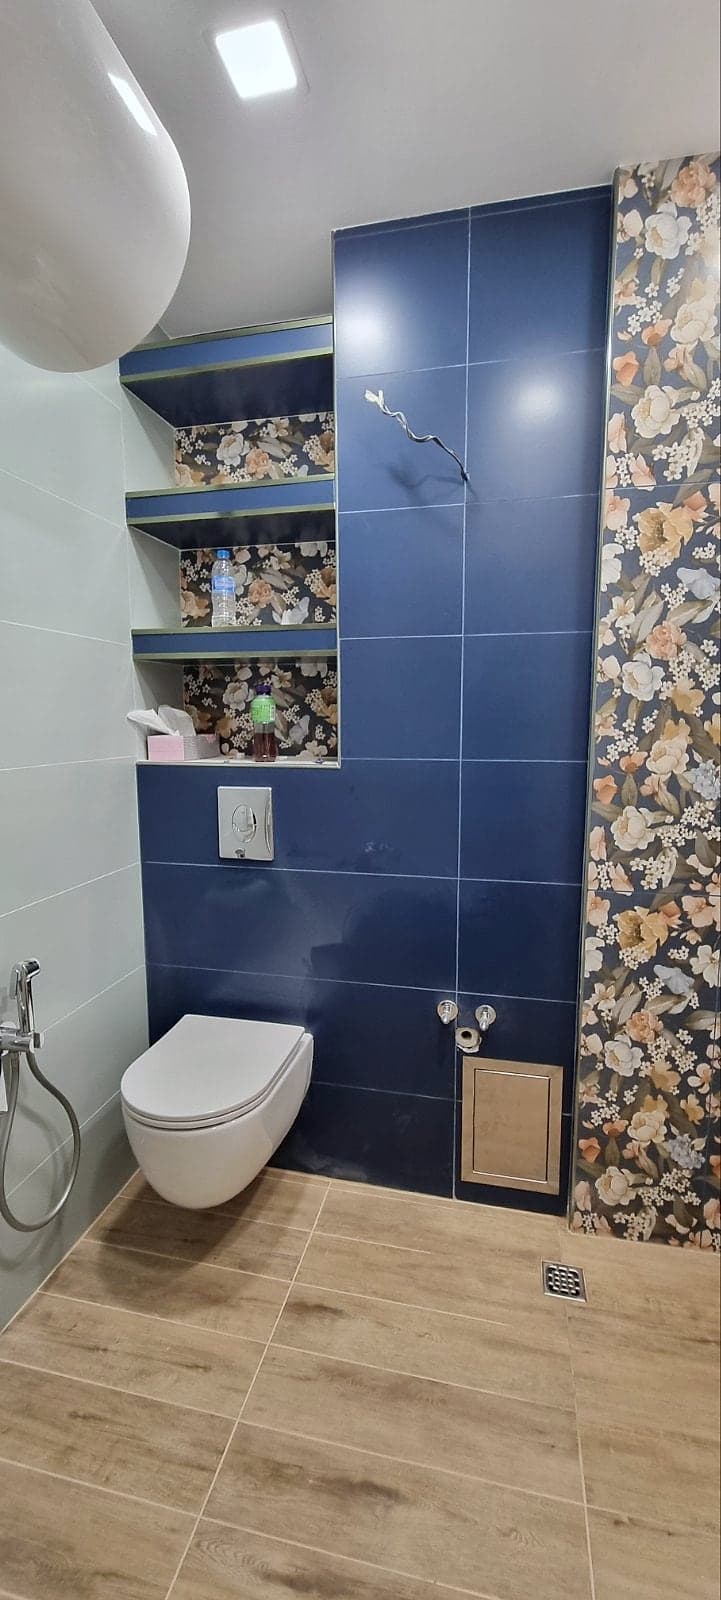
The riser: shared by every flat above and below
The riser – the vertical water and waste pipes – runs through every floor and is part of the building’s common property. In many panel blocks it is in a corner of the bathroom or the separate toilet, in a narrow shaft.
If it is old, the best time to replace it is before the bathroom renovation or along with it – otherwise the new tiles will have to be broken out later. The replacement is agreed with the building manager and the neighbours on the same riser, because the water is shut off for all of them. We describe how this is organised in the article on replacing the risers in an apartment block.
If the neighbours are not ready, just the section in your flat can be replaced. This, too, is done by arrangement and with the water shut off, and the joints with the old pipes above and below it remain a weak point.
The bathroom’s new pipework starts after the stop valves and water meters next to the riser. The shaft is not bricked up afterwards. The opening is closed with plasterboard, and an access panel – a small hatch in the tiling – is left in front of the valves and meters. It lets you read the meters, turn off the water in an emergency and reach the riser for future repairs.
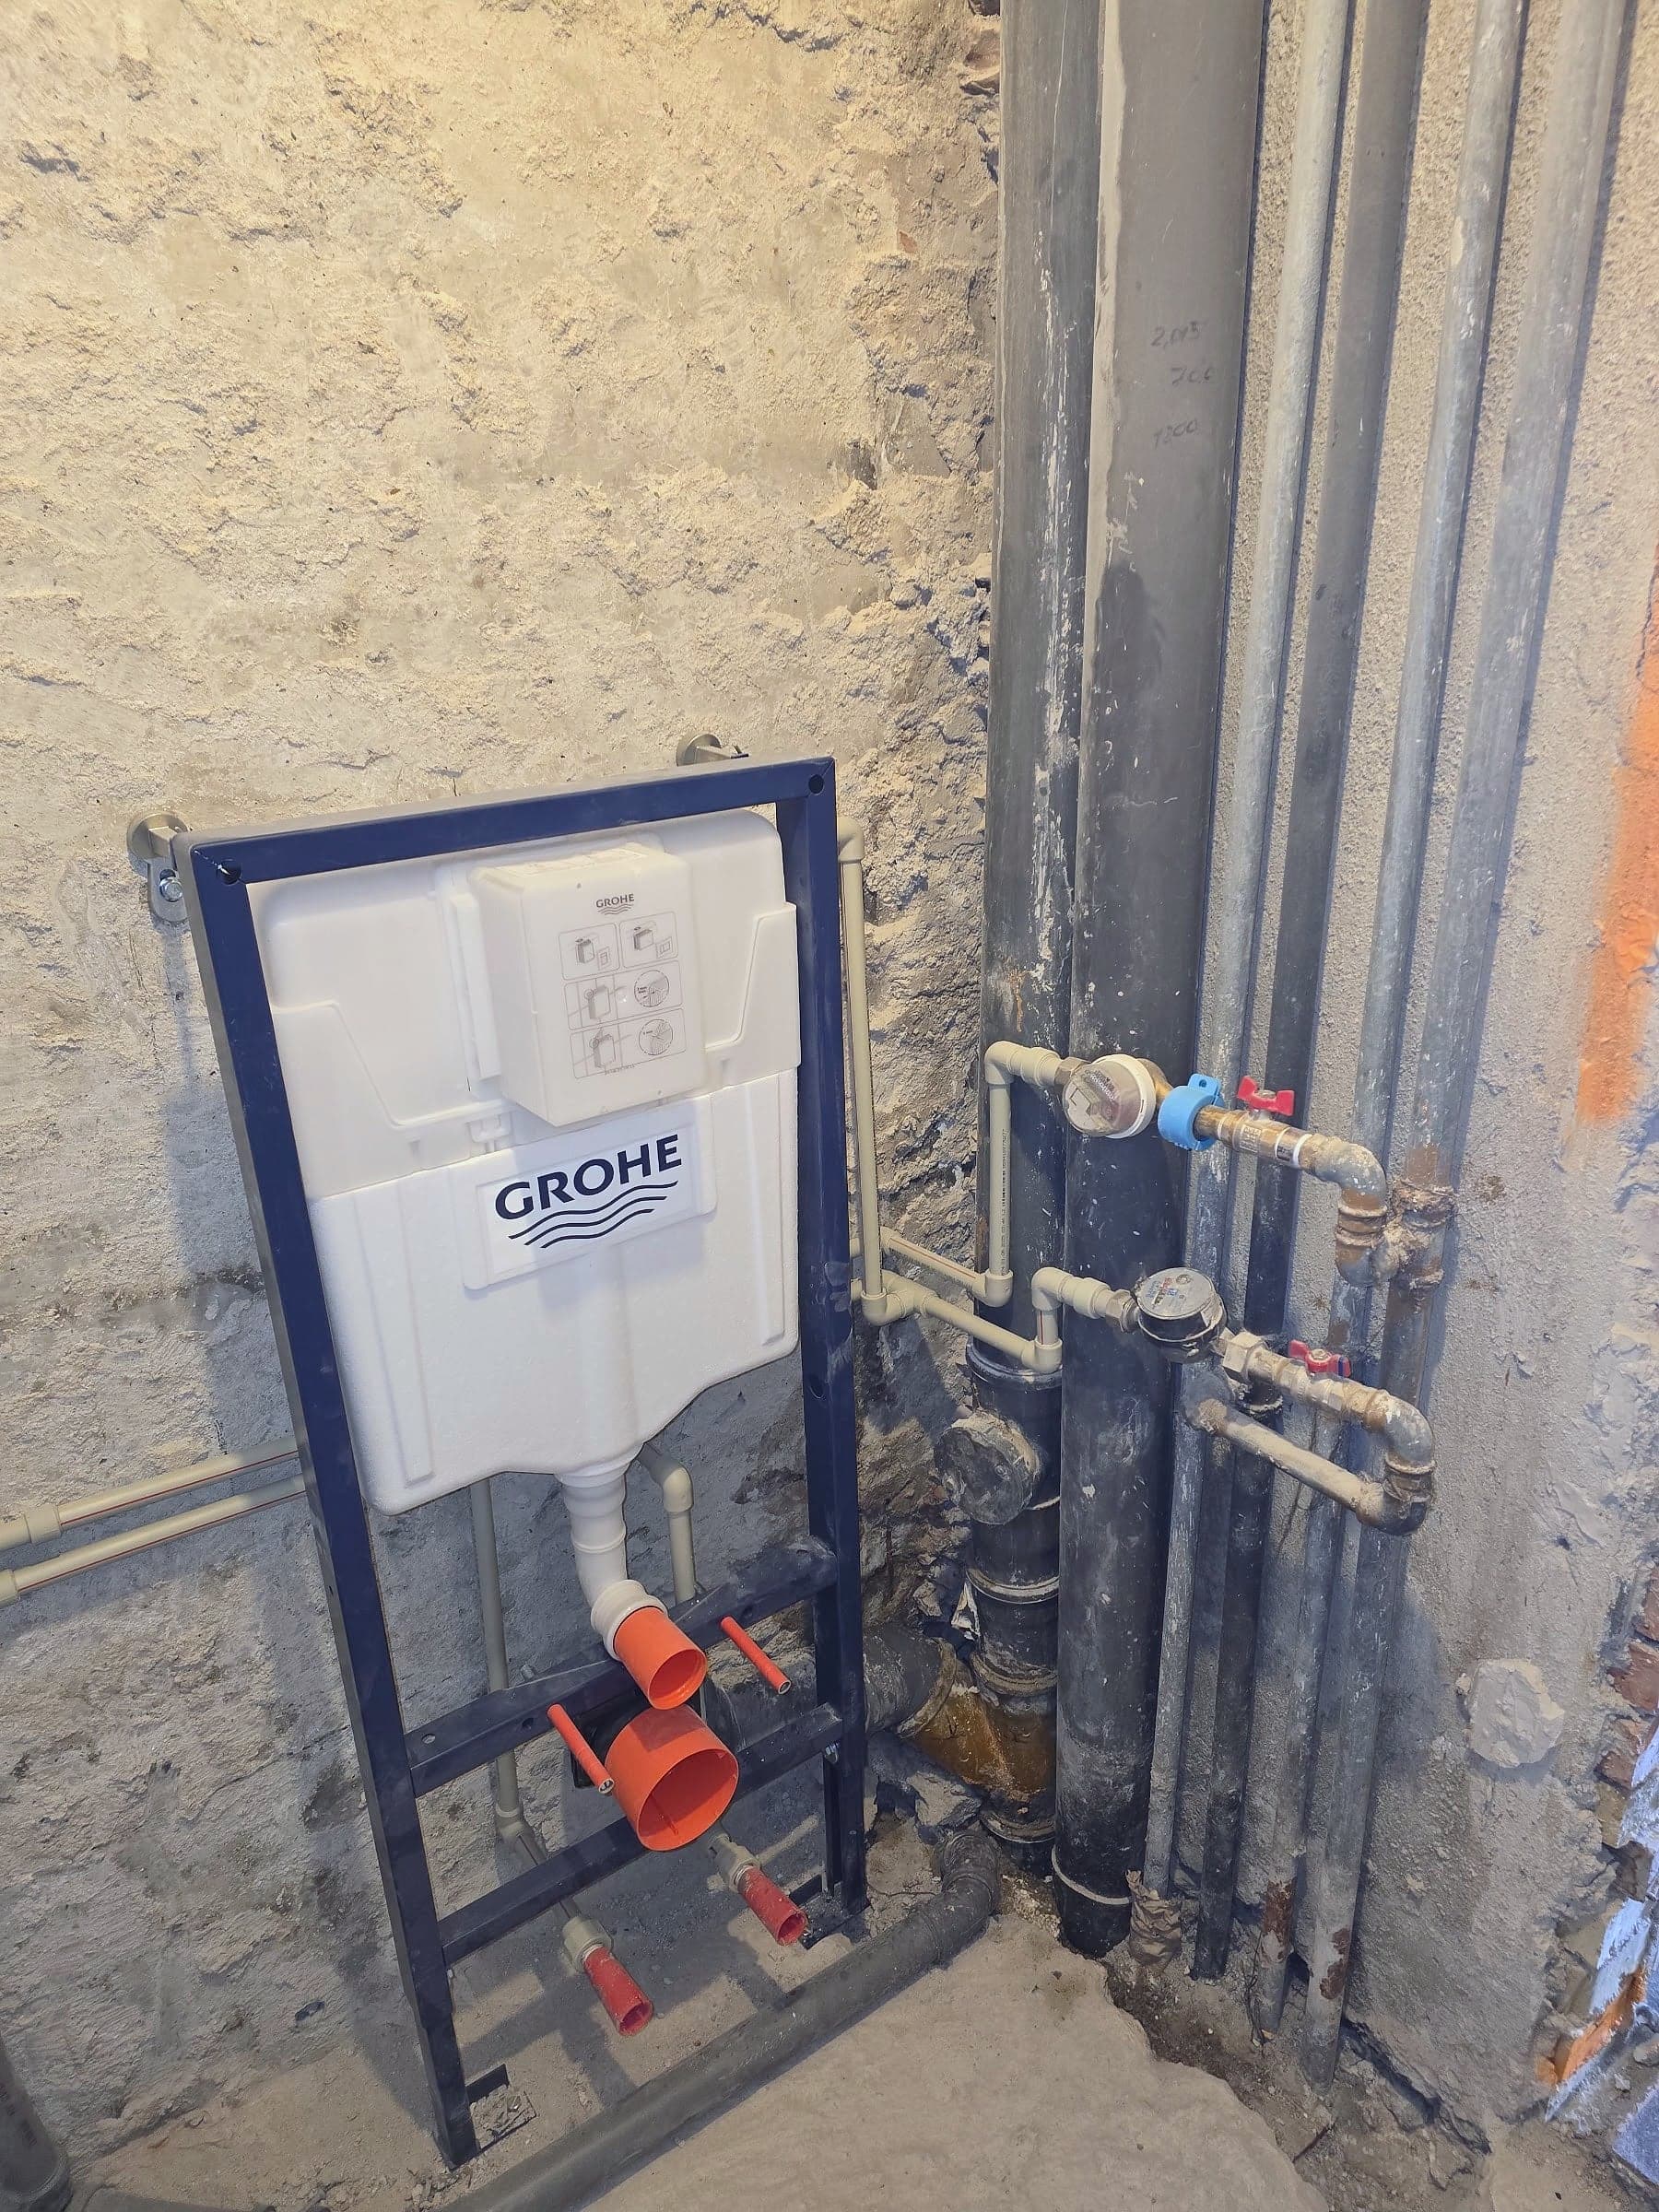
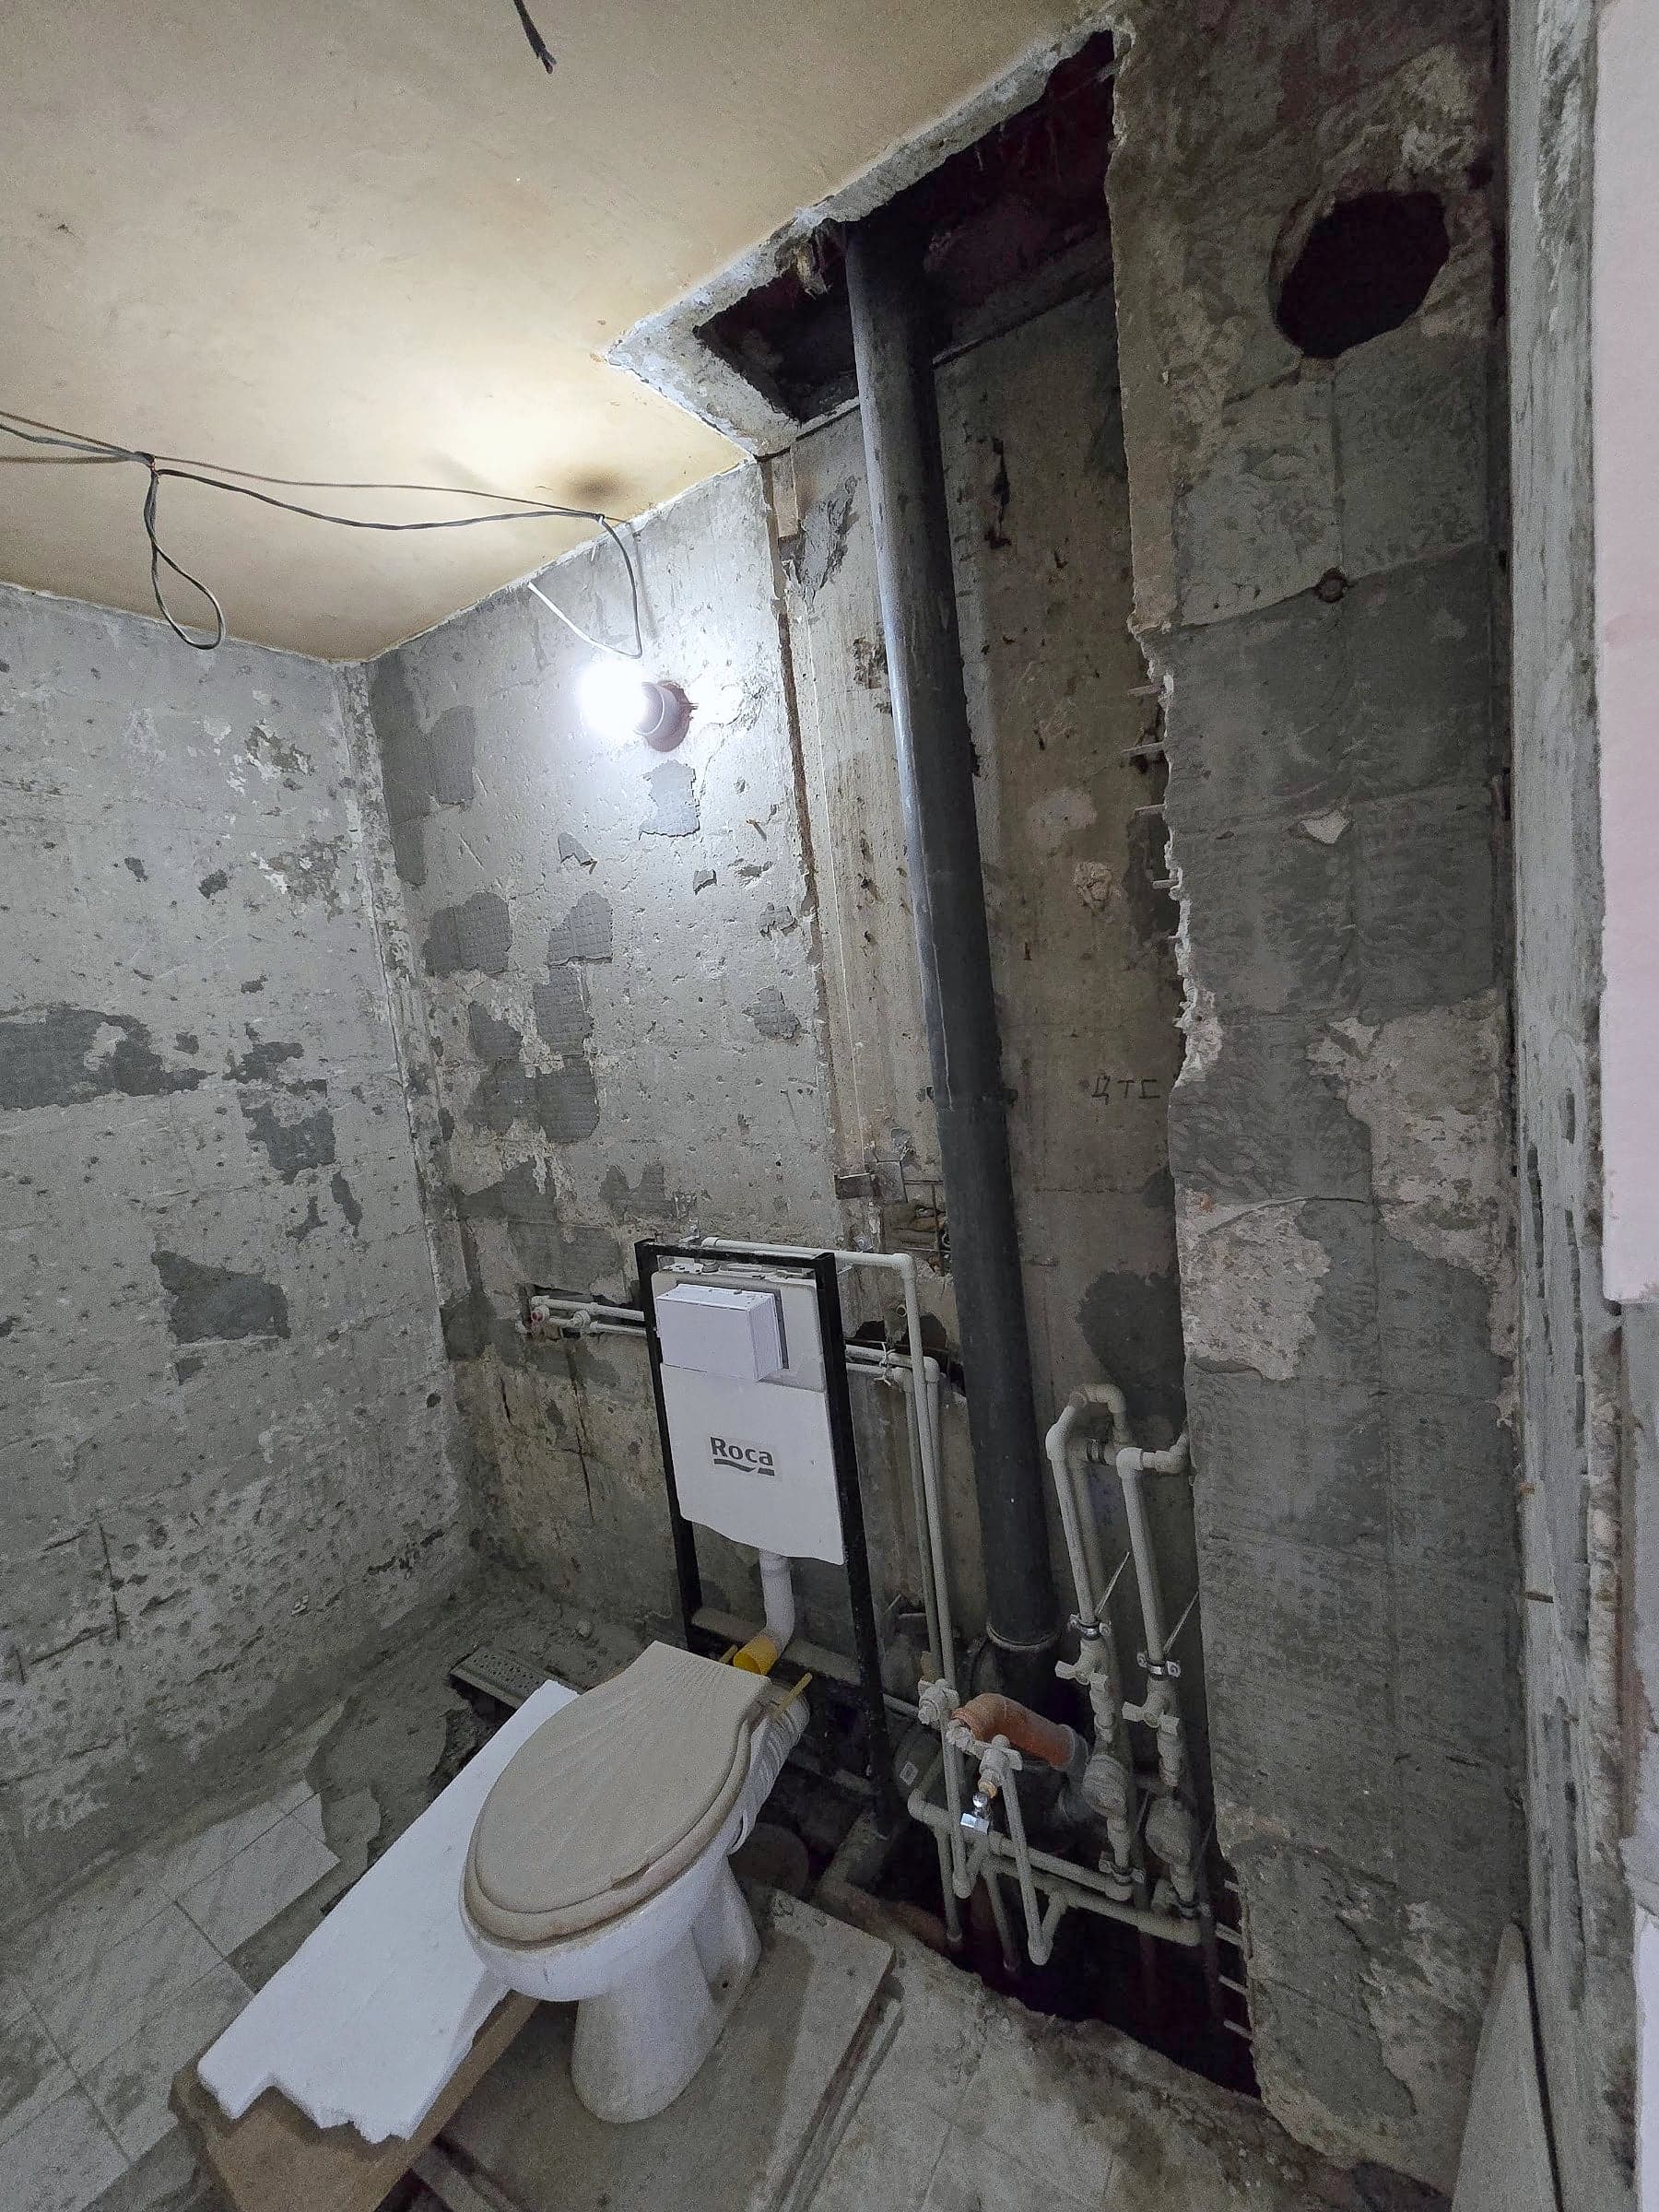
Ventilation: the shared shaft
In many panel blocks the bathroom has no window and is ventilated through an opening into a shared ventilation shaft that runs through every floor. The shaft is common property: it must not be closed off or narrowed, whether by the lining or by the suspended ceiling.
In a small bathroom without a window, moisture lingers in the grout and on the ceiling, so an extractor fan is fitted in the opening. Ideally it should have a non-return valve, which stops air from the shaft coming back into the bathroom when the fan is off. Fitting the fan costs €26.84 for labour, and the electrical point for it €32.21 for labour.
What the labour costs
The full breakdown by task, with a sample budget for a 4 m² bathroom, is in the article on the labour cost of a bathroom renovation. Here are the items that come with panel construction and, for comparison, the waterproofing and tiling that are part of every bathroom.
| Task | Price for labour |
|---|---|
| Wall lining in moisture-resistant plasterboard – 7.5 cm, with mineral wool (2 layers of plasterboard) | €24.16 per m² |
| Building plasterboard niches | €140.00 each |
| Tiling a niche | €107.37 each |
| Closing a riser opening with plasterboard | €64.42 each |
| Fitting an access panel | €42.95 each |
| Plumbing adjustment | €240.31 each |
| Fitting a wall-hung toilet | €59.05 each |
| Cutting a channel for electrical wiring (concrete) | €12.00 per lin. m |
| Plasterboard suspended ceiling (bathroom/toilet) | €161.06 each |
| Fitting an extractor fan | €26.84 each |
| Applying waterproofing (floor + shower area) | €18.79 per m² |
| Fitting waterproofing tape | €10.74 per lin. m |
| Tiling and grouting, walls and floor – bathroom/toilet | €64.42 per m² |
Three examples worked out from the table (all amounts are for labour):
- Lining a 1.5 × 2.5 m wall: 3.75 m² × €24.16 = €90.60 for labour.
- Access to the riser: closing the opening €64.42 + access panel €42.95 = €107.37 for labour.
- A niche in the lining: building it €140.00 + tiling it €107.37 = €247.37 for labour.
As with any old bathroom, the total often rises because of what comes to light after the strip-out: crooked walls, old pipes, repairs to the screed. That is why the exact price is set out in the written quote after the free site visit, and any extra work only starts once you have approved it in writing, with a price.
Construction materials are not included in the price-list amounts: plasterboard, metal profiles, waterproofing, adhesives and screeds appear on a separate line in our quote, while you choose and buy the tiles, sanitaryware and drains yourself. The warranty is in writing: 24 months for the renovation and for the bathroom waterproofing, and 72 months for the plumbing and electrical installations.
Working in the block: noise, the lift, waste
The strip-out is the noisiest part and usually takes the first day or two. Noisy work is scheduled within the hours allowed by the municipality and the building’s house rules; what applies is covered in the article on renovation rules in apartment buildings with an owners’ association.
The stairwell and the lift are common areas, and we protect them when carrying materials. If there is no lift, or it cannot be used for loads, carrying the tiles and sanitaryware upstairs is a separate item – €91.27 for labour.
Construction waste does not go into the household waste bins. We collect it in sacks, take it out every day and haul it to a landfill site; removal by tipper lorry costs €110.00 for labour.
Frequently asked questions
Can the toilet be moved?
It depends on the drainage. The pipe from the toilet has to slope down towards the riser, and in a panel block it cannot be sunk into the slab. So the further away the new position, the higher the pipe has to start, and the toilet often stays close to the riser. With a wall-hung toilet, the pipe can run behind the lining along the wall, which sometimes allows a small move – this is decided at the site visit.
Do I need permission to renovate a bathroom in a panel block?
For a renovation with no changes to the load-bearing walls, the common parts or the facade, usually not. Replacing the riser affects common property and is arranged with the manager of the owners’ association. If in doubt – for example, if you are going to remove a wall – ask the building manager and the municipality before you start.
Can the walls be broken out?
The tiles, yes. The load-bearing panel, no: no deep channels, niches or openings are cut into it. A non-load-bearing partition can be removed – for example, to merge the bathroom and the separate toilet. Before that, the building’s design drawings or a structural engineer must confirm that it really is not load-bearing.
How is the riser replaced?
Usually along its full height in one go, by arrangement with the neighbours: the water is shut off, the old pipes are replaced with new ones, with a stop valve for each flat, and the new pipes are pressure-tested. For your bathroom, what matters is that the replacement happens before the tiling and that the shaft is left with an access panel.
How long will we be without a bathroom?
A 3–5 m² bathroom usually takes 2–3 weeks of work (10–15 working days), and up to about 4 weeks if the strip-out brings surprises. The exact schedule is in the quote; the stages and the drying times are described in the article how long a bathroom renovation takes. If the riser is being replaced along with the bathroom, also allow time to arrange it with the neighbours.
If your bathroom is in a panel block, send us a few photos of the bathroom and the riser through the estimate from photos service, and you will receive an indicative price. The exact price comes after the free site visit, in a written quote that sets out the work.
More articles
All articles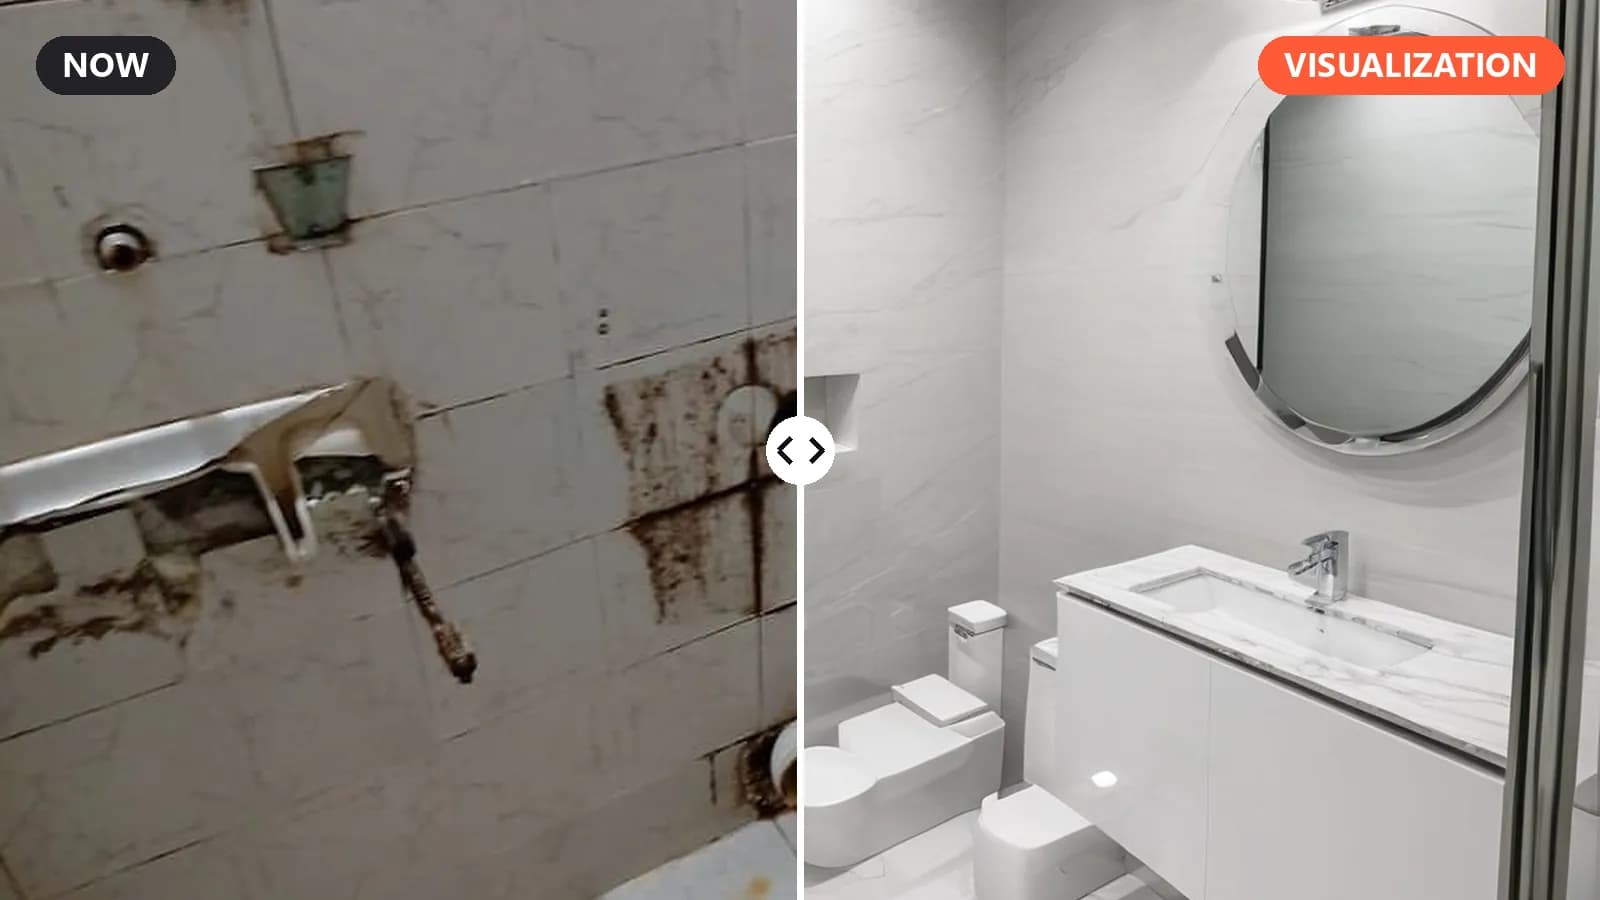 Bathroom
2 min read
New: see your new bathroom before the renovation
Upload a photo of your bathroom as it is now and in about a minute you will see it renovated in three styles – white marble, warm wood and dark stone. Free, no sign-up.
Read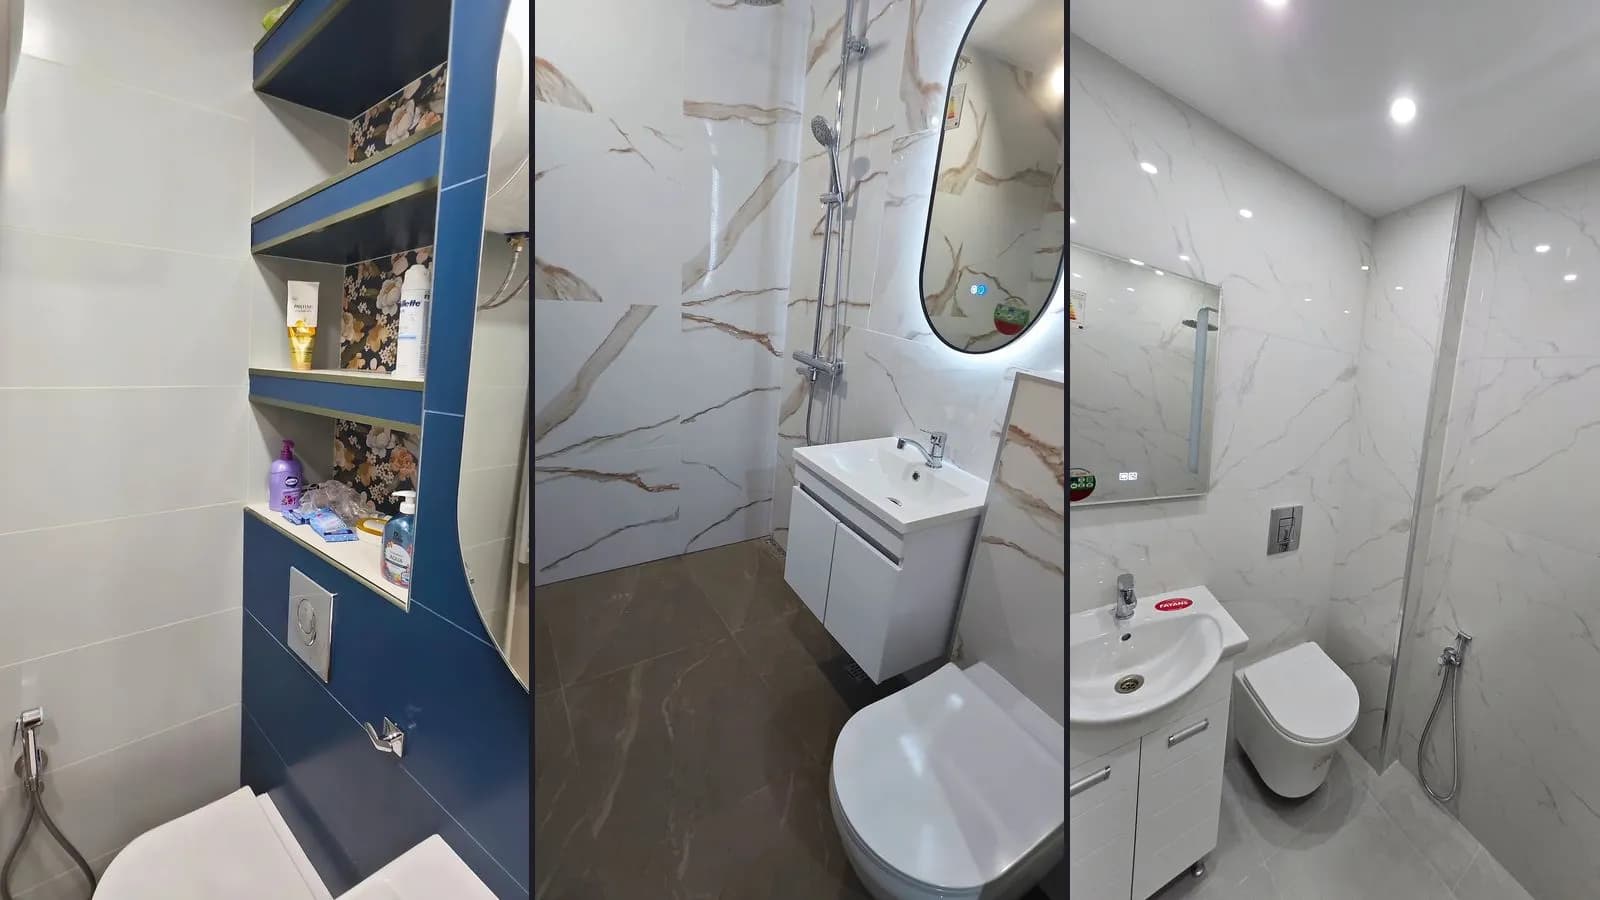 Bathroom
10 min read
Small bathrooms of 2–4 m²: ideas from our projects and what they cost
Walk-in showers, wall-hung toilets, niches and larger tiles in 2–4 m² bathrooms: when they work, how they look in our projects and what they cost.
Read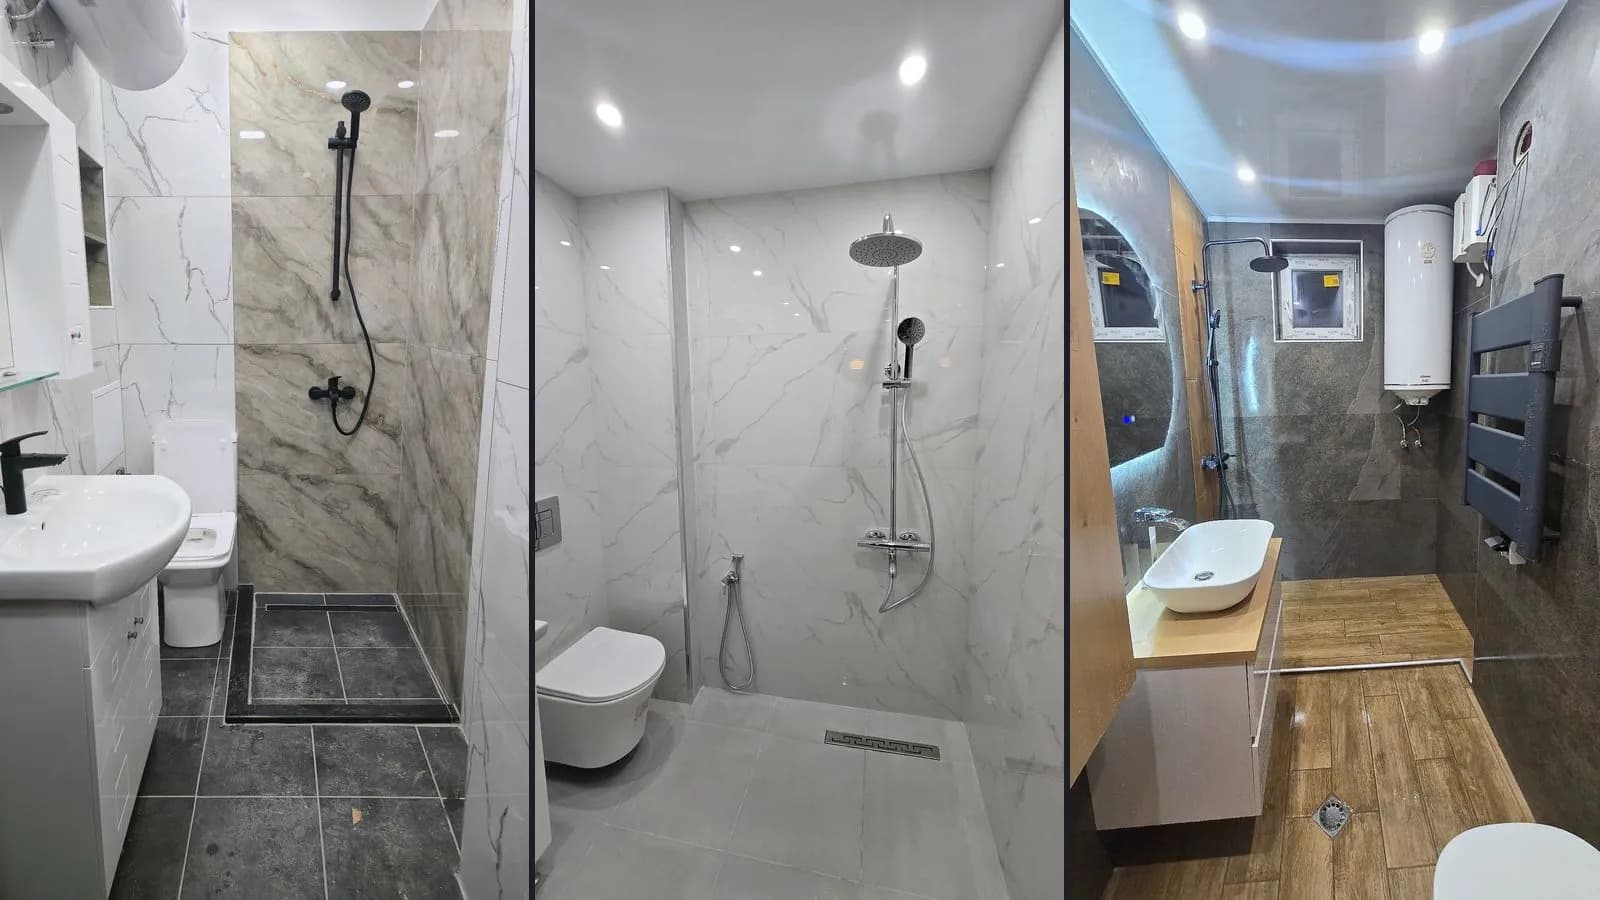 Bathroom
12 min read
Bathroom renovation: labour costs in 2026, task by task
Bathroom labour prices task by task, a worked example for 4 m² and why an old bathroom usually comes to €4,500–5,500 with construction materials.
Read