Curved shapes in drywall: bold ideas for a striking ceiling
Have you ever thought about how a ceiling can transform the whole feel of your home? With a drywall ceiling you can go far beyond straight lines and achieve movement, flow and a unique character. While classic flat surfaces create a sense of completeness, curved and three-dimensional structures add an element of surprise, style and individuality that instantly catches the eye.
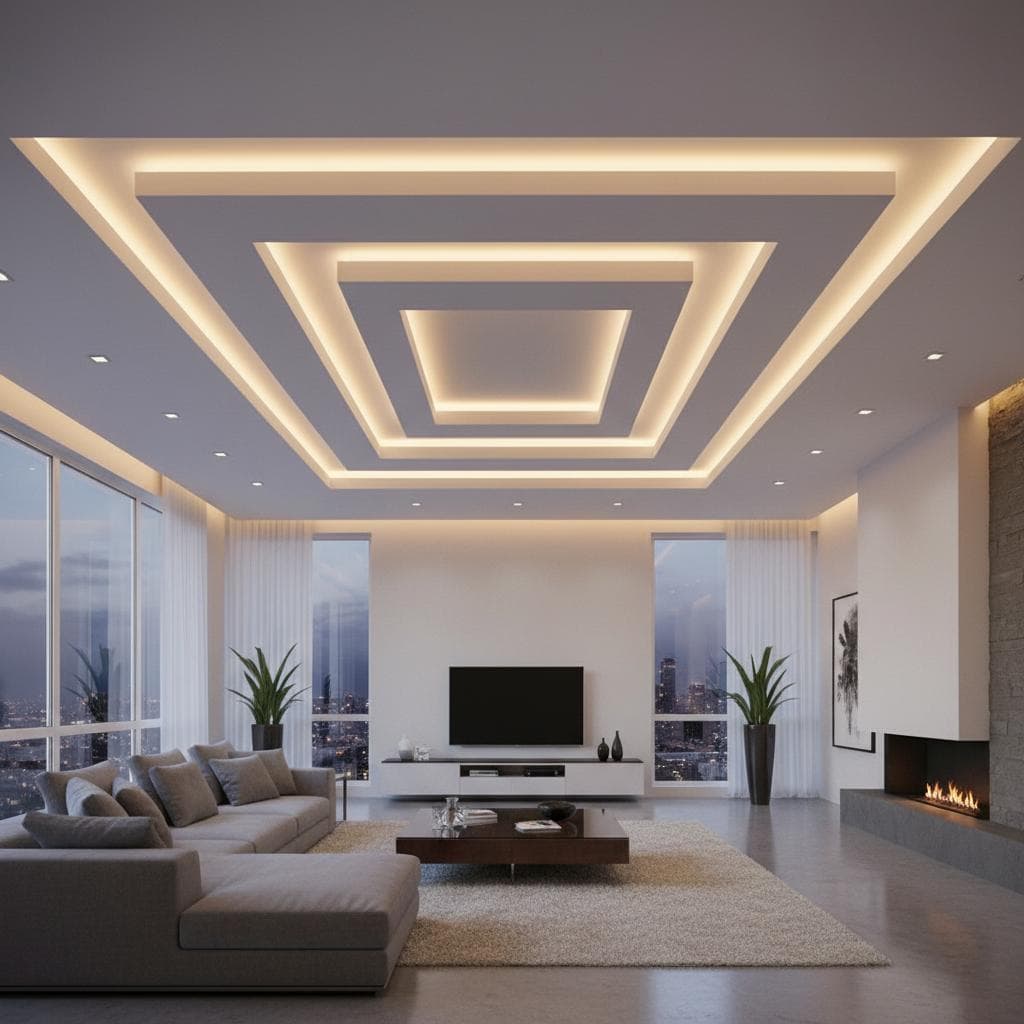
Have you ever thought about how a ceiling can transform the whole feel of your home? With a drywall ceiling you can go far beyond straight lines and achieve movement, flow and a unique character. While classic flat surfaces create a sense of completeness, curved and three-dimensional structures add an element of surprise, style and individuality that instantly catches the eye.
Modern interior design allows a suspended drywall ceiling to be not just a functional element but a central design idea. Curves and 3D shapes open up the space and create movement and visual lightness, and combined with well-chosen lighting they turn any room into a striking, modern place to live. Beyond the looks, structures like these also offer practical advantages – the chance to hide services, integrate light fittings and even improve the acoustics.
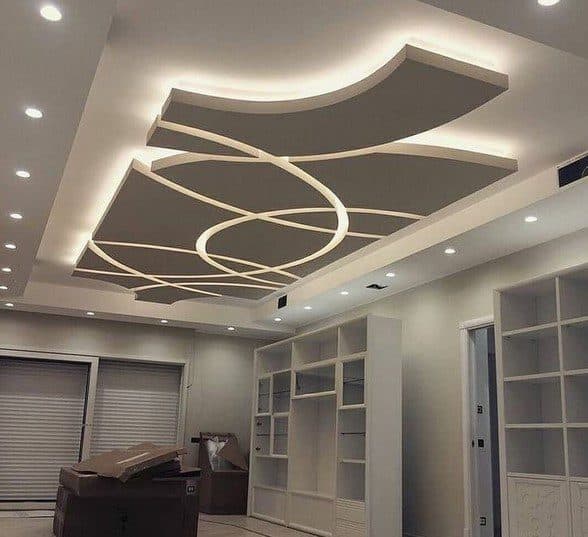
Why drywall for curved and 3D ceilings?
When it comes to bold, unconventional interior solutions, a drywall ceiling is one of the most flexible and reliable options. The reason is simple – the material allows freedom of form, is easy to work with and is relatively quick to install, without the need for heavy wet trades. That makes it a preferred choice for both homes and public spaces, where the effect of the ceiling is key to the overall atmosphere.
Drywall is a light but stable material that can be bent, cut and combined in many different ways. Thanks to this flexibility, it can be used to build arches, waves, domes and complex three-dimensional structures that turn an ordinary room into a piece of design. Compared with traditional plaster or concrete, a suspended drywall ceiling offers far more freedom for curved and 3D shapes, without loading the structure.
Another advantage is that drywall combines easily with built-in lighting, hidden cables and insulation materials. This allows the ceiling to be not only beautiful but also highly functional – improving the acoustics, hiding unsightly elements and creating a cosy feel with the right lighting. There are also different types of drywall – moisture-resistant, fire-resistant or designed specifically for curved surfaces – which opens up even more possibilities for tailoring the project.
What materials and systems are there for a curved suspended drywall ceiling?
For a suspended drywall ceiling to be not only striking but also durable, it is important to choose the right materials and installation systems.
Types of drywall
- Standard drywall – the most commonly used, 9.5 or 12.5 mm thick. It allows gentle curves, but tighter radii require dampening and careful bending.
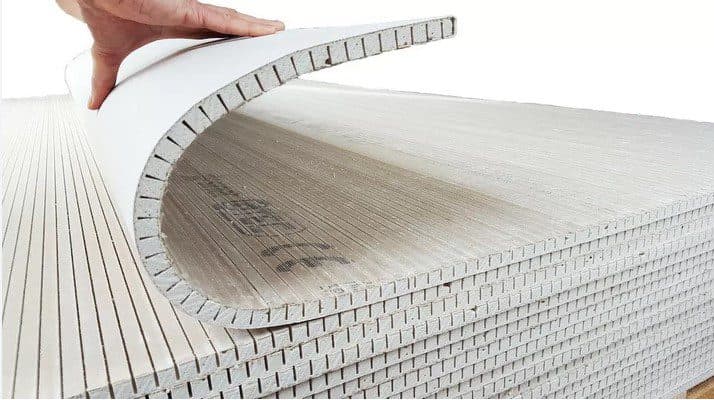
- Thin boards (6.5 mm or 6 mm) – designed specifically for bending and creating tighter curves. Laid in two layers, they provide strength and stability.
- Flexible drywall (Flex Board) – a product developed specifically for curved structures, allowing radii of under 1 metre without the risk of cracking.
- Specialist drywall – moisture-resistant for bathrooms and kitchens, or fire-resistant for public buildings. These can be combined with curved shapes, depending on the requirements of the room.
Metal profiles and frames
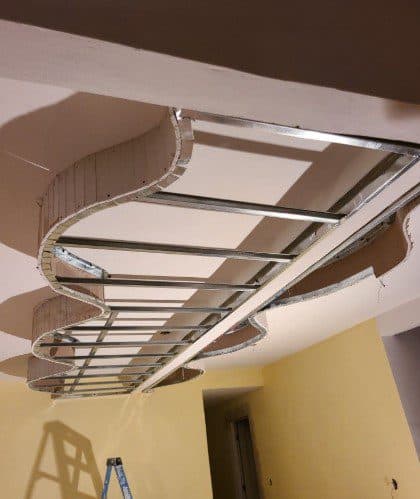
Every drywall ceiling is built on a stable frame of metal profiles. For curved ceilings, the following are used:
- CD and UD profiles – the basic load-bearing and perimeter profiles. For curved shapes, the UD profiles are cut at regular intervals so that they can be bent to the required radius.
- Flexible profiles – factory-made with notches that let them bend easily and follow complex contours. They make wave-shaped and domed ceilings much easier to build.
- Hangers and connectors – chosen according to the level and weight of the structure; on curved ceilings they are spaced more closely for greater stability.
Additional materials
- Jointing and skim coating tape – strengthens the joints and prevents cracks from appearing.
- Insulation materials – mineral wool or acoustic panels can be fitted into the void of the suspended ceiling for better sound and thermal insulation.
- Lighting elements – LED strips, spotlights or decorative fittings, which are often part of the design of a 3D ceiling itself.
System solutions
There are ready-made systems on the market for building a suspended drywall ceiling with curves and 3D shapes – including profiles, fixings and flexible boards. These solutions ensure faster installation and minimise the risk of errors when shaping the curves by hand.
How a curved suspended drywall ceiling is installed – the main techniques
Building a suspended drywall ceiling with curved or 3D elements calls for more care and precision than a traditional flat ceiling. Here, any mistake in the preparation or installation can lead to unevenness, cracks or an unstable structure. That is why it is important to follow a clear plan and use the right techniques.
1. Preparation and design
Everything starts with a well-thought-out design. The shapes are marked out on the ceiling or on a template that serves as a ‘guide’ during installation. It is advisable to transfer the curved lines using a plywood or cardboard template, to ensure symmetry and accuracy. The more complex the shape, the more detailed the preliminary sketch needs to be.
2. Installing the metal frame
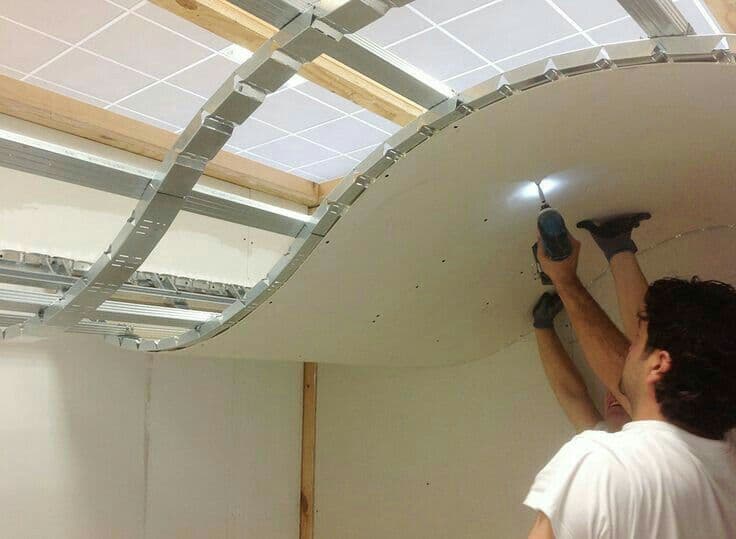
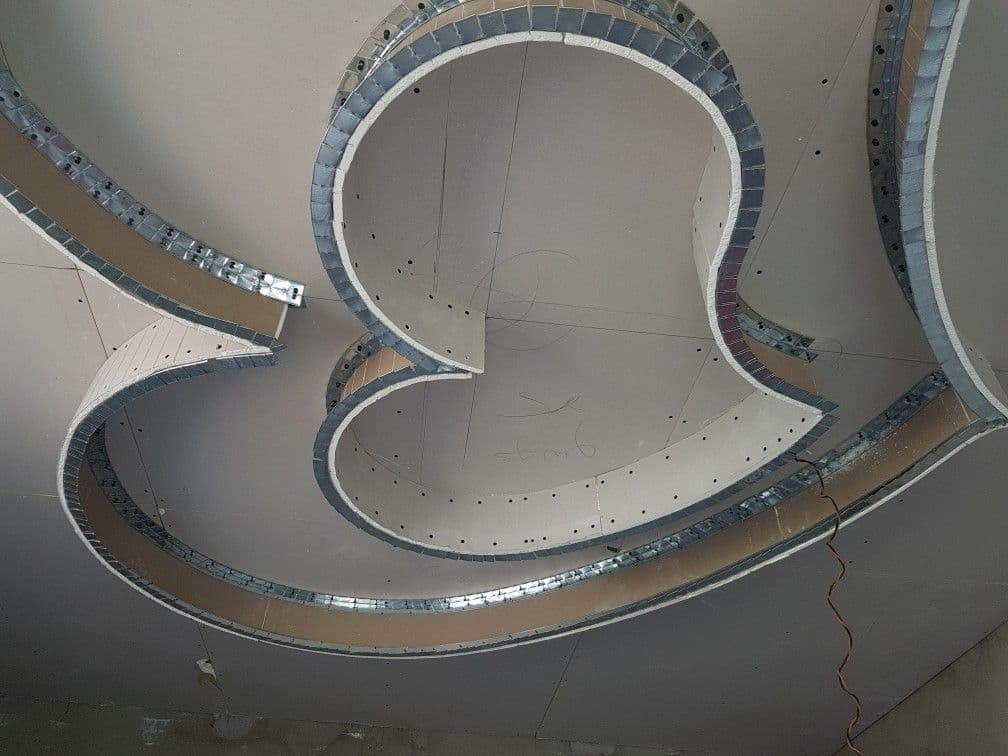
The frame is the foundation of every drywall ceiling. For curved ceilings, the UD profiles are cut at regular intervals and carefully bent to the marked line. The CD profiles are fixed to them, with the hangers spaced more closely than on ordinary ceilings – this provides stability and stops the curve from ‘kinking’. For more complex shapes, factory-made flexible profiles can be used, which follow the line with minimal effort.
3. Bending and preparing the drywall
Standard boards can be used for gently curved shapes, but for small radii thin or special flexible boards are recommended. When working with standard drywall, the sheet can be lightly dampened on the back and carefully bent. For a more reliable result, two thinner layers are often fitted instead of one thicker one – this reduces the risk of cracking and gives a smoother curve.
4. Fixing the boards
Fitting the drywall starts at one end of the structure. The sheet is fixed to the profiles gradually, following the line of the curve. It is important to space the screws more closely, so that the board sits tight against the frame. With convex shapes, the sheet is ‘led’ forward, while with concave ones the middle section is fixed first, followed by the edges.
5. Jointing and finishing
Once all the boards are in place, the skim coating and jointing begin. With curved shapes, it is important to use flexible skim coating compounds and reinforcing tape to prevent cracks. The surface is smoothed in several coats until a perfectly seamless transition is achieved.
6. Lighting and final details
Curved and 3D ceilings are very often combined with LED lighting. Before the structure is closed up, the cables need to be run and the positions for strips or spotlights planned. Well-planned lighting enhances the shapes and creates an impressive atmosphere.
Design ideas and inspiration
Curved and 3D ceilings are among the most powerful tools for visual impact in an interior. With them, an ordinary drywall ceiling can become a real feature that sets the style and mood of the room.
1. Wave-shaped ceilings
Waves are among the most popular shapes – they bring movement and energy to a room without looking overdone. They suit living rooms and children’s rooms, where the play of shape and light creates a sense of space and freshness.
2. Domes and vaults
A classic solution that adds grandeur and sophistication. Domed ceilings fit perfectly into spacious living rooms, dining rooms or formal reception rooms. Combined with concealed LED lighting, a dome can look almost like an ‘opening to the sky’.
3. A multi-level suspended drywall ceiling
Layers and levels make it possible to zone a space elegantly – for example, one level above the dining table and another above the seating area. When the levels are shaped with soft curves, the result is extremely stylish and contemporary.
4. Organic and 3D shapes
Contemporary interiors increasingly feature complex 3D structures – asymmetric lines, ‘floating’ elements or clean geometric volumes. They are especially striking in modern homes, offices and showrooms, where the design needs to leave a lasting impression.
5. Lighting as part of the design
The most powerful weapon of these ceilings is their combination with lighting. Built-in LED strips, hidden recesses or spotlights emphasise the curves and add a sense of depth. Lighting can be used both as an accent and to create a cosy atmosphere.
Conclusion
The great advantage of a suspended drywall ceiling is its versatility – it not only allows bold design solutions but also offers practical benefits: hiding services, integrating lighting, improving the acoustics and the option of adding insulation. This makes the ceiling more than a decorative element – it works for the comfort and atmosphere of the whole home.
Whether you want a discreet curve that adds elegance or an impressive 3D composition that ‘breaks up’ the space, drywall offers the solutions you need.
If you want your home to impress with a modern look and precise workmanship too, trust the experience of our team. We create suspended drywall ceilings with curves and 3D shapes that combine style, functionality and durability. 👉 Take a detailed look at our services here: Drywall and suspended ceilings from Remonts.bg – and take the first step towards an impressive interior.
More articles
All articles Finishing work
9 min read
How to avoid the most common mistakes when painting an apartment
At first glance, painting an apartment looks like an easy, manageable job, but in practice it often turns out to be a test full of pitfalls. Many owners decide to freshen up the walls and ceilings themselves, but seemingly minor oversights can lead to serious disappointment. The consequences can be patchy coverage, stains, peeling, cracking or even a colour that does not match the original idea.
Read Finishing work
8 min read
Plaster vs paint – which is the better choice for your interior?
When it is time for an interior renovation, one of the most common questions homeowners ask is: should I go for paint or decorative plaster? Both have their own advantages, look and price points, which makes each suitable in different situations. The choice is not just about aesthetics – it has a direct effect on the atmosphere, the durability and even the budget of the renovation.
Read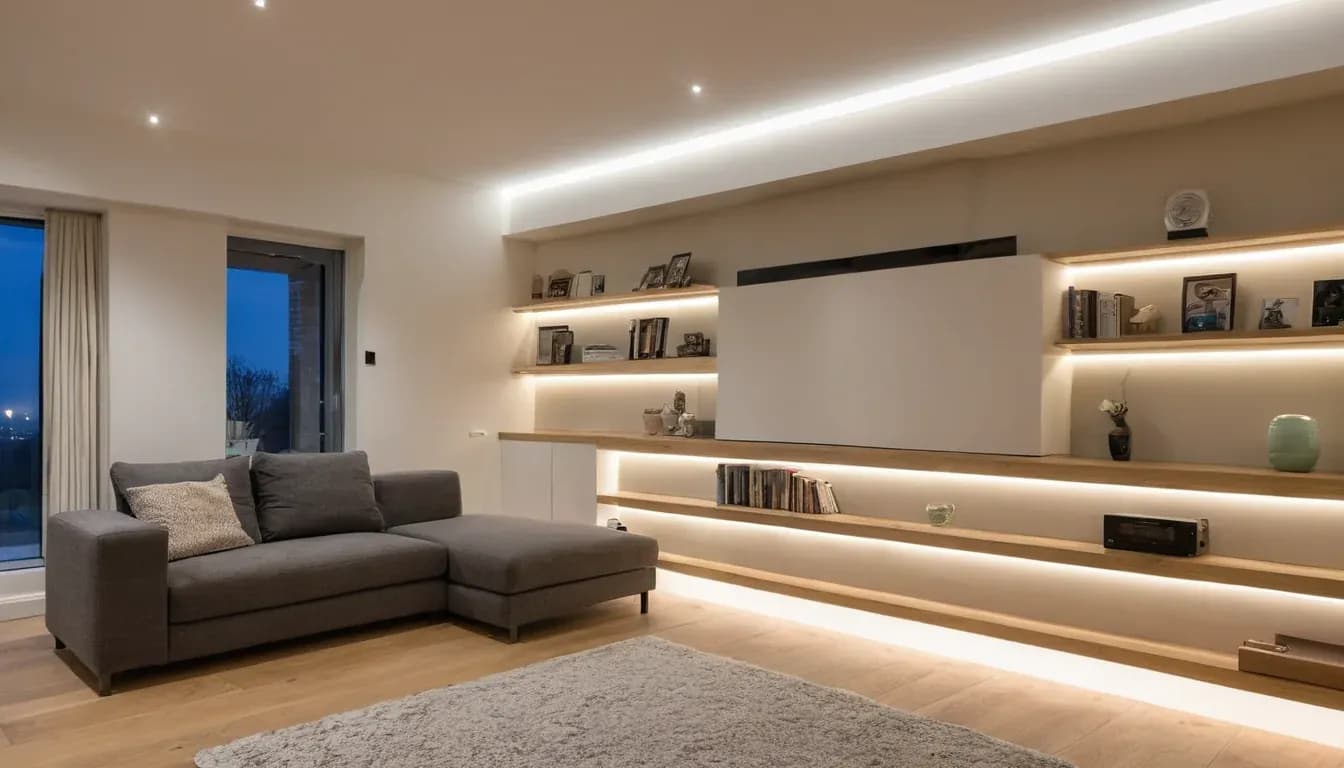 Finishing work
6 min read
Why drywall is the key to a flexible, modern interior
Drywall is one of the most versatile and popular materials in today’s interior renovations, and the basis for countless interior solutions. This light yet strong material – a gypsum core wrapped in paper – is a favourite with designers and builders for its flexibility, affordable price and ease of working.
Read